Player Avatar
Guardian Angel
Baron / Baroness
USA
Miniature Painter

Chris

gamer level 7
24598 xp
followers
22

Use my invite URL to register (this will give me kudos)
https://boardgaming.com/register/?invited_by=romanxj9
profile badges
Book Lover
Intermediate Reviewer
Video Game Fan
Gamer - Level 7
recent achievements
Old Bones
Old Bones
Explore select games by completing a series of exploration actions. learn more »
Expert Grader
Expert Grader
Grade 400 more reviews or tips by clicking "Yes" or "No" in response to the question "Was this helpful?"
Junior
Junior
Earn Professor XP to level up by completing Professor Quests!
Bard
Bard
Find your favorite games and share them with your friends via the social sharing buttons.
Go to the Battlestations page
Go to the Ace of Aces: Handy Rotary Series page
Go to the High Frontier page
Go to the Hard Vacuum page
Go to the The Lost Expedition page
Go to the Symbaroum page
Go to the Battlestations (2nd Edition) page
Go to the Mutant: Year Zero: GenLab Alpha page
8
Go to the Above and Below page

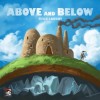
Above and Below

27 out of 28 gamers thought this was helpful

Above & Below is the first game in Ryan Laukat’s Arzium setting. This family also includes Islebound and Near & Far; I gather that there may be at least one more game coming (as of this writing), but I don’t know what it might be just yet.

In Above and Below each player controls the actions of a number of refugees as they strive to build a new home in a strange land. The events detailing the loss of their former home are chronicled (lightly) in the rulebook, but happen before play begins.

At the start of the game, each player (2-4) has three villagers each with their own skills which they will need to build a new village. The game played over a set number (7) of rounds in which each player takes as many actions as she can until there are no more villagers to activate. Play then passes to the next player. Once all players have performed as many actions in their turn as possible, the round ends, some book keeping is performed, and the next round begins. After 7 rounds, victory points are tallied and the winner is determined.

Simple, right?

Not so fast…

Let’s start by looking at the villagers. Each of a player’s starting villagers will have some symbols on the top—a Hammer (he’s a Builder), a Quill (she’s a Trainer), and all villagers will have one (or more) d6s on them with a number (1-3) of small lanterns beneath them. Builders, well… build things, and Trainers train new villagers to grow your population. You start with one Builder with a Hammer and one die, one Trainer with a Quill and one die, and one non-specialized villager with two dice but no skill icon.

On your turn you can perform various actions:

  1. Build: You can “exhaust” one villager with a Hammer in order to buy a building. Aside from needing a builder, you’ll need some gold to pay for the building. There are four areas on the table which you can buy buildings from.
    1. The House track is a row of four buildings which you can choose from; these represent the buildings Above ground.
    2. The Outpost track is a row of four buildings which you can choose from; these are the buildings Below ground (we’ll come back to that). NOTE: you can only build these buildings if you have explored the caves and have staked out a spot to do so (again, we’ll come back to that).
    3. The Star track is a row of six buildings which is that same in each game; these are high value buildings which will help you win the game.
    4. The Key track is a row of four buildings randomly selected from a set of nine possible buildings at the start of each game during set-up. The buildings all have perks which will help you in one way or another.
  2. Train: You can exhaust one villager with a Quill symbol to train a new villager to join your ranks. New villagers are selected from a row of five currently available villagers, each with a cost listed beneath them (ranging from 2 to 5 gold). New villagers join your population exhausted, so they can’t be used immediately.

  3. Harvest: You can exhaust as many of your villagers as you like in order to harvest any goods which your buildings produce or provide. This is an important distinction as some buildings provide a set number of a specified good (say Fruit), but once you have harvested it all, they produce no more. Other building produce goods on an on-going basis—once you harvest from it, it will refill with more at the end of the round. Goods are key to winning, so we’ll come back to them as well.
  4. Labor: Much like harvesting, you can exhaust as many of your villagers as you want and gain one gold piece for each one who labored. In addition, if you are the first player to have performed a labor action in the round, you will gain a coveted Cider token (useful during bookkeeping or to sell for gold).
  5. Explore: You can send 2 or more (as many as you like, but always at least two) villagers underground to explore the caves. This is how you get to build underground Outposts (and you want those), as well as how you go on Adventures (and you want to do that). Since you want the things which go along with Exploring, let’s take a look at why…

Forward! To Adventure!

OK, so you’ve chosen some villagers to go underground. Did you choose the right ones? This is where those dice symbols on the villagers will come into play. Look at the villagers; each one has at least (a possibly two) dice symbols with some lanterns (aka exploration successes) beneath them. The value on the die face must be equaled or exceeded on 1d6 in order to score the indicated number of successes; so a die showing 5 with 2 lanterns beneath it means you need to roll a 5 or 6 in order to gain 2 successes. Why do I need successes?

So, now you’ve chosen your villagers. Next you draw a card off of the Cave deck. This card will have six die results on it, each with a number beside it. These numbers represent a specific paragraph in the Adventure book. You pick a card, roll 1d6, and get a result. One of the other players takes up the Encounter book, turns to the indicated paragraph and reads it to you, thusly (NO SPOILERS):

31. Your party reaches a camp in a sandy-floored cave. A lone man with a short beard sits near a fire, roasting what looks like a rodent of some kind on a stick. ‘Got anything to trade?’ he asks. Do you sit and haggle or keep exploring?
Keep Exploring: Explore 3 (reward)
Trade With the Man: Explore 3 and pay 1 Coin (reward), Explore 6 and Pay 1 Coin (reward)

The first part sets the scene for you. The next parts offer you possible choices (Keep Exploring vs Trade) as well as how many successes you’ll need to accomplish the various choices (3, 3 or 6). All of these things are read to you; what isn’t read to you are the rewards. Rewards can be various items—Coins, Goods, etc…—sometimes, it can point you on to another paragraph (for a longer adventure), or, it could even lead you to find a unique special villager (such as the Metal Man).

Now, you choose you option—say, Trade with the Man—and roll 1d6 for each villager on the adventure. You compare your die rolls to the symbols on their tokens and see how many successes you got. If you got a number equal to or greater than one of the success options, you get the reward. In the above example, if you chose to Trade, and you got 4 successes you could pay the man one coin and gain the reward for 3 successes. If you got 6 successes and pay him one coin you would get the reward listed for that level of success (not both rewards for 3 and 6, just the reward for getting 6).

Now, if you didn’t get successes to get a reward (say you only got 2) you may choose to injure a village for an additional success. For each villager you choose to injure, you’ll get an additional success, but it will take them longer (potentially) to recover and be ready to perform actions of future turns, so choose wisely.

Neat, huh?

But wait! That’s not all… IF you succeeded at your adventure you also have scouted out a place Below ground where you can build an Outpost. Outposts are much like the buildings you build above ground—you need a builder to build one, you choose it from the current list of four available Outposts, they take Coins to build, and they give you some sort of bonus/perk for having built them. Unlike Above ground buildings which you can pretty much just build willy-nilly, you have to have a cave card (which you get by succeeding at an adventure) to build an Outpost on. However, many of the Goods which are available in the game—Amethyst, Fish, Mushrooms, and Ore—are ONLY available from Outposts (we’ll come back to why you want goods soon). The other reward you can gain from Exploring is Reputation. At the end of the game, the player with the highest reputation will gain additional victory (Village) points; have a very high (or very low) reputation can also gain (or cost) you victory points.

Now, Goods; each player has a Player Board where he keeps track of his Villagers, Coins, and Goods. Goods can be placed in various places on/around the board; placed up for sale to other players, held aside for use later, or they can be committed to your Advancement Track (at the bottom of your Player Board). The Advancement Track has a number of spaces on it for goods to be placed. Each space can only hold one type of Good, and once chosen, can only hold that specific Good for the rest of the game (choose wisely). Placing Goods on the track does two things: 1) increases you Income (aka the number of Coins you will get at the end of each round. Income starts at 4, and then goes up from there). It also gains you victory points at the end of the game. Each space on the track will have a victory point amount associated with it (ranging from 1 to x); at game’s end, you’ll gain a number of victory points equal to that number times the total number of Goods in that space (so if I have 5 pieces of Rope on a space worth 2 VP, I’ll get 10 VP at game’s end).

OK, so you’ve built, labored, harvested, trained, and explored, and now all your villagers are shagged out. Not having any further villagers to exploit, err… activate… you declare a Pass and play moves to the next player who does the same to her villagers.

At the end of each round (after all players have had a turn) various bookkeeping takes place:

  1. Advance the Round Marker The round marker is advanced by one, the Cider marker is replaced on the main game board (we’ll get there soon).
  2. New villagers are revealed. Remember training (above)? When you Train/buy a new villager from the track of available villagers you don’t replenish the track (until now), so gaps will appear in the list until now. When the track is refilled, any villagers still on the track are slid down to the left (thus decreasing their cost for the next round) and any empty spaces are refilled from the stack of remaining villagers.
  3. Rest your villagers. So, after your villagers do things (Labor, Harvest, etc…) they become exhausted, or they may have been injured while Exploring the caves below. Now is when they get better. Probably. Various buildings will provide you with beds. For each bed you have (either Above or Below) one villager can move one step (from Injured to Exhausted, or from Exhausted to Ready). What if I don’t have enough beds? That’s where Cider and Potions come in. Cider will allow you to move one Exhausted Villager to Ready without needing a bed. Potions (found on Adventures or produced/provided by Buildings) allow you to move a Villager from Injured to Exhausted. And yes, you can use a potion to move from Injured to Exhausted and then a Cider to move the same Villager from Exhausted to Ready all in one bookkeeping phase. Same goes for beds. Got an injured villager? Give him a potion and now he’s Exhausted, but if you have an available bed, he can also rest and then move right into Ready all in this round. If you still can’t get all your villagers back to Ready for next round, you choose which ones get to which state (Exhausted or Ready).
  4. Collect Income. Gain a number of Coins equal to your income. This starts at 4 Coins/round, but will be increased based on how many goods you have on your Advancement Track.
  5. Refresh Goods on Buildings. As mentioned above, some building will produce Goods on an ongoing basis. If you have such a building, and you Harvested all the Goods it contained (i.e., it’s now empty), you now put one of the specified Good back onto it (so it can be Harvested next round.
  6. Pass the First Player Card to the Left. Whoever was the first player this round, now passes the First Player Card to the Left and that player goes first in the next round.

If you reach bookkeeping and are unable to advance the round marker, do not perform any of the rest of the bookkeeping actions. Instead go straight to Village (victory) point calculation and determine the winner.

There’s a lot going on this game, and various paths to victory. You’ll need to balance the availability of your Villagers, with your ability to rest the sufficiently to be able to use them on the next round. You’ll need to look at what buildings are available to be built and what bonuses they grant you. Some are good for harvesting Goods, while others allow you to rest more villagers, others grant you bonuses to use while Exploring, and still others grant you Village points outright (or based on how many villagers/resources/etc… you have at game’s end).

I like Above & Below, but don’t play it very often. It takes a little bit to set up (not as much as others, say Firefly or Twilight Imperium, but more than say The Lost Expedition). My biggest gripe with it is that seven rounds seems just a wee too short. I like having a set number of rounds, it limits the game from going on endlessly, but seven often seems abrupt. It seems that you get your engine going right around round 5 or 6, and then only get to exploit it for a round or two at most.

That being said, it can lead to some surprise endings as one player suddenly jumps out ahead as the VP leader.

As always, my highest recommendation is that I would buy this game, but I already own it, so you decide how I feel about it.

10
Go to the Exit the Game:  The Pharaoh's Tomb page
12 out of 12 gamers thought this was helpful

This is the second of the three (now six) currently available Exit: The Game sets which I and my wife have played; the first one being The Secret Lab. We just finished it a few minutes ago and I had such a blast playing it I had to try and get my thoughts down for you all ASAP.

First, some basics in case you’re not familiar with Exit: The Game. These games are play-at-home escape rooms. That is to say, there will be a scenario—such as being stuck in an Egyptian Tomb behind a large stone door which has just sealed behind you—and you will need to solve a series of riddles/puzzles in order to “escape”. Technically, there is also a time limit placed on you, but the Exit games are flexible on this point; just do your best and solve all the riddles and get out; regardless of how much time it takes you, you WILL feel a sense of accomplishment when you “escape”.

The box comes with a small instruction booklet which will give you a general overview of how the parts—notebook, “decoder” wheel, and riddle, answer and clue cards—are used in the course of play in addition to the actual parts needed to play. In this case, a notebook, the riddle and answer cards, and two “mysterious items” which you will be instructed to get out as you “find” them by solving the various riddles of the game. It also comes with a set of hint/clue cards which you can use if you get stuck on any of the various riddles; these cards are symbol coded to match the riddles, so you’ll know which set of clues to refer to for each riddle.

The game states it is for 1-6 players, but both sets we have played we have played with just my wife and I, and it has worked out well for us. It might be helpful to have more sets of eyes and brains (i.e.- more players) working on things, but I can also see how more hands might just get in each other’s way. So far, we usually have enough to be able to keep us both engaged with the game at all times and neither of us have felt left out in the solution(s) to any of the riddles.

Exit isn’t the only play-at-home escape room game out there right now. There are at least 3 others—Unlock (from Asmodee), Escape the Room (from ThinkFun), and Escape Room: The Game (from Spin Master Games). I haven’t tried any of the other types yet, but we do have one of the Unlocks here at home waiting its turn to be played.

Here’s the one big downside (for some folks) to the Exit games: you destroy them when you play them.

I’ll let that sink in.

If it helps, think of the Exit games as legacy games with only one scenario; so Pandemic Legacy with one game instead of twelve, and you either win or don’t.

DO NOT let that dissuade you from playing any of the Exit games. Having now played two of them (and we already have the third set—The Abandoned Cabin—waiting in the wings) I cannot recommend them enough. Once I played the Secret Lab, I rated it a 9/10. I gave this one a 10/10.

That said, this one did seem more challenging to us than the first one we played. We played through Secret Lab in around 90-120 minutes (give or take). Pharaoh’s Tomb took us almost 3 hours(!) to play. But we really felt a huge sense of accomplishment when we “broke out”.

And that’s how I’ll wind up. These games have left us both feeling immensely satisfied. Yes, we can only play each set once. Yes, it took us around 3 hours to play (this one). But we both felt that those were three hours well spent—doing something engaging and fun together vs watching television for the same amount of time—and we both really want to play more of these games. With a price point of just $14.95 (less than it would cost for us both to go to the movies) it’s one of the best expenditures of money we have made this year.

When the next three Exit sets come out later this year, we will definitely be buying them all (we did). You should too.

‘nuf said.

10
Go to the Hard Vacuum page

Hard Vacuum

5 out of 6 gamers thought this was helpful

To start with, I’d like to offer you a brief history lesson.

In the late 1930s, at the request of Adolph Hitler, Eugene Sanger developed plans for the Silbervogel (the Silver Bird, aka the Amerika Bomber). The Silbervogel was a rocket propelled space plane which would be capable of reaching low Earth orbit and then, via a series of hops, it would skip along the upper stratosphere, deliver a 8,800 lb bomb to a target within the continental United States and then continue to hop around the Earth to land somewhere in the Japanese held Pacific ocean.

These are actual facts and plans for such a plane were created and had an influence on various post-war US space projects such as the Space Shuttle. Hitler, however, placed more emphasis on the V-1 and V-2 and the Silbervogel never took flight.

But, what if it had? How would the United States have responded? Would an orbital theater have opened up in the war and what might it have looked like?

These are the questions which Hard Vacuum attempts to answer.

After Battlestations Hard Vacuum is one of my favorite games, but I never have anyone to play it with. Published by (the now—sadly—moribund) Fat Messiah Games, virtually everything you need to play comes in the rule book. I say virtually because the game doesn’t come with either a map board (you can use any standardized hex grid – Chessex Battlemat, GeoHex Space Mat, heck! the Battlestations map boards work great – or use tabletop minis (the rules have conversions so you can play either way). Nor does it come with dice, but all you need is two standard d6s (and who among us doesn’t have those?); although they also sold sets of specialized Hard Vacuum dice. All the various counters and markers and such which you will need come printed on a heavier card stock which is bound into the centerfold of the book. Sure you had to cut them out (and possibly mount them—I mounted my ship counters on cardboard, but you don’t really need to), but giving them to you in this way vs die-cut punch boards saved on costs and thus kept the retail down. FMG was all about keeping costs low and making its games more affordable to the average gamer.

Simply put, Hard Vacuum is a fighter based space combat game using vector movement. Oh god! I used the “V-word” (something which FMG avoided in the rules).

Ack! Vectors! I thought I left those behind in high school physics… Yuk!

I feel some of you stopping right here, but bear with me. Each player (or team of players) controlled one or more WWII-esque space fighters in a variety of combat situations. In the base game, all the fighters are either American of German, but the expansion—Science Gone Mad—had rules for British craft as well.

Each ship had a small control sheet (click here for example blank sheets for American or German ships) which denoted its various systems – fuel, weapons, ammo, hull integrity, and any special equipment (such as radar, or booster rockets) it might be equipped with. It also has a small diagram of the ship, centered in a hexagon with numbers in small circles along the edges. These numbers showed where each ship had thrusters and how much thrust could be applied in that direction (e.g. – a ship with the number 6 in the bottom, or aft, position could apply up to 6 points of thrust behind it, thus propelling it forward 6 hexes). It would also have two small boxes above the hex representing “spin thrusters” which would allow the ship to change facing without changing the direction of its movement (vector-based flight, remember?). Lastly it would have Maneuverability number (say 3) which represented how nimble the ship was; basically it told you how many of your thrusters (directional or spin) that ship could fire each turn to effect its movement.

Now, now; it’s alright. Let me explain. The game comes with a supply of small, triangular thrust markers. When your ship applies thrust in a given direction, you place an appropriate valued thrust marker along the side where thrust was applied; make sense?

OK, try this: if you apply 6 points of thrust aft (to move your ship forward), you place a “6” point thrust marker behind your ship. Got it? Now, space in Hard Vacuum is just like space in the real world: Newtonian. That is to say, once you apply thrust in a specific direction your ship will continue to move in that direction (forever) until you apply thrust in another direction and alter its course.
I see that confused look creeping in on some of your faces again… So, here’s the simplest example: If your ship is moving forward at a rate of 3 hexes per turn, and you apply an additional 2 thrust aft (for forward movement) you will now be moving 5 hexes a turn. You will keep moving 5 hexes a turn in that direction (which is important as you can change the facing of your ship without altering the direction of movement) for all your subsequent turns until you do something to change that.

Like this: Now you want to slow down from 5 hexes a turn, so you apply 3 thrust fore (for reverse movement) and that will slow you down to 2 hexes of movement per turn. There are two ways to arrive at that number (2 hexes/turn): you can either move your ship forward 5 hexes (your original speed) and then backwards 3 hexes (the new thrust you have applied this turn) for a net forward movement of 2, or—and I recommend this—you can combine the thrust markers into one and just move that many hexes. In this case you would subtract 3 hexes of reverse movement from 5 hexes of forward movement and come up with 2 hexes of forward movement. Just replace the existing thrust markers with the one combined thrust marker and that’s what your ship will do (and keep doing) until you change that.

I won’t continue to confuse you with more detailed examples of how to combine thrust markers from multiple directions down into the fewest possible markers, but the rules do have a very simple way to do this and it makes the horror of vector movement very simple (thrust me on this—pun intended).

Rotating your ship (spin thrust) works similarly, but only has two possible spin directions (clockwise vs counter-clockwise). Thrust markers for movement are placed alongside your ship’s counter along the relevant side (as mentioned above). Spin markers are placed directly onto your ship’s counter to show which way you are spinning. Again, your ship will keep spinning until you do something to effect that spin (increase, decrease or cancel altogether).

Various ships designs have movement thrusters in different directions, so being familiar with the thrust combining rules is useful so that you know how best to maneuver your ship. But, enough about movement; I can see your eyes glazing over.

For flavor, the two sides of the war (US vs Third Reich) have different technologies which they use.

The Germans use radium pellets (which they mine from their not-so-secret base on the far side of the moon) to fuel their ships. This means they have a limited amount of fuel to use over the course of the scenario and the ship control sheet has a fuel track which you mark off as you use it. For the most part, the Germans use traditional gun-powder weapons—machine guns, cannons, and the dreaded 88mm AT gun—but they also have space mines (watch out you don’t fly into your own mines—I have done this) and a radium powered Death Ray (which also uses radium pellets).

The Americans make use of the scientific genius of Nicola Tesla and employ small Tesla energy collectors and batteries to both power the ships’ thrusters and weapons—heat rays, plasma bolts, etc…— for a more Flash Gordon style of ship. While this technically gives them limitless fuel and ammunition (did I forget to mention the Germans have to keep track of ammo as well?), their collectors will only generate so much power/turn and their batteries will only store so much, so the amount of power available to an American pilot will vary from turn to turn and power management becomes a factor for these ships.

NOTE: The British have yet a third technology—liquid fuel rockets—which they use for their ships, see the expansion, Science Gone Mad for those details, and the Russians and Japanese (which were only ever explained in an online sets of supplemental rules which may (or may not) be available here) have a fourth and fifth technologies for their ships.

Next, as you may have noticed on the blank ship control sheets (if you followed either of the above links) there is something called the Silhouette for each ship. This number represents how large the ship is (and thus how easy it to hit when you shoot at it); small ships have a larger Silhouette than large ships (that will make more sense in just a moment)… which brings us to combat!

So, you want to blow the enemy out of the sky? Here’s how you do that:
First, you have to check to see if you can see the enemy ship. To do this you count the range to the target and roll three dice. If the number rolled is greater than this distance, you can see (and thus shoot at) the target. If you fail the roll, it is assumed you spent the turn scanning space trying to find your opponent and just missed him against the inky blackness of space. This is somewhat true to what actual fighter pilots in WWII had to do when fighting in the skies (either in day or night time). The die roll is modified by whether the target is using his thrusters and/or firing his weapons (both of which make it easier to be spotted).

So, now you see the whites of his eyes and you want to shoot. Each of your ship’s weapons will have a small table (conveniently printed on the ship control sheets) which shows how many dice you’ll roll at various range increments—typically from 1 to 3 dice. You’ll need to roll greater that your target’s Silhouette (oh, now I see why small ships have a larger Silhouette than larger ships) in order to score a hit.

But, there’s one more thing to take into consideration – deflection. Again, deflection is something which actual WWII fighter pilots had to contend with; heck, modern pilots have to as well, but computers do much of the work for them now. Deflection is a complicated way of saying that it is more difficult to accurately track a fast moving target vs a slow moving one (and it takes your own speed into account as well). This is one of the few things about the rules which is bit confusing —even for me, and I’ve played the game a fair amount—so I won’t go into the full details of it. Suffice to say that if you and your target are both moving fast, it makes it harder for you to hit him. Based on your speeds (yours and his) you’ll come up with a modifier to the target’s Silhouette. Add the modifier (which will be anything from 0 {very easy to hit} to +5 or more {very hard to hit}) and you have the final number you need to roll against to score a hit.

Roll your dice. Assuming that you hit him you’ll do damage based on the weapon you fired. Again, looking at weapon on your ship’s sheet you’ll see two things: Rate of Fire and Damage. Rate of Fire is how many shots you may fire in an attack—you might want to conserve ammo or power and thus fire less shots than you could. And Damage is how much damage your attack will do/shot (RoF) you use in each attack. So, I fire a weapon with an RoF of 2 and a damage of 5 if I hit and use both shots (I have to decide this before I roll my dice) I would inflict 10 points of damage to my target. That’s a lot; most ships in the game have 10-12 hull points 9which is what gets marked off by damage). NOTE: even if you have a RoF greater than 1 you will still only make one roll to hit your target.

If that’s not bad enough, there’s a critical hit system as well. If any of the dice which you roll in a successful attack are doubles then you score a crit in addition to your normal damage. Crits don’t normally do additional damage per se, but they will have an effect the one of the target’s internal systems—such as weapons. What critical hit you inflict is dependent on the ship’s Size stat (also listed on their control sheet). Size is more properly thought of as mass, and more massive ships are better able to shrug off crits that lass massive ones are. Being large might mean you’re easier to hit (small Silhouette), but it also means you’re better able to take it (more Hull Points and larger Size). Critical Hit effects range anywhere from Chain Reaction (i.e. – the target is automatically destroyed) to +1 Damage (this hit does one addition point of damage). The only time in which doubles will NOT score a critical hit is when the only way you could succeed in hitting your target is by rolling doubles (typically this happens at extreme range).

How do you survive? Well, as you might have figured from the bit about Silhouette and attack rolls, speed = life. Move fast and be hard to hit. Again, real life fighter pilots found this to be true. You can also be a wizard pilot and try and out maneuver you opponent and stay outside of his weapon’s firing arcs (yep, various weapons are restricted to certain arcs of fire). Or, you can rely on your ship’s Hull Integrity and Armor to see you through. Armor? Didn’t I mention? Some ships have an Armor stat which is basically the amount of damage subtracted from incoming hits. Most ships don’t have any, and even the toughest of ships only has 3, but since it is subtracted from each hit (remember an attack can score multiple hits based on RoF) armor can really help out. In the above hit example—RoF 2 x Damage 5 = 10 points of damage—if the target had 2 points of armor that 10 would become 6 (5-2=3 x RoF2 = 6); this is more survivalbe, but still hurts.

A quick word about dice in Hard Vacuum; the dice they use are numbered 0-5 (as opposed to 1-6). This is easily simulated with normal d6s by subtracting 1 from the face value of each die you roll. And, the dice explode on a result of a 5. So if you roll a 5 (on their dice, or 6 [minus 1, remember?] on a regular d6) you get to roll an additional die and add it to your roll.

To sum up, Hard Vacuum is a solid game with well explained rules. The rule book is lavishly illustrated with many examples (which are very useful) to help you understand all the various rules—visibility, deflection, damage, critical hits, etc… It manages to both deliver a retro-science fiction feel while preserving a certain amount of real-world combat in a small package. Only 23 of 44 pages are rules – the rest is optional ship construction rules, scenarios, and ship control sheets. Also included in the book is a four page, removable insert, of quick start rules to get you flyin’ & dyin’ in no time.

SPOILER ALERT The Nazis lose the war…

9
Go to the Shapeshifters 10th Anniversary Edition page
6 out of 6 gamers thought this was helpful

The basic concept behind Shapeshifters is similar to the old Metagame Wizard: two (or more) wizards meet on the field of battle each intent on the death(s) of the other(s). Much like its predecessor, Shapeshifters is quick to learn, fast to play, and highly enjoyable.

The game comes with a 16 page rule booklet, a color hex-grid map with various terrain features, 63 black and white counters, and the Taxonomy Flow Chart. The map, though simple, is easy to use with the different terrain types clearly delineated. Only nine of the booklet’s pages are devoted to rules, which are straightforward with only one or two rough spots. The remaining pages are taken up by scenarios, designers’ notes, and needed charts.

The Taxonomy Flow Chart (I’ll come back to its actual purpose soon enough) is very well laid out. Each of the different “Realms of Form” is clearly separate from the others, and each form within any given realm is easily found. Each form contains its own vital statistics and a silhouette of the form making record keeping simple and helping players to visualize their current form. Other necessary information—such as players’ hit points, initiative scores, and magical battery levels—is also provided on the flow chart.
The rules, for the most part, are fairly standard: movement points, attack and defense ratings, terrain cost, and combat results charts. Anyone who has ever played wargames should be familiar with these terms.

What sets Shapeshifters apart from other games of this format is the players’ ability to alter their formsand hence their combat and movement capabilities from one turn to another.

Each player has two important statistics, determined by how powerful a wizard he is playing: his charge rating and his maximum battery level. A wizard’s charge rating is the number of spell points which he receives at the start of every turn. Unlike movement points, which cannot be saved from turn to turn, unused magic points are not wasted. Magic points which a player does not spend in any given turn may be saved in his magical battery up to his maximum battery rating.

Why is all this important? Because it costs magic points to change from one form to another, or to maintain a form which is not the sorcerer’s natural form; some forms are quite expensive (like Dragon) while others (Rat) cost nothing.

This is where the Taxonomy Flow Chart comes in. The flow chart is laid out into general categories—Realms of Form, as I call them—birds, fish, insects, mammals, plants (sometimes useful), and reptiles. Within each realm there are various creatures to choose from. There are some creatures which are realms unto themselves: Dragon, Hydra, and Griffin. Each form has its own advantages and disadvantages. For example, the Rat may not be able to attack most other forms effectively, but it can hide from other creatures more easily than most and it costs no magic points to maintain. On the other hand, the Dragon is probably the most powerful form a wizard can change into, but it costs at least 19 magic points to become one and 12 magic points just to maintain the form on subsequent turns (that’s a lot…).

Each form has lines flowing into or out of it. In order to change from one form to another a wizard must move along the lines, and pay the printed costs to move along them. No matter how many magic points a wizard has available to spend he may only move a number of forms along the chart equal to his wisdom. In order to move from one realm to another a wizard must move from one Node to another. Nodes are the base form of any given realm. Each Node has a cost printed next to it which is the number of magic points a player must spend to jump into that Node.

All of these costs and limitations on shapeshifting (the name of the game, right?) combine to limit the number of possible forms a wizard can change into on any given turn. Players make their shifting choices in secret and reveal them to each other at the same time (hence the name of this review—an actual set of declared changes in a game I played in… I was the squid). This adds an almost chess-like quality to the game as players try of outguess each other and choose the most advantageous form to change into.

Since the various forms have differing types of movement to choose from (flight, land, swim, or dive) it may not always be possible for one wizard to initiate an attack against another. Referring back to my own game – I was in the water and my opponent was on the shore and we each had a large number of magic points to spend. I expected him to plunge into the water after me, and he expected me to come rushing onto the land after him. He chose Jungle (large, immobile, and incapable of attacking, but virtually impossible to damage) while I chose Squid (one of the water-based heavyweights, but unable to attack land-based creatures—or plants in this case). Having revealed, we stared at each other—unable to attack one another—and did nothing, but prep for the next turn.

However, it is always possible for a wizard which is attacked by another to counterattack. If, in the above example we had instead chosen Piranha (me) and Eagle (him) and he had chosen to attack me, then I could have used my Piranha to counterattack his Eagle.

On the whole, I recommend Shapeshifters; it remains one of the few games I have kept and replayed over the years. I’m mostly familiar with the original edition—published in 1991—and this review is based on that edition. But the current 10th Anniversary Edition is much the same (with various errata incorporated and more scenarios to play out).

For those of you who are old enough to remember the wizard’s duel between Merlin and Mim the Merciless in Walt Disney’s film The Sword and The Stone, this game is for you.

8
Go to the Here, Kitty, Kitty! page
42 out of 49 gamers thought this was helpful

When I first heard about Here Kitty, Kitty!, I thought it would be kind of a cute, thematic game without a lot of meat to it. Good for cat lovers and not much more.

I was wrong.

Overview:

HKK is for 2-6 players (optimal play is with 4-5) and takes about 30 minutes to play.

The game consists of the rules, six illustrated property cards (6” x 6” squares), a deck of 51 cards, six player aid cards, and 40 small plastic cats (10 each in four different colors, and 3 different sculpts).

Each player selects a property card which represents their home. Each tile has three areas on it – the Yard, the Porch, and the House – which (at the end of the game) score differing amounts of points for any cats in that area (see below). These tiles are placed in front of each player and the area in between them all is called the Neighborhood. There are 40 small plastic cats (10 each in four different colors in three different sculpts). At the start of the game all 40 cats are placed in the Neighborhood.

Each player is then dealt a hand of three cards from the deck. Once you determine who the first player is (based on who has the most number of cats in real life), play proceeds clockwise around the table.
There are two phases to each player’s turn; the Action Phase and the Draw Cards Phase. These two phases are always played in this order and occur for each player.

The Action Phase:

On his turn, each player may perform two of the following three actions:

Move One Cat. Cats can be moved one ‘space’ in this fashion (i.e. – from the Neighborhood into your Yard, or from your Yard to your Porch, etc…). They may be moved in either direction (so you could move a cat from your Porch to your Yard if you wanted to). BUT, once a cat is on your property you are the only player which can move it via the “Move One Cat” action.

Play One Card from Your Hand. Pretty obvious, and, like most games, text on the cards will supersede the main rules. This is how another player may be able to move a cat which is already on YOUR property, so watch out.

I’ll take a moment here to talk about the cards; there are three types of cards:
Standard – those with a Purple border – which are held in your hand and played as part of the “Play One Card” action.

Defensive – those with a Blue border – which are held in your hand, but played in response to cards played by other players. The designation Defensive implies that they may only be played when someone plays a card against you, but this is NOT the case. You can play a Defensive card from your hand to interfere with a card being played against another player (and there may be perfectly good strategic reasons to do this, so you’re not just being ‘nice’ to another player by helping him out).

Instant – those with a Red border. These cards are NOT held in your hand, but take effect the moment they are drawn (during the Draw Up to a Full Hand portion of the turn, see below). These cards generally affect more than just you, but may not affect everyone (depending on the current situation on the table).
Most cards are placed into a discard pile once they are played, but there are a few which confer lasting effects onto your property. Such cards are placed slightly under the House portion of your property so all players can see what you have going on.

Discard 1-3 of the cards in your hand. This is the third type of action you can take on your turn. NOTE: This action is to discard cards only; NOT to discard and draw replacement cards. Drawing cards to refill your hand comes in phase two of the turn (see below).

You can take any combination of these actions (yes, you can take the same action twice) in any order (although I recommend NOT discarding before you play, as you don’t get to replace cards until the action phase of the turn is over).

Once you are done with both your actions, you move onto phase two…
Drawing Cards:

If you have less than three cards in your hand – the normal hand size (yes, it is possible to hold more than three cards in your hand) – you draw up to a full hand of three from the deck. Cards are drawn one at a time – this is important – as any Instant cards drawn take effect immediately, and are then placed into the discard pile. Since Instant cards aren’t held in your hand, you keep drawing cards until your hand is full. If you already have three (or more) cards in your hand when you get to this phase, you draw no cards and play proceeds to the next player. If you draw the last card from the deck the game enters its final round of play after which a winner is determined.

In a nutshell, that’s how it plays. The game continues until the deck runs out – it is NOT reshuffled – at which point each player gets one final turn of two actions each (including the player who drew the last card – so he gets to be the last player). Once that has happened, each player tallies up their score based on two things:

Where the cats on their property are: 0 for the Yard, 3 for the Porch, and 5 for the House.

And various sets of cats on your property (e.g. – 5+ cats of the same color on your property gets you an additional 5 points). That’s where the color(s) of the cats comes into play. The player aid cards are double-sided with a sequence of play on one side, and the scoring rules on the other.

Thoughts on Strategy

It’s a simple game to learn, simple to play, and it plays in around 30 minutes. So, how much substance can there be to it? The answer is rather a lot. The way scoring runs at the end of the game – not just based on where cats are on players’ properties, but also on sets of cats – you need to keep an eye on what your neighbors are doing. It may be to your benefit to help another player by playing a Defensive card on their behalf IF it prevents another player from outscoring you. Also, the game has a fair amount of ‘screw your neighbor’ going on, but it’s done in a lighthearted way which makes it less nasty and vindictive than many games of this type are.

Like many of Fireside’s titles, I think HKK serves as a good gateway game to players who are not very familiar with this style of play. It’s fun, and even when you are on the receiving end of ‘screwage’ it’s still fun – thanks to the art and descriptive text on the cards. You’ll always get a big “Awww…” from around the table for playing the Foster Kittens card on your house. And even if another player swipes those fosters from your house by playing the Adoption card, you don’t seem to mind so much as you know they’re getting a good home (insert sad Sarah McLachlan song here). Besides, you’ll just swipe one (or more) of them back with your Cat Burglar card, or move one back into their yard by playing the Open Window card. What goes around comes around…

The game can accommodate either 2 or 6 players as well, and the rule book makes some suggestions on what cards to remove from the deck if playing with those size groups. The times I’ve played were with three to five players and it played very well.

In conclusion, I’ll say this; I ran some demo games of this at my local game store and had some of the regulars sit down and give it a try. After playing they all told me the same thing: based solely on the box and what they perceived the game to be about they might not have looked at it on the shelf. BUT, having played it and experienced how much fun it was, and how much meat there was to it, they’d be sure to look for it to hit the shelves and get one when it did.

For myself, I’m happy to have this game in my collection and will be more than happy to play it both with new and experienced gamers alike.

8
Go to the Illuminati: The Game of Conspiracy page
23 out of 25 gamers thought this was helpful

… Is the History of Warfare Between Secret Societies.

That is the great secret which THEY don’t want you to know. That is the great secret which YOU get to play out as one of these Secret Societies in Steve Jackson’s classic game Illuminati.

I bought the very first edition of Illuminati, in the old plastic pocket box format, in 1982 (NOTE: this review is of the 1982 edition). It quickly became a staple of my gaming group throughout our high school days. I kept it, and all three of the original expansions, lovingly tucked away in a box as I grew up and moved across the country. I haven’t played the game in many years, but I could never bring myself to get rid of it either. I’m glad to see it here on the site, as its appearance has made me break out my old copies and start going through them again. I’m going to have to introduce this at my local game club and share it with a whole new generation of gamers.
Let me start with you, gentle reader…

Illuminati is a game for 2 to 6 players, but I don’t really recommend it for two. It’s OK with two players, but the more players you have, the better it plays. Each player takes on the role of a Secret Society bent on Global Domination (insert evil laughter here). The original game came six such Societies (collectively called Illuminati groups): The Bavarian Illuminati (from whom the game takes its name), The Bermuda Triangle (thematically an odd ‘group’), The Discordian Society (from R.A. Wilsons Illuminatus! Trilogy), The Gnomes of Zurich (basically Swiss banking concerns), The UFOs (all hail our extra-galactic overlords!), and The Servants of Cthulhu (although it was in the base game, you could argue that the obligatory Cthulhu expansion for EVERY game made today started right here…). There are two ways to win the game: 1) depending on the number of players, the Illuminati group which controls a specified number of other groups (we’ll get to that) is declared the winner, or 2) each Illuminati group has its own special victory condition which, if they achieve, allows them to win immediately.

Now that you have a group, and a goal, how do you take over the world? Simply put, by controlling the various groups of people which comprise the world. Let’s back up for a second. Each Illuminati group has a card which represents it. This card has several things printed on it. The name of the group, that group’s special ability, some art for their group, two vital statistics (Power – which is what they use to take over other groups with; and Income – how much money they make each turn), and four arrows pointing out from each side of the card. These are the “control arrows” and show which groups are controlled by the Illuminati. Lesser groups have pretty much the same information, but also feature the following information: Resistance (which is their ability to resist attacks), and alignments (such as Violent, Government, Criminal, or Weird). Also, lesser groups don’t necessarily have four control arrows; they can have from one to four, but one of them will always be incoming (showing which group controls them).
As you build your power structure, you’ll place groups such that the incoming arrow on their card matches an outgoing arrow on either your Illuminati group, or of a lesser group which is already in your structure. There’s sort of a puzzle building aspect to the game which comes in here as you have to be aware where your arrows point. It is possible to cut of routes of control for a group with multiple arrows, so be careful.

So, here’s how the game plays.

After each player takes an Illuminati group (how you choose – random or player’s choice – is up to you), each player takes a number of Megabucks (MB) equal to their income and places it on their group. This is your starting bankroll. Decide who’s going first (high roll). Shuffle the lesser groups and the special event cards (there are just a few of these) into a deck and deal out the top four groups (if you draw an event, just return them to the deck and draw another group) face up in the center of the table. I’d tell you that you should choose one player to be the banker, but in this game, that’s a bad idea (you’ll see why…), so just place the pile of MB in in plain sight of all players. Starting with the first player, each gets a turn in order; play passes counter clockwise.

On your turn you do the following things in order:
Collect Income
Take the listed income for any groups (including your Illuminati group) you control. Yes, this means that on the first turn, the first player will have more money that everyone else. (start plotting against him… now!) You take the MBs from the pile and place onto the card(s) in question. This is important as each group (Illuminati or lesser) has it’s own treasury, and who has what to spend matters.
Draw a card from the deck
If it is a group, place it face up alongside any other groups in the center of the table. It is now available to be controlled.
If you drew a special event card, keep it to yourself. Horde it until you can use it to best effect. There is no limit to the number of special event cards you can hold in your ‘hand’, but there are only a few in the deck, so that’s not your worry (7 events vs 41 groups in the base game).
Take two (2) Actions
Available actions are making an attack (there are three kinds of attack – to control, to neutralize, or to destroy a group), transfer money from any group in your power structure to an adjacent group, or move a group to another location in your power structure.
Take any “Free” Actions
Technically some of these things are done during the Take Actions phase (above), but they don’t count as one of your two actions for the turn. You can drop a group from your power structure by placing it (and any groups it controls) back into the idle of the board as “uncontrolled”; you may aid an attack (while this is done as part of the attack, it is NOT an action to aid); you can give away money or special event cards – this can be done at any time not just on your turn (although, money given to another player must come from YOUR Illuminati treasury and go into HIS Illuminati treasury, not from/to subsidiary groups); you can check any or all of your own treasuries; and, lastly, you can use any Special Event cards you might have (note: Bribery is the exception to this as playing that card IS an action).
Transfer Money
You can take two “additional” money transfer actions, but only after your two actions and any free actions have been resolved. Yes, this means you could transfer monet four times (if you did nothing else that turn).
Take your Illuminati Special Power Action
Each Illuminati groups has a Special Power (e.g. – the Gnomes of Zurich may, once each turn, reorganize all the money in all their treasuries freely). Now is the time when you can use it.

As mentioned above, the game is all about taking control of the non-Illuminati groups and using them to control the world. You take over groups by attacking to control them. An attack (of any type) pretty much works like this: you decide which group (your Illuminati group, or one of the other groups you control) is making the attack. Then you compare that group’s power to the defending group’s resistance (Power – Resistance = target number) to see what you have to roll on 2d6 to succeed. You need to roll that number or less on the dice.

Example: It’s early in the game and my Illuminati group (the Bavarians) want to control the CIA. The Bavarians have a power of 10 and the CIA has a resistance of 5 which means I have to roll 5 or less to win and thus gain control of them.

Now, the target number will be modified in a variety of ways. I can spend money to gain a bonus to my roll (+1/MB spent), if I’m attacking with a lesser group I may be able to support the attack with my Illuminati or other groups by using transferable power (Power which is transferable will be noted as x/y – where the x is the groups power if they are attacking and the y is the power they can lend out to other groups in support of attacks), the alignment(s) of the groups involved can have an effect (groups of like alignemtns are easier to attack while those of opposing alignments are harder to attack), and, lastly, other players can contribute their MB to either aid or hinder your attack.

Back to our example: Later, if the Bavarians were successful in their bid to control the CIA, they now want to use the CIA to control other groups with. Let’s say the CIA wants to control Underground Newspapers. The CIA has a power of 6/4 and the newspapers have a resistance of 5 (which means the CIA would have to roll 1 or less on 2d6 to control them – not possible). BUT wait, there’s more. The CIA has the alignments Government and Violent while the Newspapers are Communist and Liberal. Government (in the case of the game assumed to be the US Gov’t) is the opposite alignment from Communist, so there is an additional -4 to the attack roll (now at -3 on 2d6). But, don’t despair! The Bavarians have a power of 10/10 (which means they have 10 power they can lend to the CIA for this attack) so the roll would them be 7 or less (much more manageable); plus either group – the CIA or the Baviarians could spend money out of their treasuries to modify the number). Combined they’ll spend 3MB for a total of 10 or less (a die roll of 11 or 12 is ALWAYS a failure, so why bother spending beyond that?). Other players could toss their money in to help the Newspapers remain free, and I can always spend more to resist their interference, etc… until we’re all spent out.
OR
I could have gone a different way; the Bavarians (power 10/10) could have tried to control the Newspapers directly with the support of the CIA. That roll would look like this: Bavarian Power 10 + CIA transferable power 4 – Newspaper resistance 5 = 9 or less. NOTE: the alignments aren’t a factor in this as only the alignments of the attacking/defending groups count and Illuminati groups have no alignment. And then, of course, comes the money throwing…
If for some reason I really want the CIA to control the Newspapers, it’s best for me to use one action to have the Bavarians attack to control (better odds) and then use my second action to move the Newspapers to another spot in my power structure (say, under the control of the CIA).

The three types of attacks vary only slightly in effect:
Attacks to Control may be made against either uncontrolled groups or against a group in another player’s power structure. If you succeed in controlling another player’s group it becomes part of your power structure along with any groups it may control. (This is harder that it sounds as groups in an existing power structure get bonuses to their defense, etc). Also, if you take over a lot of groups this way, they all have to fit into your power structure in the same way the fit into the other player’s (we’re back to the puzzle building aspect here), and groups which don’t fit (or can’t be made to fit) are lost back to the uncontrolled area of the table.

Attacks to Neutralize are a better way of hurting an opponent’s power structure as you get a +6 bonus to your die roll for only trying to neutralize them. Neutralized groups (and ay they control) are returned to the uncontrolled area of the table.

Attacks to Destroy groups are literally that; you are trying to wipe out the CIA (for example). Destroyed groups are removed from the game. Some Illuminati (the Servants of Cthulhu) have special victory conditions predicated on destroying a certain number of groups.

The few Special Event cards allow you to do things like revive a Destroyed group back into the uncontrolled area of the table, gain 25 MB into your Illuminati treasury, or other fun nasty surprises.

In a nutshell, that’s the game. I enjoyed all of the expansions, especially the first one where they made it ‘legal’ to cheat (and this would be why you don’t want any one player to act as the banker…). Cheating was broadly defined as bending the rules in any way you could get away with, and was only against the rules if you got caught.

Play with friends. Play with strangers. In the end, it all boils down to playing with enemies who can’t be trusted anyway. Invest in some mirror shades and you’ll be fine.

7
Go to the Chainsaw Warrior page

Chainsaw Warrior

14 out of 17 gamers thought this was helpful

I was working at my local game store in 1987 when Games Workshop released their solitaire game Chainsaw Warrior. I know the title of this review sounds like you should give it a pass, but bear with me on this one.

The premise of the game is that a rift has somehow opened between our world and another, and a strange being referred to as “The Darkness” has made its way here. It has occupied a building in Manhattan and is gaining strength enough to pull the city and its inhabitants back through to its home dimension… The United States government, desirous to prevent this fate from befalling so many tax payers, drafts YOU – a highly trained special forces commando – to go in to defeat Darkness and save the city. By the time you arrive on site, receive your briefing, and your necessary equipment, you only have 60 minutes before Darkness drags the city back to its home dimension (which probably won’t be very much fun for anyone other than Darkness…). As a setting, it strikes me as similar to the Mutant Chronicles setting, or the Lawrence Fishburne film Event Horizon.

The board consists of four sections which lock together as large puzzle pieces, and is nothing but charts and tracks for keeping track of the various bits of information and decks of cards you’ll need to play. The cards themselves come in perforated sheets and you need to separate them and sort them into their respective decks.

First off, you’ll need to know what you’re capable of. Each time you play you randomly determine your commando’s stats. You have 5 stats: Endurance, Hand-to-Hand, Marksmanship, Reflexes, and Wounds. Endurance reflects your ability to resist the adverse effects of both Radiation and Zombie Venom; Hand-to-Hand represents how deadly you are in, well, HTH combat; Marksmanship how good a shot you are; Reflexes is how fast you respond to danger; and Wounds should be self-explanatory…

Each of these stats has a track on the board where you note what your total is. Apart from your stats you also have one skill which you are exceptionally good at – Marksmanship & Endurance modify the stats of the same names, Agility modifies your Reflexes, and Strength your HTH. The final two skills – Climbing & Hiding – are used to counter the effects of some of the various “House cards” which you’ll encounter as you make your way through the building. Hiding is used more often, but Climbing is (IMHO) more useful to avoid the “Chasm” trap which requires you to retrace your steps and waste valuable time.

Lastly, it’s time for you to gear up! This is where the cracks in the premise appear for most players. You randomly determine what your Equipment Allowance is. There are 5 types of Equipment – Clothing, Devices, Guns, HTH Weapons, and Heavy Weapons; each type of equipment has a differing point cost in order for you to draw a card from the appropriate deck. (Yep, that’s right! The fate of Manhattan rests on your shoulders, so close your eyes and reach into this bag and grab some stuff and see what you get.) There is one other piece of equipment – the Laser Lance – which you MUST take with you, but doesn’t count against your initial Equipment Allowance. You need the LL in order to defeat Darkness, and to prevent yourself from dying if you find an elevator shaft (a type of house card) flooded with Slime.

The building is represented by the House Cards; shuffled into two cards – one for the lower levels of the building and one for the upper levels. Once the two decks have been shuffled and separated into equal piles, the House card for Darkness is shuffled into the second deck (for the upper levels). The building is now set for you to enter. Each house card when flipped over reveals what you encounter in that area (areas are Balconies, Corridors, Elevators, Rooms, or Stairs, and are noted on the backs of the cards). Most of the areas that you’ll enter contain bad things – Cultists (deranged humans who have sided with Darkness), Mutants (what you’ll turn into if you are exposed to too much Radiation), Traps (which range from deliberately set obstacles to weakened floors which you might fall through), and Zombies (which you will turn into if exposed to too much Zombie Venom) – but some are Empty (with a chance of a Wandering Zombie), and some contain good things (supplies dropped by the first teams to enter the building) for you to pick up and use.

Turns play out in the following sequence:
Move the time counter along the countdown track. You’ve only got 60 minutes, and this track is how you know time is running out. Each turn takes 30 seconds, so there are 120 possible turns. Each deck holds 54 cards (that includes Darkness in deck #2), so it should only take you 54 turns to run through each deck. But some House cards – notably traps – will take more than one turn to deal with. You’ll have to move the timer more than one space for those cards.

Explore the building. Flip over the top card of the House deck you are currently working through. You start with deck #1 and when that’s exhausted you move “upstairs” to deck #2. Read the card and do what it says. If it’s an enemy you have to kill it, or otherwise deal with it, before you can move on.

If you’re having a fight, you first have the chance to shoot it with a ranged weapon (if you have one). If you don’t have one (or choose not to use it – you have to keep track of your ammo, so choose what to shoot wisely) you engage in Hand-to-Hand. [NOTE: If you have the Hiding skill you can try and avoid the fight altogether.] If you fail to kill the enemy in the first round of combat you keep going until one or the other of you is dead, or you escape the fight. However, for each additional round the fight goes on you move the timer along the countdown track… so be quick about it.

Play goes on like this until the game ends. This happens automatically if the countdown hits 0 (in which case you and all of Manhattan die horribly), or if you die as a result of the hazards of the building (i.e. – you run out of wounds, or your exposure to Radiation of Zombie Venom equals or exceeds your Endurance).

Your only hope to win is to run through the lower levels of House cards, get to the second deck, and find Darkness (he’s a room card, but could be anywhere in the second deck; pray he’s towards the top). Once you find Darkness you have to kill him. This requires one of three things:

You shoot him with the Laser Lance; remember it? The one piece of equipment you have to take with you. It only has three shots, and you may have had to use one if you ran into a Slime filled Elevator. This is your best bet, but even so it requires you to roll 11+ (you get to add your Marksmanship bonus to this) to kill him.

You defeat him in HTH combat. This is virtually impossible as he has a HTH skill of 20(!) which makes him very hard to take down.

If you were ‘lucky’ enough to draw the Implosion Waistcoat (yes, Waistcoat; they’re British after all…) you can go all Kamikaze on him and kill yourself and Darkness (you saved Manhattan, but you die too. Oh, boy!). Technically, the card says “The Game ends in a Draw,” so you could use it in the first fight you get into and thus save the city early on, but that makes for a short game.

All in all, it’s hard to win. Over the years of playing, I think I’ve only done it two or three times (once with the Waistcoat). But this is where the game really wins out. Despite being almost impossible to win, players seem drawn back to try again and again. When you do win, it feels really good.

I come back to this game for the challenge and for the nostalgia value of playing it. Visually, it doesn’t stack up to more recent games like Zombies!!!, or Zombicide (although GW did make CSW miniatures, there was no way to use them in the game), but it’s still kind of a hoot to play now and then. There were rumors, back in the day, of GW making a sequel game, but that never happened.

There is an app version of the game available here. I haven’t played it myself, but I’m told it simulates the board game experience fairly well.

8
Go to the Darkest Night page

Darkest Night

25 out of 28 gamers thought this was helpful

When I came across Darkest Night about a year ago, I was drawn to the game for two reasons:

1) The look of the game. The board, cards, tokens and other pieces are all well illustrated and the artwork really evokes the gloomy feel of the game’s setting.

2) While billed as a co-operative game for up to four players, it is also well suited to solitaire play, and I love a good solitaire game.

The rules are well organized and when new concepts are introduced they are offset from the other text in a different color. This was a good idea, but the offset color tended to blend into the background a little and thus didn’t stand out as much as intended. Important concepts are set apart by BOLD text, and symbols for Grace, Secrecy, Wounds, and Dice are used throughout the text.

The main idea of the game is that an evil Necromancer has all but wiped out the forces of light and goodness in your kingdom. But all hope is not lost. A few heroes yet survive and hope to defeat the Necromancer as he consolidates his grip on power. That’s where you come in.

Players take control of four heroes striving to build up enough strength and to collect holy relics to finally defeat the Necromancer. Regardless of how many players there are, there will always be four heroes (divide them up among the players). Players may choose from the nine heroes included in the base game (and up to 13 more heroes with all the expansions – see below) each with its character card and unique set of powers and abilities she brings to the fight.

Each character card features an illustration of the hero, a brief description of what he’s about, two tracks at the bottom for tracking the hero’s Grace and Secrecy, and a player aid on the back. Grace and Secrecy are the stats which each hero will use as she moves about and combats the Necromancer and his minions.

Grace represents that something special about heroes which, “…allows them to survive in situations where normal men would die.” In a situation where a hero is faced with death, he may expend a Grace point to save himself. While running out of Grace is not instantly fatal, it does leave the hero vulnerable; effectively, Grace = Hit Points.

Secrecy represents how stealthily a hero moves about the kingdom. It both shields the hero from detection by the Necromancer (bad) and reduces the effects of various event cards. Again, running out of Secrecy not instantly fatal, but it does allow the Necromancer to attack you directly (very bad). Both stats may be replenished during the game.

The heroes’ powers and abilities are represented by a deck of Power Cards for each hero. These decks consists of 10 cards; four of which have a special symbol in the upper right hand corner. Once heroes have been chosen, take out the deck associated with each and find the four cards with the special symbol. Each hero starts the game with three of these cards already in play and places those three cards face up next to his character card. Shuffle the remaining seven cards into individual decks and place them close to the related character card.

There are also decks of cards for Events, the Map (used when searching, see below), and Artifacts (not to be confused with the Holy Relics). Each of these decks is shuffled and placed near the board. The four Relic counters are placed at the Forest, Mountains, Ruins, and Swamp locations. Counters for both Blights (minions of the Necromancer) and Items (useful things to have) are placed in piles near the board. Place the marker for each hero on the game board at the Monastery and the marker for the Necromancer at the Ruins. Draw a Map card for each location and place the indicate Blight on that location (not the Monastery). The game is now played in a series of rounds until one side defeats the other.

A game round works like this:

Each Hero takes a turn. The order in which heroes act can change from round to round. Sometimes it’s important for one hero to act before another. The player(s) should vary the order of hero turns as best suits the situation each round, and may decide which hero goes next after each preceding hero has completed her turn.

In his turn, each hero resolves the following phases in order:
Start: follow/resolve any start of turn instructions. These are listed on Power card on the player aid cards and some are based on hero Powers.

Event: Draw an Event card. If a hero is at the same location as the Necromancer and has zero Secrecy the Necromancer initiates combat against the hero and no Event card is drawn (try and avoid this…)

Action: Do one of the following:
Travel to an adjacent location
Hide (replenish your Powers and regain Secrecy)
Attack (either a Blight or the Necromancer)
Search (possibly draw a Map card and find something). Heroes also gain access to more Power cards as a result of searching, not to mention finding artifacts and keys (see below)
Pray (ONLY while at the Monastery – to regain Grace)
Retrieve Holy Relic (useful in defeating the Necromancer). You’ll need to discard three key tokens (found by searching) to claim an undiscovered Relic.
Power (use the “action” effect of one of your Power cards). Powers have various effects and are broken down into Actions (which can be taken during the hero’s action phase instead of one of the listed actions), Tactics (which are used during combat, see Attack, above), Bonuses (used as needed), or Active Effects (which must be activated to be used). Some powers are exhausted when used, and can’t be reused until they are refreshed.

Once all four heroes have taken a turn, the Necromancer gets a turn during which the following things happen:

Advance the Darkness Track by one. This represents things getting worse around the kingdom and activates new powers for the Necromancer. If the DT is high enough, the necromancer can place multiple Blights (see below), or even place them inside the Monastery (very bad; the Monastery is normally immune from Blight placement).

The Necromancer moves. Here is where the heroes’ Secrecy level comes into play. The Necromancer rolls 1d6 and compares it to the Secrecy level of all the heroes outside of the Monastery (kind of like Sauron’s all-seeing eye in the LotR). If his roll exceeds the secrecy level of a hero, he moves one location closer to them (or stays in place if he detects a hero where he is). In the event that he detects two or more heroes he moves towards the closest hero (roll if they are equidistant). If he fails to detect ANY heroes, he moves in the direction indicated on the board.

Place a Blight in his current (post movement) location. I liked this mechanic and found it be reminiscent of the way in which Dracula leaves traces of his passing in cities (see Fury of Dracula).

The heroes win if they either slay the Necromancer. This is the most direct way to win, but is hard to do as only a hero with a Holy relic may fight him and any Blights in the Necromancer’s location must be defeated first. The heroes can also cleanse the land by enacting a Holy Ritual. This is more indirect, but also tricky to pull off; to enact the ritual they must collect three Holy Relics at the Monastery. The ritual takes place immediately when three Relics are in the Monastery.

The Necromancer can only win in one way; by overrunning the Monastery with Blights. Normally the Monastery is safe from Blights, but if the Darkness Track is full, then Blights can be placed there. If, at any time, there are five Blights within the Monastery then the Necromancer wins and all heroes lose.

It sounds simple, but it’s not. Blights will build up in locations, and each hero can only do ONE thing in each turn. Some Blights (Desecration) increase the Darkness Track and need to be wiped out ASAP, some prevent heroes in the effected location from recovering Grace, others increase the search difficulty in the effected location, and others are just creatures (Zombies, Skeletons, Liches, etc…) which need to be killed.

The Darkness Track will build up faster than you think, and with Blights cropping up all over the place, it can be hard to get a clean shot at the Necromancer. I’ve played several times and have yet to win, but that has only served make me want to strive again (and again; Curse You, Necromancer!)

The rules also have variants which allow for a fifth hero and for the Necromancer to be controlled by a player. Using these rules, you could play with up to six players.

The game has several expansions:

Full Expansion Sets

With an Inner Light

On Shifting Winds

From the Abyss

In Tales of Old (not yet listed on this site, but is available from VP).

Single Character Expansions

Victory Point has also created several single characters as promotional expansions. Each comes with all the cards needed to play the character.

  • The Nymph
  • The Mercenary
  • The Enchanter
  • The Tinker

These smaller expansions used to be available through the BGG Geek Store, or directly from Victory Point; however, they no longer appear to be available anywhere. They can be fund, so good luck finding them!

8
Go to the Destination: Neptune page
18 out of 20 gamers thought this was helpful

I’m a fan of High Frontier from Sierra Madre games, but some folks feel intimidated by its apparent complexity. Destination Neptune shares a lot of the same things which I love about HF – it was designed by an actual space scientist, has technology based on what is currently available to various space agencies now and what they could have within the next 100 years, and is all about mankind taking his first real steps into space to explore, exploit, and colonize our solar system.

The object of the game is to be the player with the most Victory Points at the game’s end. There are four decks of cards which players will be drawing from which represent each generation of space exploration (a generation is 25 years). Each deck is used in turn until it is empty and then a scoring round takes place. Once relative scores have been determined, play resumes with the next generation deck. The game ends immediately when the last card of the fourth generation is drawn. This triggers the final scoring round and a winner is determined.

The game board is well illustrated and represents the Solar System, the various planets, (some of) their moons, and other locations – such as Ceres or Pluto (sadly, no longer a “planet”) – which players can travel to. Each location has a series of spaces next to it: one with a satellite which denotes a scientific mission, one with a flag which denotes a base, and one (or possibly two) which denote areas to be exploited (more common that colony sites) or colonized.

Lines between the various locations represent the orbital flight paths which a Construction Team (see below) must follow in order to reach specific destinations and are also marked with how much fuel must be spent to move from point to point. The total fuel needed is calculated by adding up the total amount of fuel on the flight path and can be modified by various technologies and the presence of bases along the route.

Each location on the map represents an area which can be exploited in some way or another. These locations have three spaces associated with it (as mentioned above) each of which is necessary in order to build the next in line. Base, Colony, and Factory spaces at locations may also have one (or more) icons next to them indicating which advanced technologies a player must have first in order to build into that space. Example: In order to build a base on Triton a player must first be part of a Scientific Mission to Triton AND have High Efficiency Insulation technology.

Each player starts the game with the following:

3 Construction Teams (they look like rockets), 5 credit counters (money), 5 fuel counters (needed to fly your rockets). Also, off to the side, are a pile of 35 (for each player) small wooden disks used to mark off ownership of various missions, locations, and technologies as pay progresses. Each player is dealt 5 cards from the first generation deck.

On his turn a player does the following things:

1) He MAY sell a card to the Opportunity Track. The Opportunity Track is a row of cards placed along the bottom of the game board. By doing so, the player receives either one or two credits (depending on the number of players). Selling a card to the Opportunity Track does not prevent it from being played later (see playing a card, below). The maximum number of cards which can be in the Opportunity Track is based (again) on the number of players. When it is full, and a player sells a card to the track, the first card drops off and is moved to the discard pile.

2) He MUST play a card, either from his hand or from the Opportunity Track. The main difference here is that a player only gains the Fame points associated with a card when playing it from his hand. Fame points are used for two things: 1) they may provide additional Victory Points when during a scoring round, or 2) they may be exchanged for credits on a 2 for 1 basis when an Attract Investors card is played. Once a card is played – from either place – it is moved to the discard pile.

3) He refills his hand back up to five cards. He first draws from the current generation deck. If he depletes the current generation deck and still does not have 5 cards, he continues to draw up to five from the next deck. As above, when the last card of a generation deck is drawn, a scoring round occurs.

All of the actions in the game – establishing scientific missions, building, acquiring new technologies, attracting investors, etc… – occur as a result of playing a card. On your turn, when you play a card, you take an action as stated on the card. BUT, you are not the only one to take advantage of your actions. Having played a card, and taken your action, each of the other players may also take an action. Example: You play a build card to build a base on the moon. Now each player, moving clockwise, also gets a chance to build something somewhere.

This sort of shared actions means that you need to take your opponents possible gains into account as well as your own. Do you develop a new technology now? By so doing your opponents could gain access to it now, and then, on their turn, they may be able to build a base somewhere which required them to have that technology before you can. Building in, or deploying scientific missions to, various locations first is important as it effects scoring (both of Fame and Victory points). Any number of players can share a scientific mission and base at any given location. But only one player can have a factory and/or colony at a location.

This, along with the timing of actions, makes for a lot of jockeying for positions around the map. Is Fame more important to you, or do you want to try and build more factories and colonies without regard for who took the “one small step for man…”?

All in all, I found Destination Neptune to be both fun and engaging. I intend to buy a copy as soon as I can (which is always the highest recommendation I can give any game).
UPDATE I got a copy of the game this past Xmas (2015), so now I can play to my heart’s content.

9
Go to the Splendor page

Splendor

66 out of 74 gamers thought this was helpful

It was a rainy night at Brews and Board Games this past Tuesday. It was late and the crowd was thinning out, but I wasn’t ready to head home yet. I spied a table with three guys sitting at it opening a copy of Splendor. I didn’t know what it was, but I hovered around hoping they might be looking for a fourth player. I was in luck; they were.

I had never heard of Splendor, but one of the others had heard good things about it, and he said it was supposed to be fairly simple. We decided to give it a try.

The game consists of four decks of cards; three of which are labeled with either one, two, or three pips respectively (denoting the relative value of the cards in each deck). These are the development cards. These decks were arranged into a column from one to three, and four cards were taken from each deck and laid out in rows stemming outwards from their ‘parent’ deck.

We now had 12 cards face up. Each card has an illustration of either a gem mine, a means of transporting gems to market, or a gem market of some sort. Each card also has a series of numbers on the card:

lower left – one (or more) numbers in colored circles. These denote the various types and amounts of gems (either chips or in production) you need to purchase that card.

upper left – IF a card has a number here, it is the number of victory points this card is worth.

Lastly, each card will have in the upper right hand corner a gem – onyx, emerald, ruby, sapphire, or diamond – which is sort of gem that the card produces for you.

Above this grid of cards we laid out cards from the final deck – the noble cards. Each of these cards had a picture of a noble on it, as well as a victory point amount, and an amount of gems in which you need to have in production in order to attract that noble to inspect your goods.

Finally, we had stacks of chips – real casino quality clay-type poker chips – with art on them for the type of gems they represented, and one additional stack for gold (which serve as a ‘wild card’ chip). There are seven of each type of gem chip and only five gold chips.

Play works like this:

One your turn you may do one of the following things:

1) Take one each of any three different gem chips (not the gold chips).

2) Take two of one type of gem chip, but only of there are four or more of that chip to be taken. If there are three or less, you may not take two of this type of gem at the present time.

3) Use gems which you have to purchase a card from the face up selection of development cards. As cards are purchased, they are replaced by the next card off their deck.

4) Place a development card into your hand and keep it in reserve and take one gold chip. You may purchase this card from your hand on a later turn.

5) Attract a noble.

Play then passes to the next player.

The object of the game is to get to 15 victory points (at least with four players it was; it may vary with 2-3 players).

Development cards which you buy get laid face up in front of you. The gem in the upper right hand corner is now considered part of your available gem store and can be used to buy more cards.

Example: I buy a dev card which produces a Sapphire. On future turns, if I need Sapphires to buy other cards, this card will count as one Sapphire which I can use towards a purchase. These cards stack, so if I have three cards which produce Sapphires, I have three Sapphires I can ‘spend’ without needing actual Sapphire chips.

Initially, of course, you start with no dev cards in front of you, so the first turn or two is spent taking chips to be able to purchase a development card.

As you spend gems to buy cards they go back into the pool of chips which can then be taken. As you build up development cards in front of you, it becomes easier to buy more expensive cards (some of them require 7 of one type of gem to buy, which you certainly won’t be able to get in just chips). Bear in mind, gold chips are ‘wild cards’ and may take the place of any type of gem chip in a purchase.

Not all development cards are worth victory points, but they all produce some kind of gem. Cheap cards which aren’t worth victory points will still help you.

To get a noble card you must have the right amount of gems in production . Gem chips won’t cut it here.

Once you have the right number of gems in production you can attract a noble to inspect your wares. All nobles are worth victory points.

You can win without attracting any nobles, but they make it easier to edge out the others and claim victory for yourself.

I didn’t read the rules, so I don’t know how clearly they are presented. But we figured out how to play in about 2 minutes. In 5 minutes were seeing the strategies involved. In 25 minutes we had played the game to completion.

In short, the components are TOP NOTCH; I really don’t know how they got such quality into that box for $40(!)

The game was very easy to learn and play.

Play was interesting and fun.

My highest recommendation is to say I will add this game to my collection as soon as possible.

If you get the chance to play this game, do it!

8
Go to the Can't Stop page

Can't Stop

80 out of 87 gamers thought this was helpful

I attend a local gaming event in the Baltimore area called Baltimore Brews and Board Games. It’s an open forum where people gather and bring the games they like to share with others. I find it a great way to play things I might not normally play.

One such game is Can’t Stop.

It’s not the sort of thing I would have looked at twice on the shelf in a store, but the folks I was sitting with at B&BG pulled out a copy and asked if I’d like to play; “Why not,” I said.

The game is very simple to play. Each player takes a set of colored (traffic) cones – violet, blue, green or yellow. There are also three white cones which you will use to move along the board. The board is an octagon (stop sign) with 11 columns (numbered 2-12).

Each player, on his turn, takes 4d6 and rolls them. You make two sets of 2 d6 and get numbers out them. Then you take white a cone to denote which numbers you are backing this turn. Example: Your first roll is a 2, 3, 4, 6; so you could make the following pairs 2+3=5, 2+4=6, 2+6=8, 3+4=7, 3+6=9, or 4+6=10.

You choose 7 and 8 and place white cones those columns. You roll the 4d6 again. This time you roll combos that make 3 and 7. You place the third white cone in the 3 column and move the cone in the 7 column up one space. On your third roll, you MUST get at least one combo which is either a 3, 7, or 8. If you get any of those numbers, you move the white cone in that column up one space. If, however, you don’t match any of the three numbers you are currently backing you remove all of the white cones.

So what?

Here’s so what; at any point you can choose NOT to re-roll the dice. In this case, you replace the white cones with cones of your color. If, on a subsequent turn you get another roll in one of these columns (say the 7), you start moving the white cone up the column from where your colored cone is.

Your goal is to get to the end of three columns first. Once you get to the end of a column you lock it out and no other player can advance in that column anymore (thus eliminating that number as a valid roll). The columns are of differing lengths – 2 & 12 being very short, while 6 & 7 being the longest.

So, you have to decide which numbers to back on each of your turns, and as players (yourself included) lock out numbers the likelihood of busting out on any given roll increases. You have to know when to stop rolling and preserve your gains (modest though they may be) as opposed to rolling for broke to try and close out a column before the next guy does.

On the surface, not a lot of strategy; roll your dice, place your cones, pass to the next player, repeat as necessary. I was pleasantly surprised at how much thought actually went into each successive turn.

In the end, I can say the best thing I can say about any game; I would play it again.

9
38 out of 40 gamers thought this was helpful

I recently read a book called “Reality is Broken” which was all about how we can use games and game design theory to make our lives better. One of the points the author makes is that if work were more like a game, then we’d all enjoy it more and consequently be more productive and satisfied. Her prime example is WoW and how people will sit around for hours crafting or fishing (fishing!) to improve their characters; it’s basically doing work to make their character better.

Well, boardgaming.com is a great example of what she’s writing about. The whole site is designed to be like a game; you level your profile up which earns you more gold to make your profile spiffier, or enables you to shower your favorite games with love and thus make them more noticeable to other users. When you complete quests and/or level up, you are rewarded immediately with pop-up graphics saying “You did it! Here’s your gold and XP!” (this is another of the author’s points about how instant gratification serves to motivate us to do more)

And, the rewards system is subtle and sometimes based of the feedback of your peers. In order to advance as ‘Critic’ you have to write reviews of games; duh. But that’s not enough; you’re reviews have to found valuable by other users on the site. When people read your reviews, they can vote to say if they found it useful or not. More yes votes helps you earn XP for your ‘Critic’ levels. No votes don’t penalize you, but they don’t help you either.

I’ve found that this means that you want to take your time and write well thought out reviews which are really helpful to people (in the hopes that they’ll vote for you as being helpful). If people get to know that you write generally good revues, they can follow you; which can also help you level up.

It’s insidious!

I’ve found the site to be fairly addictive and I keep coming back over the course of the day to see how my revues are being received and to work of some of my various quests (mostly so I can shower my favorite games with love – which, did I mention?, also gets you XP).

Literally everything you do to contribute to the site helps you level up, which makes you want to make the site better, etc…

Plus as an employee of a game company (which now has themed avatars and badges for our stuff on the site) I can ‘contribute’ in that way as well (although it doesn’t buy me XP, it does make me happy to see other users making use of the new avatars and badges – woo hoo!)

On the downsides (yes there are a very few) the list of games on the site is far from complete (they’re constantly expanding though), and it doesn’t seem to be very easy to add games.

Also, the designers seem to be overly concerned with possibly offensive material. Obviously no cussing is allowed, but sometimes words are **** blanked out when it may not be necessary.

However, these are small gripes on my part, and really haven’t detracted from my enjoyment of the site.

Well done, I say.

I can’t stop playing!

9
Go to the Ace of Aces: Handy Rotary Series page
23 out of 24 gamers thought this was helpful

(This review is for any of the three basic Ace of Aces sets – Handy Rotary, Powerhouses, or Flying Machines. I will also mention Balloon Busters, briefly.)

Ace of Aces has long been a favorite staple of mine. It’s a great game which can be taken and played almost anywhere as it involves NO DICE.

It’s strictly a two player game and each player takes on the role of a WWI pilot in either an Allied and German plane of the era. There are three sets to play with, and each is fully compatible with the others; although if you took a plane from the Flying Machines set up against a plane from the Powerhouses set, you’d be going down in flames.

Each player gets a small book. The pages of these books are all made up of pictures of what your pilot sees from the cockpit of his plane, and a series of available maneuvers which you can perform along the bottom of the page. Under each maneuver is a number; a page number.

Play works like this:

Each player decides what maneuver he wants to make with his plane. He looks at the page number under that maneuver. He then tells the other player what that number is, while his opponent does the same. Now, you turn to the page number in your book which YOUR OPPONENT gave you, while he does the same with the page number you gave him.

This is the mid-turn page; not the final position of the planes. On this page, you each look at the maneuver YOU performed and see what the page number under it is. This number should be the same for both players. This is now the page to which you both turn in your respective books.

This is where both planes are now that both maneuvers have been completed. Look at the picture. What do you see?

Most pages are a view of where your opponent is now – off to your left, for example. But some will show you shooting at your opponent, some show him shooting at you, and some show you shooting at each other. There’s even a page for a mid-air collision (ouch!). Damage is based on the weapon mounted on you plane (specified by the set you are using) and the range of the shot (determined by the picture). It’s pretty self-evident how much damage you’ve done/taken.

All you do is keep track, and when your plane has taken the full amount of damage it can sustain (again specified by which set you are using) you’ve been shot down.

It’s that simple. As such, each game boiled down to a contest of flying ability – in this case, the ability to visualize where in space your opponent was in your head and try to out fly him. As you played the same opponents you might get to know their style of flying – who likes to side-slip, or try an Immelman turn to get behind you. Winning and losing is literally in your hands, not the random chance of the dice.

At the time, Nova Games (the creator/original publisher) was the only manufacturer to have ever Patented his system. This remained the case until WotC tried to patent CCGs. This same system is used in the all the Nova/Flying Buffalo ‘flip book’ games including the Wingleader (WWII version of AoA), Jet Eagles (modern day version), Star Wars: X-Wing vs Tie Fighter game (published by West End Games), the Lost Worlds (mano a mano version with orks and such; also had books for Luke Skywalker and Darth Vader – always fun to have Vader fight a hobbit…lol), and the often overlooked Bounty Hunter: Shootout at the Saloon (wild west gunfight) and Dragonriders of Pern versions.

In the Pern version players competed to see who could stop a set number of threadfalls first rather than ‘shooting’ at each other.

Lastly, for completeness, I mention the AoA Balloon Busters set. This set was fundamentally different from the other three AoA sets in that one player – the Allied player – was flying a plane and trying to shoot down German observation balloons while the German player was trying to shoot the Allied plane down from a ground based AA gun. I tried BB once or twice and didn’t really enjoy it very much.

For my money the sets to stick with are the 3 original AoAs (in order of pub Handy Rotary, 1980; Powerhouses, 1981; Flying Machines, 1983), and the X-Wing vs Tie Fighter sets. Any of these sets included both books needed to play and came packaged in a slipcover which held them (as did Balloon Busters).

The Handy Rotary Deluxe edition, Wingleader, and Jet Eagles all came in standard boxed sets and included various charts and tables to help simulate different planes, or advanced systems such as missiles. I liked Wingleader well enough, but JE was too complex and lost a lot of the feel of the game.

And this sequence from the film The Blue Max is what the game is all about!

7
Go to the Dragonmaster page

Dragonmaster

21 out of 34 gamers thought this was helpful

This game is basically the standard card game of Hearts.

There are four suits – Druids, Warriors, Nomads, and Lords – of cards and the each player takes a turn being the dealer. After dealing out the cards the dealer decides which of the 5 types of hands this one is going to be. Each of the 5 hands has a different objective (ie – different sorts of cards you want/don’t want to take), and each hand is played by the dealer only once. After a dealer has played all 5 hands, the role of dealer passes to the next player, and so on around the table.

Winning a hand gets you points (small plastic gemstones included in the game). At game’s end most points wins.

The cards are beautifully drawn and are very good for use in any fantasy rpg you might play.

As a game, you could just play Hearts. It’s the art on the cards that makes this game worth having.

I have good memories of playing this game, but don’t feel the need to play, or own it again.

7
Go to the Red November page

Red November

48 out of 57 gamers thought this was helpful

I bought this game in the original, smaller cheaper edition, but it’s basically the same (just pricier now).

The premise is that you all are crew-gnomes aboard the Red November, which is on it’s maiden voyage and not doing so well. in fact, it’s filling with water and about to be attacked by a Giant Squid!

You’re job is to try and survive.

So, you and your crew mates run around the ship doing things – grabbing gear which will help you, fixing things, etc – in furtherance of your not finding a watery grave or winding up as squid food.

I really like the turn system, which also acts as the countdown to the destruction of the Red November. You see, you’ve only got so many turns before the end hits, so on the double sailor!

Each time you want to do something, it takes 1 or more of these units of time. You can use more, if you want, and improve your odds of succeeding at what you’re trying to do, or grabbing more equipment, etc. But don’t run out of time!

As you used up time, you move a marker along the track. The remaining players than all take turns until their time marker matches whoever has used the most time up so far; thus simulating that while I take a lot of time fixing the engines, you can run around and do more things (but maybe fail at some of them). The flow of play is thus somewhat fluid.

It’s mostly a co-op game as you are all trying to survive, but there are some screw each other moments which come along, and, if you play your cards right, you can even take one for the team and swim out to fight the giant squid (probably dying in the attempt, but you get a posthumous award!)

10
Go to the Carcassonne: Hunters and Gatherers page
16 out of 25 gamers thought this was helpful

Any game which I, my girlfriend of the time, and my friend can learn to play at 3AM at a convention and play right the first time while having a blast, is well worth checking out.

A typical euro-game, Hunters & Gatherers comes with an assortment of meeple and wooden huts, a large number of ‘map’ tiles and the rules.

Play proceeds thusly:

On your turn, you randomly pick a map tile and lay it down connected to the others. Tiles can only be placed in such a way that they connect to existing map tiles – plains to plains, forests to forests, rivers to rivers, etc.

Different tiles have different things on them – some forests have mushrooms in them, some plains have prey animals (antelope or mammoths), while some have predators (tigers or sabre cats), etc. You place a tile and then decide if you want to place a meeple or a village.

Villages can only be placed on tiles with a lake or river; and you want to place them on a river system which will grow and grow. You’ll score pints at the end of the game based on how long your river system is. You can’t place a village on a river system which someone else has already claimed, but you can hook a river system you’ve claimed into one another player has claimed (by cleverly placing subsequent tiles) and force them to share their points with you.

Meeple are more flexible about where you can place them, but you only have so many to go around, so use them wisely. Some placements will allow you to score points immediately, and reclaim your meeple into your available pool, while other placements are permanent. Again, no placing one of your meeple into a region which someone else has claimed, but you can attach your region to theirs and force the sharing of points.

In a nutshell, that’s it. Play is relatively quick, and there are some ways that you can screw your neighbor – such as placing a grassland with a predator into contact with a grassland they already own (predators reduce the number of game animals, and thus points, for that region).

Since the ‘map’ is randomly generated by each player, there is a lot of replay value to this game. My girlfriend and I enjoyed it a lot with just the two of us playing, or with a full compliment of players (5).

Unfortunately, Rio Grande no longer in produces H&G (see below); I guess it sold poorly. If you find a copy, buy it at once!

4/14/15 News Flash Apparently, Z-Man Games (makers of Battle at Kemble’s Cascade and Pandemic) has made this game available again.

UPDATE: 7/10/17 Equally apparently, Z-Man (now a part of the Asmodee North America family) has ceased production of Hunters and Gatherers (again). And we’re back to, IF you can find a copy, buy it.

8
Go to the Dark Tower page

Dark Tower

25 out of 31 gamers thought this was helpful

OK, so the title is a blatant reference to spokesman Orson Wells’ other famous ad tag-line “We will sell no wine before it’s time.”

Dark Tower was a fun kids game which was cashing in on the new craze which was fantasy games (primarily rpgs). The game itself was a simple board game which was represented by a circular map that players had to move around in order to find the three keys they would need to unlock the Dark Tower.

The Tower, in the middle of the board, was a plastic, electronic tower with a touch pad (remember this was the early 80s, not like a touch pad today) that you would use to let the game know certain things – like were you entering a ruin, or going to the bazaar, or crossing the frontiers between kingdoms (and thus could find the next key you needed), etc.

The tower also told you when you would run into bandits, or dragons, or what you might find inside the ruins, etc.

Once you had all three keys – Bronze, Silver and Gold – you would return to your own kingdom and assault the tower. If you had enough soldiers in your army, you’d win, if not, you’d be repulsed and would have to go and recruit more soldiers and try again. All while hoping another player didn’t beat you to the punch, kill the bad-guy, and claim the king’s scepter (or some such) as his own.

I had a lot of fun with this game when I was 15 or so, and remember it fondly. I would play it again for nostalgia’s sake.

10
Go to the Battlestations page

Battlestations

28 out of 30 gamers thought this was helpful

Battlestations is, bar none, my favorite game ever!

I was introduced to the game in 2004 by Jeff Siadek (the publisher) at a Strategicon in Los Angeles. I played it for the whole convention, and by the end of the show I had purchased my own copy and was teaching others how to play!

The game is played on two scales; shipboard and space. Players move their ship around in space on a large scale ‘space map’ while moving their characters about on board their vessel to perform various necessary actions, such as steering the ship, firing the weapons, scanning enemy vessels, etc.

The referee does the same for the enemy ship(s) and crew(s), albeit in a simplified fashion.

Scenarios range from simple stand up fights to bug hunts to voyages of scientific discovery to rescue missions.

Each character has a unique class (Pilot, Marine, Engineer, Scientist) and has differing abilities. Alien races add to the mix, as do various types of ships which can be flown. Characters gain experience with each mission and become more skilled with successive play sessions, and missions scale easily based on overall crew capabilities. And there is a wide variety of special abilities which players can choose from each time their character advances a level (or rank as it is called in the game). And, of course, cool gear to buy and use!

The true joy of Battlestations comes from each of the players dashing madly about his ship trying to get things done; engines need to be coaxed into generating more power, targeting locks need to be achieved on enemy vessels, weapons need to be fired, damage needs to be repaired, etc. Sometimes the order in which these things happen is important, so the order in which players take their actions is fluid from round to round.

Each game takes 2-3 hours and is best with 4 players and referee.

Well worth checking out!

PS – Jeff and the crew are working on a 2nd Edition. Keep your eyes peeled for it!

× Visit Your Profile