Player Avatar
Miniature Painter
Rosetta Stone
Advanced Reviewer
BoardGaming.com Beta 1.0 Tester

Bit and Bot Massacre

gamer level 9
82909 xp
followers
129

Use my invite URL to register (this will give me kudos)
https://boardgaming.com/register/?invited_by=sephiroth2906
profile badges
Video Game Fan
BoardGaming.com Beta 2.0 Tester
Strategist
Baseball Fan
recent achievements
El Dorado
El Dorado
Explore select games by completing a series of exploration actions ...learn more »
Lookout
Lookout
Follow a total of 30 other gamers.
Stone of the Sun
Stone of the Sun
Explore select games by completing a series of exploration actions ...learn more »
Reporter
Reporter
Earn Reporter XP to level up by completing Reporter Quests!
Go to the Cthulhu Dice page
Go to the Mage Knight Board Game page
Go to the Mr. Jack page
Go to the Killer Bunnies: Quest - Blue Starter Deck page
Go to the Small World page
Go to the RoboRally page
Go to the Toc Toc Woodman page
Go to the Gulo Gulo page
7
Go to the Pass the Pigs page

Pass the Pigs

20 out of 22 gamers thought this was helpful

Have you ever thought that dice would be so much better if they were pigs instead of cubes or dodecahedrons? If so, there is no reason to read any more of my blather. Go buy this right now!

What?

For the 99.99999% of you who read that and are confused, yet did not click “not helpful” and moved on, Pass the Pigs is a clever push your luck dice game that replaces your tried and true cubes with adorable, slightly squishy pink piggies.

What?

You already said that.

Well, what is in the box? Wait, that isn’t a box…

Nope. It is a plastic case. You pull on the ends, and the inside slides out. There isn’t much here, but it is everything you need to play in a small container. There is a scorepad, two little pencils, a scoring reference sheet and the aforementioned (slightly) squishy pink piggies.

What do you do?

Take the pigs and roll them like dice. You score points based upon how the pigs land. For example, if they land on their feet or on their back, you get five points for that pig. If both land the same way (on their backs, for example) you get bonus points (in this case, you score 20). They can land on their snout or jowls for even more points.

As previously stated, this is a push your luck game. You keep rolling the glorious bacon givers, racking up points, until you decide to stop and bank the points you earned that round. If the pigs end up on their sides, one on their right and one on their left, your turn ends and you get no points that round. If the pigs land and are touching, your turn ends and you lose all points you had accumulated so far this game. Play continues until a player reaches a pre-determined number of points.

Thoughts

Is two tiny rubber pigs in a plastic case for somewhere around $12.00? Sure, but it is so much more than just that. It is two tiny rubber pigs in a plastic case that you throw around on the table like dice hoping one or both will land with their snout on the surface and their hind legs up in the air!

The case is easy to carry, can fit in a pocket or purse, contains writing implements and scorepad and can be pulled out to keep the kids quiet at the restaurant for a little while. Certainly just a novelty for adults, but something your kids will be up for playing again and again. If you have little ones, I guarantee you spent this much or more on things that get a lot less mileage than these delightful little oinkers. Just keep them out of their mouths. They don’t actually taste like a spiral ham, and they don’t stand up as well with teeth marks all over them.

7
Go to the POX: Save the People page
122 out of 132 gamers thought this was helpful

Let’s get this out of the way. This game is pretty simple. Simple does not necessarily equate bad, however. There is fun to be had here, and there is more than one way to have it.

POX, what is it?

POX is a cooperative puzzle game for 1-4 players. The premise is that there is a disease that is trying to kill the good people of your neighborhood. You have the ability to vaccinate or cure the members of your neighborhood. The choices you make are affected by random card draws as the infection spreads. Your ultimate goal is to give the infection nowhere to go, essentially containing it. Doing so wins the game. You lose if too many people die from the infection. The number of deaths for a loss are determined by the difficulty setting you choose, from one death to five.

What is in the box?

Cracking open the box, you will find 95 plastic chips in red, blue and black, 28 cards, the game board and the instructions. I don’t have much to say one way or the other about quality of components.

What do you do?

Shuffle the cards and set up the first red and yellow chips as described in the rules. You draw a card to determine how the infection spreads. Some cards will indicate that any open spaces oriented a certain direction from any red chip becomes red, or, infected. Some indicate that spaces of player’s choice that are not touching any other chip become infected.

Depending on how the infection spreads, the player has options of how to proceed. In the most common case (infection spreads) the player may either place three blue chips on any person (space) unoccupied by any chip. You have now vaccinated these people and they cannot become sick, meaning that an “infection spreads” card cannot infect that space. You may instead choose to cure and vaccinate one infected person, changing a red space into a blue.

The other instance (outbreak) only gives you the option to vaccinate one person that turn. Outbreak cards can be difficult to deal with both because infected people show up outside of the quarantine zone you are working on and because you only get to vaccinate one person that turn.

If at any time any infected person is surrounded on all four sides by infected people, that person dies, marked with a black chip. There are also yellow chips indicating vulnerable people (the infirm or elderly, for example) If these people are infected, they die immediately (no need to be surrounded) If you meet the death threshold determined by your chosen difficulty, the team has lost. If the players manage surround the infection completely with vaccinated people, giving the infection nowhere to spread, the team wins.

Thoughts

As I said at the beginning, the premise is pretty simple. Games will last around 15 to 20 minutes, and setup is minimal. This makes for a pretty decent filler. The players have to work together or all fail. You never know what way the infection is going to spread, and an inopportune outbreak card can occasionally ruin a good thing the team may have going. A certain amount of luck certainly plays into this as a result. However, a good team thinking a couple of steps ahead should be able to win more often than not. There isn’t any reason why the younger kids can’t play, even as young as six, but the older folks will have to let them know if they won. There isn’t anything here that really knocks my socks off, but I have spent $25.00 on worse.

The game’s homepage touts that they are using this game as a vehicle to show the importance of vaccination. I can get behind that. I does show, in a simplistic way, how vaccination can stop the spread of disease. To me though, it is primarily a light coop puzzle game. Nothing wrong with that at all.

8
Go to the Forbidden Island page

Forbidden Island

77 out of 85 gamers thought this was helpful

I’ll begin with the short story. My wife is not much of a gamer, but she will play this willingly. My six year old daughter loves games, and she is a fan of this one. She understands the premise and can make her own intelligent decisions. It is pretty short to play, 20-30 minutes or so, so it can bridge the time between meatier offerings effectively.

Ooh! Pretty! (Components)

First off, the textured tin is awful nice for a $20.00 game. It looks pretty good on the shelf. Of course, you want something that is going to get taken off the shelf, so let’s look inside.

The first thing you are likely to notice once you get the tin open (and the paper out of the way) are the plastic sculpted figures representing the treasures. These are solid, good looking figures. In contrast to these, the colored pawns representing the players are chintzy generic fare. If it bugs you too much, you can always get some miniatures to stand in for them.

There are 24 heavy cardboard tiles that make up the modular gameboard. Each is double-sided, with a full color picture of one of the Forbidden Island’s landmarks on one side and a faded blue “flooded” side. I am not much of an art guy, but some of the art on these tiles strikes me as pretty cool. There is also 58 cards used for play. Pretty much standard playing card fare. Nothing striking one way or the other in regards to their quality in my opinion. A numbered bookmark-sized piece of cardboard with a plastic marker used to mark the water level rounds out the tin’s contents.

The Adventure

This is a cooperative game. Everyone wins or loses together. There are no bad guys to battle. Instead, your enemy is the environment and your limited hand size. The basic premise is that you and your team found beautiful island with treasure just waiting to be looted (liberated?) from temples therein. As soon as your helicopter touches down, however, the island begins to sink and flood. Your job is to find the four treasures and get them and your team back to the helicopter and off the island before the island completely sinks. Each player will take on the role of one of the team members. Each available role has a special ability. Some move in different manners, some can ignore missing tiles, some can more easily repair the flooded environment, etc. Each game will be different due to board layout and adventurer roles chosen or randomly assigned.

Setup

The board is modular, but Arkham Horror this isn’t. Setup for the board consists of laying down the 24 island tiles color-side up in the proper formation, putting treasures onto proper temple tiles and putting player pawns on the helicopter tile (Fool’s Landing). Separate the two decks of cards (treasure and flood). Give two treasure cards to each player. Then, draw six flood cards. Each of these cards represents one of the tiles that make up the game board. You will flip each corresponding tile to the blue “flooded” side for each card chosen. Choose or randomly determine each player’s adventurer role, and set the water marker to your desired difficulty level. Now you are ready to go looting!

Gameplay

Now that everything is set up, the adventurers begin to move about and affect the island environs. This is accomplished by the adventurers taking up to three actions each turn. These actions consist of any combination of:

Move one adjacent tile
Shore up an adjacent flooded tile (flip it back to the colored side)
Give another player on your tile one of your treasure cards
Capture a treasure on your tile

Various adventurer roles affect these options in certain ways. Engineers can flip two flooded tiles for one action. The pilot can move to any tile once per turn, messenger can give cards without being on the same tile, etc.

After a player performs their actions, they then draw two treasure cards. Most of the treasure cards depict one of the four treasures you are seeking on the island. In order to claim the treasurers, the following conditions need to be met:

The player taking the treasure needs to be in possession of four cards depicting that treasure.
The player must be on one of the two tiles depicting that treasure.

The player then expends an action to take the treasure from the board. While this process is reasonably easy, achieving it is complicated by the fact that you can only hold 5 treasure cards at any time. If you are ever in possession of more than five, you must immediately discard down to five. Chances are you are not going to just draw four of the same card, so it is imperative that you work with the other players to supply one player with the necessary cards to claim a treasure. Since one action allows you to give (not trade) a treasure card with another player on the same tile as you, some forward thinking is going to be required.

In the treasure deck, you will also run into three other card types. Two are special ability cards that cannot be traded, but can be used at any time by the player holding them, not just on their turn. One is the “sandbag” card, allowing a player to shore up any flooded tile anywhere on the board. The other is the “airlift” card. This allows a player to move any player (including themselves) anywhere on the board at any time. However, use of one of these cards is mandatory after all treasures have been claimed to leave the island and win the game.

The last type of card in the treasure deck is the “waters rise” card. This effects the flood deck, which I will touch on next.
Each turn, after taking treasure cards, the player will draw flood cards equal to the number depicted on the water meter. Any tiles depicted on the cards that are not flooded are turned to their flooded side. Any tiles that are already flooded and are drawn are removed from the game. This means that, unless you are playing the diver or pilot, you have to go around the hole in the island that was just created to get around, expending additional movement points.

So, if you draw a “waters rise” card from the treasure deck, you shuffle all of the flood cards before drawing them. In addition, the marker on the water meter rises to the next notch. As time goes on, the island floods more quickly and tiles start disappearing. If a player is on a tile that sinks with no adjacent tile nearby, they are lost.

Winning and Losing

There is only one way to win the game. Capture all of the treasures, get all players onto Fool’s Landing at the same time and then any player plays an “airlift” card. The game is lost if:
Any player is unable to make it to Fool’s Landing for any reason
Fool’s Landing sinks
Any treasure becomes unable to be collected, due to both of that treasure’s temples sinking

Thoughts

This game has a pretty common “one way to win, many ways to lose” mechanic found in several cooperative games. There is a good bit of running around the island to keep it afloat while coordinating with your fellow adventurers to supply one with the necessary cards to claim the next treasure. It does a good job of building tension while not being particularly difficult. After several plays though, losing often comes down to dumb luck from rising water coming at an inopportune time.

That said, I find the game to be a pleasant experience, and as the title suggests, it is a great primer for younger kids to become acclimated to the idea of cooperative games. You want your kids playing games, and you would much rather play this with them than Candy Land. No reading is necessary, so kids can be introduced just as soon as the mechanics can be reasonably understood.
This is a short game that takes up little space and can be enjoyed by players of nearly any age. Couple that with a low price point, and there is little reason I can see not to have this in most anyone’s game collection.

7
Go to the Dungeon! page

Dungeon!

39 out of 44 gamers thought this was helpful

Not as good as I remember
I generally go into gameplay and such in my reviews (which I know not everyone likes, but you can’t please everyone  ) and I will, but first I wanted to highlight the differences between the new version of the game and the older ones for those who already know what the game is and how it is played.
Ah, Memories

When I was a kid, I had a copy of Dungeon! I remember it as a tri-fold board, with rooms conveniently the size of the cards. You would put a monster card on top of a treasure card in each room. Setup took a while as a result. There were a lot of little cards, and we were hard on our board games. I still find little cards in boxes at my parent’s house from time to time. I also remember enjoying the heck out of this game.

Fast forward many years. I see a revised version of Dungeon! at my LGS. It was $20, and I was already on a spending spree with some birthday money burning a hole in my pocket and armed with a 20% punch card. I bought it and was excited to teach my five year old daughter a game of high adventure!

2014 Realities
There are some good things about this version of the game. It is smaller, which makes it easier to store. Instead of the tri-fold board, it is folded once. Instead of putting cards in each room, you have six stacks of monsters and six stacks of treasure cards, separated by level. This makes setup much easier and keeps things from getting pushed around the board and becoming a mess. Retrieval of cards at the end of the game is easier too. Instead of gathering unused cards from the board and separating out the treasure from the monsters, you just combine your discard and unused piles for each type and apply dozen rubber bands. You are all ready for storage. Cardboard tokens are placed in conquered rooms to show they have been looted.

One more thing, my memories of the gameplay from childhood are shinier than the gameplay in my thirties. It is, however, awesome for my child, who doesn’t know any better than kid me did.

Components

The box is slim. Inside you will find a foldout rulebook (I prefer stapled pages, but not a huge deal) 165 smallish cards, two six sided dice, 8 hero standees (cardboard representations with plastic stand) and over a hundred tiny cardboard tokens. It all works, although you want to keep those cardboard tokens under control. I would have liked to have little miniatures instead of cardboard critters to play with like in the old days, but I can always replace them with something from Reaper or the like if I choose.

Gameplay

I am going to start with the stated goal for victory, which is to amass treasure in a specific aggregate amount. This is simple enough to track, as every treasure has a monetary value assigned to it. Some treasure may be a bag of coins, others a magic sword, but they all count toward your amount needed for victory.

However, the victory conditions is where things start breaking down for me gameplay-wise. You have four different classes to choose from, Rogue, Cleric, Fighter and Wizard. There is a male and female depiction of each, totaling the 8 heroes. The problem is that each class has different victory conditions. Clerics and Rogues need $10,000 to win, Fighters $20,000 and Wizards $30,000. The reason for this is the game is designed to accommodate certain classes to tackle certain areas of the dungeon.

Which brings us to battle with the dungeon’s denizens. When you enter a room in the dungeon, you pull a monster card of the appropriate level. The card has a picture and name of the monster, say a werewolf, and a bunch of colored spheres with numbers on the bottom. The colors correspond to the different classes of warriors, as well as values for fireballs and lightning bolts for the Wizard. This number represents what a warrior needs to roll on two six-sided dice. At higher levels, these numbers can quickly escalate for the Cleric and Rogue, and the highest levels are hard for even Fighters. Should you not roll high enough, every monster uses the same table to determine if/how badly they harm you.

The game recommends that Rogues hang out around level 1-3 dungeon rooms, Clerics 2-4, fighters 3-5 and Wizards 4-6. There are magic swords in the game that can add a point or two to the result (that Wizards cannot use) and spells are finite (d6 + 6 spells per wizard)

Thoughts

As I said at the beginning, this game was remembered fondly, but did not stand up to the memory. That being said, the game hasn’t changed, I did. As a result, I think that this is an awesome game to play with your kids to give them a D & D light experience. While getting together with my brothers and playing the game no longer has the appeal it did when I was 10, our kids can enjoy it just as I did when the world was new and I did not need more than Dungeon! offered for a good time.

7
Go to the Cosmic Encounter page

Cosmic Encounter

65 out of 72 gamers thought this was helpful

The Precursor’s explored the galaxy, and they found no one. They were powerful. They were lonely. They were BORED. So, like the factory computer in Robo Rally, they created the seeds of life. In their case, they sent them onto planets throughout the galaxy. They then left them easter eggs to find at the outer rim of their respective solar systems so they could rapidly advance their technology and find their parents and siblings.

Except the parents were gone, no trace of them was found. So, once again, like the robots in the factory, naturally the species making up the Precursor’s legacy decided that the best way to deal with other species was conquest.

Premise

Cosmic Encounter is a game for 3-5 players. A game takes 1-2 hours to play. Players take control of one of 50 alien races, each with their own special ability or power. As leader of the race of your choosing, your goal is to expand your sphere of influence throughout the galaxy through combat or diplomacy. The game relies heavily on misdirection and shrewd alliances and, to a lesser extent, resource management. The goal in the game is to establish five colonies on planets outside of your own system.

Components

There is no board used in this game. Instead the play area is dominated by modular heavy cardboard planets and the like. Your spaceships are standard 1960’s UFO fare, made of plastic that stack. The stacking is nice, since you will have 20 of these suckers to manage, and multiple players can have multiple ships on the same planet. There is a whole mess of cards used in this game, including large cards depicting the alien race you have chosen to play this game and much smaller gameplay cards. I haven’t seen anything fall apart, so it seems well constructed.

Setup

Setup involves passing around the alien race cards for each player to choose from, putting five cardboard planets in front of you horizontally and placing your twenty ships on them, four apiece. That covers the players area. The communal area in the middle will contain the warp, which does double duty as a holding area for defeated ships and the score track. Player tokens are notched to accommodate several on the same number, which is good, since they will all start at zero. Find a place to put the hypergate and cards where everyone can reach them. Remove all the cards depicting player colors not being used and deal everyone gets 8 cosmic cards. You are now ready to go. This should just take a few minutes.

Gameplay

The first thing to do is familiarize everyone with the various phases to a turn. This is important because many alien powers can only be used during a certain phase. To further complicate things, some powers might happen at the beginning of a phase or at the end of the phase, such as before encounter cards are flipped or after they are flipped. Some aliens have powers that are mandatory to use each turn, some are passive and some can only be used when a main player (offense or defense in an encounter) or offense or defense only. Some of the alien powers are more complicated than others, and there are colored lamps in the upper left and right corners that inform players how complicated. Green are good for beginners, yellow for more seasoned players and red for experts.

Look at the cosmic cards you have been dealt. Of the eight, you must have at least one “encounter” card. This would be an attack, negotiate or morph. If you do not, show your cards, discard them and draw 8 more. In addition to encounter cards, you will find reinforcements, flare and artifact cards. These additional cards can change the tide of battle or otherwise further your agenda. Flare cards are special in that they return to your hand after use, at least until you need to discard your hand and draw a new one. If, at the beginning of your turn, you have no encounter cards at the beginning of your turn, you play or discard all cards in your hand and draw 8 new ones.

Once you have your race and cards sorted out, the first player draws a card from the destiny deck. This will determine who they will have and “encounter” with. If you draw a colored card, you have a confrontation with the player of that color. There are some cards with specific rules, such as requiring you to confront the player with the fewest or most ships, and some cards are wild cards, letting you choose who to face. However you opponent this turn is chosen, take the hyperspace gate and point it at one of their planets. You will be trying to establish a colony there, and the defense will be trying to stop you or limit the damage. The offense will place one to four ships on the hypergate.

Now, each player will choose whether to ask any other players to ally with them. The offense first states which players they would like to help them, followed by the defense. Players choose whether or not to ally with one of the parties who asked them. Allying with another player entails committing one to four of your ships to either side. If at this point, the defense has no encounter cards, they must show their hand, discard all held cards and draw 8 new ones. Then the main players, the offense and defense (not allies), place an encounter card face down. Once this is done, and all powers and cards that can be played during the planning phase have resolved, both players reveal their cards.

If both players reveal attack cards, then each player will take the value of the attack card, add the number of ships, their own and their allies to that amount and compare the total to their opponent. Reinforcement cards can be played by all players involved at this point, along with flare or artifact cards that can be played at the reveal stage. The player with the highest total wins the encounter. Should the offense win, all defending ships are sent to the warp, and all offense players, allies included, place all the ships committed to the battle onto the planet in question, establishing a colony upon that planet. In addition, if the offense wins, they may play a second encounter if they choose. If the defense wins, all offense ships go into the warp. Defending ally ships go home, but get to take cards from the cosmic deck or ships from the warp of their color equal to the number of ships committed to the defense in any combination. This is how a player can retrieve ships lost in battle.

Should both players play a negotiate card, the allies no longer factor into the decision. The offense and defense now have one minute (an hourglass timer would have made sense here) to come to a deal. This deal can include establishing a colony on this planet and/or trading cards. Something must change hands, however. Should the players fail to come to a deal, all main player ships committed to the battle are lost to the warp.

If one player plays a negotiate card and the other an attack, the attacking player wins by default. However, the player with the negotiate card gets to take a random card from the hand of the attacking player for each ship they lost.

Stratagy, Summary and Thoughts

As mentioned previously, the object of the game is to gain five colonies outside of your system. Choosing whether to ally or whom to ally with, or whether to ask a certain player in the first place, is an important part of controlling the game. Having assistance is great on an attack, for instance, unless taking this colony will place the ally in the lead. Committing ships to defense can get you more cards or more ships back, but can go disastrously wrong if you lose. Managing your ships is important so you can defend the territory you hold and enable you to take more. Cards are not refreshed until all encounter cards are gone, so hand management is important. Wasting cards can also lead to you losing a good flare card when discarding. Managing your resources and proposing saavy alliances are very important in this game. The alien powers often break game rules, so players have to keep in mind how their opponent does this and incorporate this into their plans. Once all players are playing with red aliens, the game can get very complicated, especially if the optional technology rules and cards are used.

My Verdict

I never say no to a game of Cosmic Encounter. I enjoy the strategy and player interaction, and the multitude of alien races makes sure every game is different and fresh. The path to victory is never certain. I feel this is best played with 4-5 players. This game is also a good one to play with your buddy who is terrible at planning a turn in advance, since it is very hard to do that anyway in this game since you have no idea who you will be against next round. I find Cosmic Encounter to be a good time, and if your group is into strategy and resource management, it has a place in your collection.

8
Go to the Mice and Mystics page

Mice and Mystics

150 out of 159 gamers thought this was helpful

Daz Bellows gave his son a stern wag of the finger. “Into the bed with you boy!” he said gruffly. Little Tip gave a hefty yawn and a stretch, and then climbed into his straw nest, his tail curling around him. Outside the tree, the wind was howling, and the snow was forming mounds. But inside it was warm and dry, and Daz tucked Tip in with a thick blanket. “That’s my lad,” he said softly, and fluffed the scruffy fur between Tip’s mouse ears. “Dream of spring and pretty things that bloom.” He turned to blow out the enormous candle that stood in the corner of the bedroom, but Tip sat up.
“Don’t leave yet, Papa,” he said. “The wind is fearsome tonight. Stay with me and tell me a story.” Daz arched an eyebrow.
“A story, eh? And which one do you have in mind?” Tip’s tail twitched with excitement.
“Tell me the story of brave Prince Collin and the Kingdom of Men!” Daz chuckled and settled into the walnut shell rocker that sat near the nest. Candlelight danced over the face of his excited son. (From the storybook included with the game)

Premise

Mice and Mystics is meant to be played as a multi-part campaign. As such, there is, in addition to the rule book which governs overall gameplay, a storybook that both provides flavor for each scenario and special rules that apply to the scenario. The crux of the premise here is that the widowed king meets a beautiful evil woman who ruins the kingdom, and those loyal to the king are arrested and magically transform themselves into mice to escape the dungeon. The evil queen figures it out and transforms her minions into rats to catch them. The mice will also have to overcome insects, cats and the kindly old cook in their adventures to save the kingdom.

Components

The box contains the aforementioned rule and story book, a story control board. 8 double-sided map tiles, 5 proprietary dice, 22 miniatures and necessary cards and counters. The miniatures are made of a good-quality brown plastic and have nice detail to them. They are certainly candidates for painting. Everything else included seems to be of decent quality. No qualms here.

Gameplay

The first step in playing Mice and Mystics is to choose a scenario to play. You can choose whatever one you want, but the design of the game is to have them be played in order. Not only is a linear story being told, but our heroes gain skills and equipment along the way that can carry over from scenario to scenario, and the game design and scenario difficulty takes this into account.

Each scenario accommodates as certain number of mice. This is generally 4, although a couple push it to 6. This means a group moving through the campaign would generally number maximum 4 players, as one person could easily play two mice, but two players sharing one would just be silly.

Each hero starts with unique stats and equipment. As the campaign progresses, 6 different mice will be available, allowing players to sometimes change who they play to accommodate the scenario at hand. Some are melee specialists and others have a ranged focus. Each of four stats on the hero costs, battle, defense, lore and movement have a number on them. With the exception of lore, this value determines how many dice the mouse rolls when performing a function based on that statistic.

The dice themselves are rather brilliant in my opinion. Many games would use multiple kinds of proprietary dice to accomplish the various rolls required by this type of game, or, instead, use standard dice with various rules governing how they apply to each roll. Mice and Mystics uses five colorful dice with various markings on them to move the game along, and after a short time using them, the rules are simple to remember.

For example, there are 4 pictures on the six sides on the dice, a bow and arrow, sword, sword and shield and cheese wedge. The bow and arrow results determine damage done when attempting a ranged attack, sword and sword and shield melee damage and sword and shield defense. In addition to these, there are stars on some sides and numbers from 1-3 on each side. The stars determine success when searching and certain skills and the numbers are used with movement. Cheese, well, we will get into that.

The stats determine the versatility of the character chosen. For example, to move, a player rolls dice equal to the number assigned to the movement statistic. The mouse than moves the total of the number indicated on the die. Filch, for example, rolls three dice for movement and rolls two dice to attack. Nez, on the other hand, rolls one for movement but up to four to attack with his starting equipment. A good balance of abilities is important when you have options of what mice to take.

The storyboard is used to keep track of hero and enemy turn order by placing cards representing the heroes and baddies along a track after shuffling them upon an encounter. Rather than having a player act as a dungeon master, the baddies are controlled by the players themselves adhering to specific rules about their movement and attack based upon hero location and initiative. This is very similar to how combat works in one of my all-time favorite games, Warhammer Quest. Once a new tile is entered by the players, and encounter card is drawn. This encounter card determines what enemies or hazards the players will face in this room. Certain rooms, however, have rules outlined in the storybook for the scenario being played.

The storyboard also has a timer presented as pages in a book. When certain things happen throughout the course of the game, a counter with an hourglass depicted on it. This counter is moving toward a “chapter end” counter, whose placement is determined by rules for the specific scenario being played. Some events move this counter forward, and other will move the chapter end marker further along the track. When the hourglass gets to the chapter end marker, the scenario ends in failure for the heroes. I always look at this as something of a fatigue tracker.

The cheese side of the dice do different things depending if the baddies roll them or the player. When attacking or defending, any cheese rolled by the players’ results in a cheese wedge token being given to the player. These tokens power the hero’s special skills and, when six are collected, can be used to level up the hero, giving said hero another skill that is retained through the campaign.

Every cheese rolled by the baddies is put on the cheese wheel located on the storyboard. Once six pieces of cheese are on the wheel, they are removed and the page marker is moved one page closer to chapter end. In addition, the first time this happens on a tile, a special surge occurs. This generally means more baddies for the mice to fight, and what happens is determined by the encounter card drawn upon entry to the room, or detailed in the storybook for special scenario rooms.
Each turn, a mouse may use its action to search the room for items. The mouse rolls a die, and if a star is present, the mouse found something! A card is drawn from the search deck. This could result in new equipment, one-time special attacks, party items to more easily navigate the dungeon, or, possibly, a trap. After clearing a tile, of course, mice can search without worrying about getting stabbed by a rat, but each turn spent on a tile without baddies on it results in another cheese wedge added to the cheese wheel.

There is of course more, but if you interest is piqued, you can always take a look at the rulebook rather than watch me drone on here. There are a good amount of rules, and some items will likely result a look in the rulebook from time to time. I don’t find this unpleasant or disruptive, but some might. I have experienced a couple of defeats and some really close calls, so pacing and play-testing seem to be pretty spot on.

Summary and thoughts

What we have here is a story-driven campaign-type roleplaying game. It works best with groups willing to come back to the game again and again, rather than a game that gets pulled out every now and then with new players. There are a good amount of rules involved, and you will be consulting the rulebook frequently the first few scenarios. The storybook is a must every game, as there are scenario-specific rules. Playtime for a scenario is an hour to two hours, and players who have trouble planning their actions before their turn comes up can really drag out a scenario. I have seen some people complain that there are unclear rules. I have not experienced that often enough to bother me, however, and a quick Google search has taken care of clarifications the couple of times it came up in our group. This is not a game you pull out just to pass the time or as a one-off. There is a level of commitment required.

My Verdict

I like this game. The story is somewhat silly, but I kind of get a kick out of playing what sort of amounts to a story being told to a kid by his grandpa, Princess Bride style. My favorite kind of video game is an RPG, where you invest time and energy into creating and growing your characters, and that element is well done in this board game version of an RPG. I would recommend this game for a tight group of 3-4 gamers looking for more than just a board game to play, but a story and world to immerse themselves in for a time. The downside, of course, to this type of game is that once you play through the campaign a good deal of the magic wears off. There is an expansion, however, to help mitigate that eventuality. Even then, starting another play through with a new group would be just fine for many people after the first group is done. This game could certainly be played solo, but I would miss the group interaction in doing so and end up a little flat, so I wouldn’t recommend solo gameplay.

9
Go to the Toc Toc Woodman page

Toc Toc Woodman

79 out of 86 gamers thought this was helpful

This review is for the newer version of the game recently released through a Kickstarter campaign called Click Clack Lumberjack. My understanding is that the games are virtually identical, except Click Clack Lumberjack reduced cost by reducing packaging (A smaller, thinner box). The components are supposed to be the same. I am little unclear, but they may have added the grubs to the new version.

TOC TOC WHAT?
So, be it called Toc Toc Woodman or Click Clack Lumberjack, what is it? This is a dexterity game, where players take turns hacking at a tree. It will be easier to explain this organically so we will move on to

COMPONENTS
In the box, you have a heavy plastic axe, a plastic stump and a whole bunch of light brown circular pieces and curved darker brown pieces. These represent the core of the tree trunk and outer bark of the tree respectively. This stuff is of nice quality, which is good, because it is going to be hitting the table and quite possible floor often. It is built to last.

SETUP
Put the bark pieces into the slots on the core pieces. Each core piece holds four pieces of bark. Each completed core piece will be stacked one on top of another atop the stump. That’s it. It takes a couple of minutes.

GAMEPLAY
Each player takes turns whacking the tree with twice with the axe. The goal is to knock down pieces of bark without knocking down core pieces. Hit any part of the tower you choose in an attempt to knock as much bark off as possible. It is kind of like a violent Jenga. Game ends when all bark is stripped from the tree.

SCORING
Each piece of bark is worth one point. Each core piece is worth negative five points.

GRUBS
As I said, I think Toc Toc Woodman may not have had the grubs included, so I am putting that here separately. There are four grub stickers included with Click Clack Lumberjack. You affix each to a random piece of bark when you first open the game. These pieces of bark are worth an additional point to whomever has them at the end of the game, and, in addition to that, getting a piece of bark with a grub gives you an extra turn, which, depending upon the state of the tree, could be good or bad.

WHO IS THIS FOR
You. Seriously. I have played with people of all ages, including my 2 and 5 year old daughters (over and over again), and it is easy to understand, easy to play and, most importantly, fun. This has had more playtime in the couple of months I have had it than any game in my collection over the past couple of years.

VERDICT
This game is dead simple. The full extent of the instructions are on the outside of the box, and can be understood without further reading after playing a game. A game takes a couple of minutes to set up, and about 10 minutes to play. I would be surprised if you play once and put it away. The laughs are plenty when someone knocks the whole tree down, and no one is going to really care who wins or loses. This game is what games should be; it is all about having fun. Click Clack Lumberjack is supposed to retail for $20.00, and Toc Toc Woodman I believe goes for $25.00. Go get it.

8
Go to the Castle Panic page

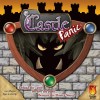
Castle Panic

155 out of 169 gamers thought this was helpful

Welcome to Castle Panic. You are surrounded on all sides by critters who want to suck the marrow from your bones, or, you know, kill you and stuff. It is time to call your troops to arms until the very last foul forest denizen has breathed their last.

The game plays 1-6 players, with sliding rules depending upon the number you use. The ages are advertised as 10 and up, but I know for a fact younger kids can play this just fine.

So, we open the box. We will find 49 cards, 49 cardboard monster tokens,. There are 6 each cardboard walls and towers, 12 plastic stands to hold them up, along with a couple of miscellaneous cardboard playing pieces. The cards seem sturdy, and the cardboard pieces are nice and thick. You will also find your playing board, a rule book, and a six-sided die.

We then get into what we are going to do with all this stuff. First you deal cards to each player. This number varies by number of players. Cards are all face-up throughout the game. Go through your monsters and find 3 goblins, two orcs and a troll. Put the stands on the walls and towers, put one tower on each of the pie-wedges in the middle, and a wall in front of each of those. Now is a good time to take a look at the board and the cards.

The playing area is circular, and it sectioned off into wedges and circles.. You will notice that you have three colored wedges, blue, red and green, and each wedge is split into two slices, each represented by a number, 1-6. Around the board, there are four circles outside the castle, getting larger as they move outward. They are labeled, from inside out, Swordsman, Knight, Archer and Forest.

If you look at the cards, you will notice that most of them depict either a swordsman, knight or archer. Monsters begin in the forest, and move toward the castle one ring at a time (usually) when in the Archer ring, archers can damage a monster, but knights and swordsmen cannot, and so on. You cannot attack a monster in the forest ring, and, if they get into your castle, there are very few cards that can get them out.

You will also notice that there are colored circles on each of the above-mentioned cards. A blue archer can only attack a monster in the archer circle and blue wedge. There are one of each of the three main attack types in the deck that can attack any color. You will also find Hero cards. They are restricted by color, but can attack in any of the three rings.

Alright, that should be enough information for us to be able to move on. You place one of each of the 6 creature tokens we set aside on each numbered slice in the archer circle. At this point, we should look at the monster tokens themselves. These are triangular, each with some numbers on each point representing hit points. Each of your standard attack cards do one damage. You rotate the monster as it becomes damaged without dying to show its remaining life.

So, let’s say we are playing a three player game, and this is the first turn. The first step of every turn is to draw cards to your maximum hand size, which, in our scenario is 5. This does not factor on the first turn. Step two is a discard phase. You MAY, should you choose, discard one, and only one, card and draw a new one. The next step is to trade a card with the other players if you choose to do so. Again, you may only do this with one card on your turn.

We will not discard a card, however, the next player to go has a red archer card, and you have a blue knight. There is nothing in a blue knight wedge, but there will be next turn. There is also something in a red archer wedge right now. So, you trade these cards, and get ready to play your cards.

You now have a red archer, a green archer, a red hero, a green swordsman and a green knight. There is a goblin on each of the red archer wedges, a troll and a goblin on the two green archer wedges and an orc on each of the blue archer wedges. You can use your entire hand if able, so you play your red archer and red hero, which will do one damage to each of the goblins, killing both. You play the green archer, and must decide whether to kill the goblin or wound the troll. You choose to damage the troll, rotating it to the “2” point. You now have no cards to play. The next step is to move each of the surviving monsters one ring closer to the castle. This means the troll, orcs and remaining goblin each move into their respective knight rings, remaining in their slices.

You then draw two monster tiles. You have two new monsters, so you roll the die and place the first one on the forest ring labeled with the result of the die, and then do the same with the next. Monsters in the forest ring cannot be attacked.

The next player has a brick. This normally can be used in conjunction with a mortar card to rebuild a piece of wall that has been destroyed, but, as the wall is currently pristine, the player chooses to discard it and draws a new card, getting a blue swordsman. This does him no good, but the next player has a green knight, and both agree to trade. You have a blue and a green knight, along with some other cards that will not benefit you this turn. You use these to kill the remaining goblin and damage an orc. The survivors continue their advance toward the castle, and new ones join the fray.

Resource management plays a role. For instance, the second player chose to discard his brick in hopes of picking up something to attack with. While that may work to your benefit, just because the wall is fine this turn does not mean it will be next turn. Already, the monsters are knocking on the door the first turn of the third player. The limited deck of cards does get shuffled and reused when exhausted, but do you think you can wait that long for a discarded card to come back around? The castle is not completely defenseless either. Any monster can destroy a wall segment they come up to, they will take one damage for doing so. This will kill some wounded creatures and goblins outright, and even if the monster survives they will remain in the swordsman ring for another turn. The towers also damage monsters, but, once they take out a tower and survive, they then rotate inside the walls each turn until they either die or take out the last remaining tower. While walls that have been destroyed can be replaced, towers cannot. Once all the towers are gone, they are gone.

In addition, there are only two cards in the deck that can even affect a monster inside the walls of the castle. Once can push any monster back into the forest wherever they are, and another, the Barbarian, can kill any monster anywhere but the forest ring. There are special monster tiles and special cards to draw in addition to what I have discussed

This is a very simple game to teach. Everyone will be up to speed by the end of the first player’s turn. I have successfully played this game with a four year old, and she understood enough that I was not playing for her. I will put a tip that explains how that works. What is important here is that this is a great game to play with the family. I suspect it would get old being played over and over by a gaming group, but, it plays in about 30-60 when you have folks who are good a planning ahead, so you are not going to get slogged down for a long time, so it works as a great filler.

If you have kids who are willing to play, I cannot recommend this enough. For a group of adults, I think it would be a shame if at least one person in the group does not have the game to break out once in a while. Sometimes simple mayhem is what the situation calls for, and this game certainly delivers on that end.

7
Go to the Battle Line page

Battle Line

131 out of 142 gamers thought this was helpful

Welcome to Battle Line. I will start by pointing out that this game is based upon a game published in Germany by the name of Schotten-Totten. This information is not particularly important, but, come on! The name Schotten-Totten is awesome! Those crazy German’s know how to name a game! Add to that names of units like Hoplites, Peltast and Hypaspist, how could you possible go wrong!

Of course, pointing out a rhyme in a language many of us here do not speak is not particularly helpful when trying to answer the question of “Battle Line, huh? Why should I care?” So, let’s try and answer that question.

Battle Line is a two player game, no more and no less. If you have three people, this isn’t going to be much fun for one of them, unless they like to watch. A copy of this game should run you around $15-20. When we open the box, we find 70 cards, 10 of which are “Tactics” and 60 “Troop” cards, 9 plastic or wooden (mine are wood) pawn-looking things and a short rule book, more of a piece of 8/12 x 11 glossy paper folded in half, really. Everything else, what little there is, holds up well. The card stock is acceptable in my opinion.

Setup is a breeze. Separate the Tactics cards and shuffle the 10 of them and put them in a pile, and do the same with the 60 troop cards. Deal 7 troop cards to each player. Take your pawn-looking things, which today will be playing the part of flags, and place them in a row between the two players. The goal of the game is to capture a certain amount of these suckers. The number varies a bit depending on HOW you capture them.

Which, of course, brings us to gameplay. You want to either capture three flags adjacent to one another, or any five flags to claim victory for your people. You do this by utilizing your troop cards. You place one card on your side of any given flag, and then draw a card to replace the played card. The troop cards come in 6 colors, blue, green orange, purple, red & yellow, and are numbered 1-10 with various pictures and names. Each player will be placing three cards on either side of a flag to attempt to claim it. You may place next to any flag and have as many in dispute as you wish. There are, of course, better combinations of cards to have than others, from best to worst:

Wedge: Cards of the same color numbered sequentially (ie. B1 B2 B3)

Phalanx: Three cards with the same number (ie. R1 B1 Y1)

Battalion Order: All cards same color, non-sequential

Skirmish Line: Different color cards numbered sequentially

Host: Whatever garbage you had leftover that matches none of the above criteria

A Wedge always beats a Phalanx, regardless of the numerical value of the cards in the Wedge, a Phalanx always beats a Battalion order, a Battalion Order beats up on a Skirmish Line, and a Skirmish Line always breaks up a Host. If both players have the same type of formation on either side of the flag, the numeric value is greater. For instance, a flag is being disputed by two Phalanx. Player One’s Phalanx is made by three “8’s” and Player Two’s by three “6’s”, Player One wins the flag.

There is certainly a bit of a strategic component to all of this. You do not want to put down cards willy nilly, but, neither do you want to put a 8, 9 & 10 of the same color down on the first three turns. You want to spread out the cards among the flags to cause your opponent to guess whether or not you really have what it looks like you are implying you have with your first two cards, and making them have to spread out their resources or call your bluff when you have a yellow 7 & 8 down but no 9 in your hand. Flags do not need to have both players put down all three cards, just so long as you can prove, based upon the cards already played, that an opponent cannot beat your placement. Should a tie occur, say, both players have down a Phalanx of equal numbers, the last player to place (or would place) the final card loses the flag.

As mentioned before, there are 10 tactics cards available in a randomized deck each game. These have varying effects, such as acting as a wild card, allowing you to steal a troop from your opponent, stripping the type of combination from the resolution of a flag (so, all cards placed are treated as a Host, and are determined based solely on the value of the cards), move a previously played card to a more desirable area when it is apparent a flag is lost, or cause 4 cards to be needed to resolve a flag rather than three. You always have the option to draw a tactics card rather than a troop card. However, there is a restriction on the play of these cards: no player may play more than one tactics card more than their opponent has played this game. Should your opponent not be into tactics cards, you could play your one and that is it for the game, taking up a spot in your hand filled by that second tactics card you picked up and will never get the chance to play.

In my experience, a game does not generally last longer than 30 minutes. 15 minutes would be achievable by two people who play often and are good at planning ahead. It is easy to teach and easy to learn, and, even when kept in its box, is low profile and does not take up much space. I and the people who I have played with find the game enjoyable, and, even if you are a group gamer, we all know there are times one of your guests arrives early, and this would be a good opportunity to pull this out and kill some time. With a lack of good, cheap, quick two player games that take more than a deck of playing cards, I think this a great purchase that should see moderate use in any game collection.

7
Go to the Red November page

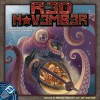
Red November

49 out of 55 gamers thought this was helpful

The gnomes, intrepid explorers and expert inventors they are, have built their greatest achievement yet, the submarine Red November. It has set sail on its maiden voyage, loaded with alcohol, equipment and you, the players.

That was a mistake…

This is one of those coop games that really means it. If you cannot work together with the rest of the crew, this isn’t going to take very long. The Red November is a deathtrap, and as such there are many ways to meet your end aboard her. The reactor is overloading, the vessel is taking on water, fires are burning, the pressure is rising… what is that sound? What do you mean the missile is about to launch!? The tube is blocked! Wait, what is that tentacled thing I see out the porthole?!
Your job is not to save the ship, it is to keep it patched together just long enough for rescue to come.

This is a game advertised for 3-8 players. A game will run you from 30 to 60 minutes or so, depending upon the number of players and how well folks can plan their turns in advance.

Upon opening the box, you will find;
a gameboard,
54 cardboard item tiles,
4 cardboard destruction tokens,
15 cardboard hatch blocked tokens,
8 plastic gnome sailors playing the part of your avatars,
9 plastic time keepers
20 cardboard flood and fire tokens
8 player gnome cards
56 event cards

Everything seems to hold up well enough, although everything is pretty small, which should be no surprise upon seeing the box. Setup is pretty easy.

Put the Disaster Track markers upon the proper color track on the board,
Give everyone a card and time keeper the same color as their chosen gnome.
Take six Grog tiles from the item tile supply, and place them faceup by the Captain’s Cabin (I am starting to see WHY we have a problem here)
Take the rest of the item tiles, mix them up, and put them facedown within reach of all players
Everyone takes two items
Go through the event deck and set aside the Kraken card
Get ready for mayhem

The good news is that rescue is coming. The bad news is that it is one hour away. During that time, you need to keep the sub intact and yourselves alive. This introduces a mechanic that at least I have not seen in the past. The board has spaces that correlate to minutes. All of the time keepers get stacked upon one another at the appropriate spot (based upon the number of players). Everything you do takes time, as represented by the spaces around the board. Certain spots on the time track cause you to draw event cards when you pass them. These event cards cause all of the problems that you need to address as you play. The more time you spend moving or on a task, the more issues that crop up. Get too many things happen at the same time, you and your comrades will get into a heap of trouble. Fortunately, some of these spots also indicate you found some items, so all is not lost. Let’s dissect a turn.

Phase 1; Movement

You can move your gnome around the submarine pretty much as you like, and even leave the sub (although I recommend some protection to do so) Doing so takes time, and as time passes, bad things happen.

If you want to enter a room, you need to open that room’s hatch. Doing so takes one minute.

Entering the room takes no time, unless that room has taken on water. If it has, that will take you another minute.

Should you need to get from one side of the sub to the other, a good chunk of time can pass doing so.

Submarines were not made to traverse quickly after all, but instead to be compartmentalized so small disasters can be contained.

When moving, you move the ghost timer ahead of your time keeper so you can see how much time you have taken up.

Phase 2; Action

So, you got to your chosen destination. What can you do?

Fix It
The pressure is rising! The room is on fire! The missile is about to blow! The room is flooded! The hatch is blocked! We are running out of air! The reactor is going to blow! Is that a Kraken!!! There are all sorts of things that are going to need fixing during the course of the game, and someone is going to need to fix the problems so you can get past those problems to fix more problems…

So long as you are in the proper room, you can attempt to fix any problem present there. You will declare how many minutes you wish to spend working on the problem, and move the ghost token that many spaces. Then you roll the die. If you roll less than or equal to the amount of time you said you would spend on the task, you succeed, and there is one less thing to worry about. Should you fail, all is not lost, but the time you spent is. There are positive modifiers that can be applied, represented by items you can use to aid in the task (such as a fire extinguisher when fighting a fire) and negative modifiers (such as attempting to fix something in a room filled with water)

Item actions
When in room 8 or 10, you can find items to assist you in your quest to survive. Room 8 is the item storage. Here you can spend 1-4 minutes picking up gear. For every minute you spend, you get to draw one item tile.

Room 10 is the captain’s quarters, and the captain loves his alcohol. A player may spend up to two minutes taking grog from the captain’s stash, until it is gone. You get one per minute spent.

Most items are specific to a task, but grog is different. While other items give you a +4 modifier to your fix-it action, grog gives a +3, but that is a +3 to anything you may be doing. While that is great, every time you imbibe, you will need to increase your intoxication level (as represented on your player card) and make a faint check later in your turn.

Phase 3; Faint Check

So, you drank some grog. OK, hope that worked out for you. Now, let’s see if you can hold your liquor. Take an event card and look at the number in the lower right-hand corner. Should it be a dash, you are good. Otherwise, if the number shown is equal or less than the gnome’s current intoxication level, he passes out. This is bad.

First, you move the ghost timer up 10 spaces, so bad stuff is going to happen while you lie there doing nothing. This is going to put a greater strain on your shipmates, as they will not have your help keeping the sub intact. In addition to this, should a room fill with water, or a fire start in the room you are lying in your own filth in, you are a goner, since you cannot leave. Moral: Watch you grog intake!

Phase 4; Updates

During the final phase, you will move your token up to where the ghost timer is and draw an event card for every event marker you pass on the way there. Cause the appropriate events to happen, and you are done. Now, the player furthest back on the time track goes next. You do not go again until you are the furthest back. Occasionally, some players may go twice in a row.

There is also a potential traitor aspect to the game. As you play, you will eventually find an aqualung and harpoon. These items are used to battle the Kraken, who gets put back in the deck after it has been exhausted and shuffled. However, if you have the aqualung, you can choose to leave the ship once someone passes “10” on the time track. Once you do so, the victory conditions for you change. You win if everyone else dies. Should they survive, you lose.

That should be enough to get a feel for the gameplay. I get a kick out of this game, but that depends a great deal upon whom you play it with. People who take their winning and losing very seriously are not going to have a great time with this. Folks who can laugh when their character passes out and dies or get a bit of glee watching all their hard work go to pot when a tentacled monstrosity crushes the vessel should also have a good time. Most games are not for everyone, and this is no different. I have had a blast with this game every time I have played it, as I have the right group to play with. If this sounds like the people you like to play with, I encourage you to give this a try. Perhaps a joyride upon the great gnome vessel Red November is just the thing for your gaming vacation!

9
Go to the Telestrations page

Telestrations

92 out of 99 gamers thought this was helpful

Do you remember playing telephone as a kid? You whisper something to the person next to you, they do the same to the person next to them, and so on and so forth. Between you and the end of the line, something would often happen to the message. Sometimes, in fact, what came out the other end barely resembles what you began with.

Then there is Pictionary. If, like me, your art skills can only be called “skills” by a very charitable saint, you struggle to draw something, while your team calls out things that have nothing to do with what you are trying to draw.

Now, mash the two together, and you have Telestrations.

This game plays 4-8 players. The more, the better. Once we open the box, you will find:
8 Erasable sketch books
8 Dry erase markers
8 Cloths
1 sand timer
1 die
142 double sided cards

Everything is decent, except the markers. They seem to go dry awful quick in my opinion.

So, what do we do? Everyone gets one of the sketch books, markers and cloths. They all write their names on the first page. Deal a card to everyone, and then roll the die. Each card has 6 words on each side. Determine if you are working off of “This Side” or “That Side” and secretly write your word down.

If you have an odd amount of players, you will now pass to the left, that person will secretly look at the word you wrote, and draw their interpretation of the word. Should there be an even number of players, then you will do the first drawing.

Regardless, whoever drew the first picture passes the pad to the person on the left. The timer will be set, and they have until time runs out to write what they think was drawn on the next page in the sketch book. They pass to the left, the timer is set, and the next person has 60 seconds to draw their interpretation of the word. Play continues in this fashion until the pad returns to the person it started with.

Then, the real fun begins, as each player goes through their pad, showing what the word was, what was drawn, and how it changed (or didn’t) change as each person got a hold of it. Hilarity ensues. There is a scoring system, but I never use it. Frankly, the scoring is counter-productive, because I have always found that everyone has a much better time when things went horribly wrong, and everyone starts arguing about why they thought that was what you drew.

This is a game that plays best with people who don’t care who wins or loses and who can laugh at themselves along with everyone else. Some of the cards feature a choose your own word, which works great with inside jokes between family and friends as well. I don’t know how many times I have played this game and ended up gasping for breath. I know there are people who would not have fun playing this game, and I am sure you all do as well. However, for those who put aside their ego and their artistic snobbishness and are just looking to have a great time with their friends and family, I think you will find this was money and time well spent.

7
Go to the Galaxy Trucker page

Galaxy Trucker

84 out of 94 gamers thought this was helpful

Congratulations on your assignment from Corporation Incorporated! We need you to build a ship as quickly as possible, find some stuff out in space, and deliver it on time!

Meteor storms? Smugglers? No, of course these things are not a problem. Just take the time to build a mighty craft and you will have no worries! You have two minutes…

So many people think of space travel as some glorious occupation in a ship filled with comfort, holodecks to relax in, plenty of room to kick back and just do what needs doing, exploring the galaxy. But, even in the future, people want stuff. People NEED stuff! How do people GET this stuff? Well, in the future, they will get it the same way they do now; from the backbone of civilization that is the long road trucker.

Alas, there is nothing glorious about the life of the long road trucker. We cuss at them for going too slow and forcing us to pass them. We ride in their draft to save some gas mileage, not being able to see their mirrors and knowing **** well they cannot see us, but they know we are there, using them. Long lonely days and nights, greasy nasty food at truck stops… Now, lets add the perils of space to this life, and the requirement to build your long haul spacecraft from scratch in a matter of minutes and hope you don’t screw it up, and you have the beginning of Galaxy Trucker.

Galaxy Trucker is a game for 2-4 players. The goal for the players is to have the greatest amount of cosmic credits at the end of the game. This is not a combat game, but more of a race. Your greatest enemy is the events that crop up, and yourself, depending on how well you build a ship under pressure.

Let’s look in the box. you will find:
1 flight board
8 space ship boards double sided
4 number tiles
140 component tiles, and 4 starting component tiles (cardboard)
60 adventure cards
1 rules card
4 number tiles
8 space ship markers
8 (cute) plastic aliens
40 (adorable) plastic human astronauts
36 plastic tic-tac-looking battery tokens
56 wooden goods (cubes)
2 six sided dice
1 sand timer
1 rule book

Everything in my experience has held up well, and by golly, it had better for $75.00

OK, we have stuff, what do we do?

Your first round of your first game will give you some more time, but I will go into what is expected when playing after that. Each player will first take a spaceship board labeled “I”, Each player takes a starting component color of their choice. They place this on their ship. Then the mad dash begins. The timer is placed on I on the game board. The boldest player says “Go!” and turns over the timer. All of the ship components are upside down. Using one hand, you grab one, pull it to the area of your ship board, and then turn it over and look at it. At this point, you can do one of three things:

1. Place the components somewhere on the ship nest to another one that has already been placed (your starting component will already be there in the center of the ship)

2. Return the component, face down, from where you got it

3. Place it, face up, on the corner of your board. You may do this with no more than two components at a time. Once you do this, you are committed to using this tile. Should you fail to do so, it will count against you at the end of the round.

Once a component is placed on the ship, it cannot be moved or rotated. You are committed. This continues until someone has completed their ship. This player will take the token numbered “1” and then turn over the timer (when it is empty) and place it on the “Start” area of the flight board. Everyone else now has until that timer runs out to complete their ship.

There are various components you will see when rooting around in the junk pile to add to the ship, most of which are necessary. You will find:

Living quarters (for your adorable little astronauts)
Cargo bays (for carrying cargo)
Hazardous material cargo bays (for stuff that makes your hair fall out and makes you sterile)
Laser cannons (for self defense)
Engines (to move with)
Batteries (needed when using more powerful double engines and double lasers, as well as shields)
Life support modules (cause aliens don’t breath oxygen)
Shields (to defend against the perils of space)
Structural modules (provide no other purpose other than having several connectors)

If you launch and find out you forgot engines, you are hosed. If you do not have enough astronauts (two per living quarter) you will not be able to complete certain adventures. Wanted to bring an alien? (they give bonuses to engines or laser power, depending on which ones you bring) You better have the proper life support module attached directly to a living quarter for them to live in. No lasers? Hope you don’t see any meteors or smugglers. No shields? Ditto.

So, obviously there is a lot to consider in the short time you have to build. Yeah, it is more complex than that. Each component has one of three different connector on it. One is universal, so it can connect to either of the other types, but if you accidentally connect a double connector to a simple connector, things will go badly for you. In addition, you cannot have a laser with any other component directly in front of it (although you could have one two spots away, just figure it is three dimensional and it makes sense) nor can an engine have anything directly behind it. In addition, all engines must point backwards.

Lasers can point any direction, but in direct combat scenarios, they only count for half if not facing forward. However, should something threaten the back or sides of the ship, and you have no laser pointing that direction, you may have a problem.

Shields can protect basically two sides of a ship, depending on how they are placed. They could do, say, the left side and back if facing downward left, or the right and front if facing those directions… Just make sure your design included some batteries, or that shield is completely useless. Same goes for double engines and double lasers. These are more powerful, but do nothing without batteries to power them.

Alright, so, time is up, and your ship is complete. Time to get some cargo and some profit! Not so fast… Time for a spot check!

You and the other players are going to look over your ship and each others ships to see if every connection is legal. Should you have connectors, say, a double to single, for instance, things start falling off your ship. Anything that is connected to an illegal connection that is not legally connected elsewhere just falls right off. If you were not careful, you could have a quarter of your vessel disappear before you get underway, along with any of the critters, engines, shields, etc. attached to them. This will happen occasionally.

There is nothing stopping you from leaving exposed connectors on your ship, but there are penalties for doing so. For instance, when you encounter a meteor storm adventure card, small meteors can be ignored if they hit a smooth side of your ship. However, should they come into contact with an exposed connector, that piece of the ship is destroyed. Hope everything else next to it was attached to something else on the ship! In addition to this, stardust, when encountered, will slow you down by causing you to loose a flight day for every exposed connector. The player with the best looking ship at the end of the round (the one with the least amount of exposed connectors) gets a bonus, so there is another upside to create a complete ship.

During the course of the game, once ship building is out of the way, you will move along the flight path based upon your engine power, which is determined by number of engines, brown aliens augmenting them, and double engines you choose to power. The lead player gets many perks. They often get first crack at adventures that are encountered to find goods and credits, get the chance at the best stuff planets have to offer and get the largest bonus when reaching the end of the round. This does not necessarily mean the fastest player will always win, but it sure doesn’t hurt.

You will sometimes encounter abandoned ships and space stations, which you can spend astronauts and flight days, which cause you to move “x” amount of spaces back. These will often give you additional cosmic credits and sometimes goods.

Planets take time to land on and barter with the inhabitants, but are a great way to load cargo on your ship. Often there are only two or three spots to land on, however, so if you are lagging behind, you may get left out!

When encountering the scum of the galaxy, being first could be a detriment, provided you don’t have the firepower to take them. The bad guys will attack each player in line, until someone takes them out. If you cannot, you may loose crew or goods, or they may blow up parts of your ship.

Meteor storms can harm parts of your ship (based upon a die roll) Should you be unable to stop the meteor, say goodbye to parts of your vessel.

There is more, but I think you get the idea. Once you get to the second round, you get a larger ship template, and the time goes through an extra step, giving you more time to complete the ship. The same thing happens on the third and final go-around. There are also more perils each round, so it is more important as the game progresses that you be a good ship builder, timer or no.

At the end of the day, this game is all about the ship you build. Every game is going to be different, so there is plenty of replay value here, and I will admit, I see the humor in watching parts of my ship crumble because I made a mistake when building it, and, even more so, I see the humor in it when it happens to someone else. When things go badly, you can get a bit frustrated at yourself, but the quality of the ship was always in your control, so you never have the game to blame. When things go right, I tend to feel mighty good about myself when blowing a pirate out of the sky with my superior firepower or shooting into the lead through open space with my engine-filled vessel.

So, is the game worth a purchase? I have to admit, I do not own it. A friend of mine has it, and it is a blast to play when he pulls it out. However, $75.00 is an awful steep price of entry here. I cannot tell you what to do, but I can say everyone I have played with enjoys the game, and there is never any groans when it is suggested.

10
Go to the Small World page

Small World

59 out of 67 gamers thought this was helpful

A new land awaits, ripe for colonization. It has everything a people looking for a new land could possibly want; prime farmland, rolling hills, lush forests, mountains that touch the sky, even a native population to eradicate.

Yes, a great new land to explore and exploit. So great, others have found it and want a piece for themselves as well. Sadly, it’s a Small World, and there just isn’t enough for everyone…

Welcome to Small World, a game for 2-5 players. The ultimate goal of the game is to be the player with the most victory coins at the end of the game. To accomplish this, you will lead your chosen race to take as much territory as possible in the Small World, and hold it as long as you can. That is, at least, until your chosen people just are not making you rich enough, so you abandon them for a new people to lead.

To begin, lets take a look at what you get for your money.

2 game boards, double sided
35 cardboard game pieces
14 cardboard race banners, double sided
20 cardboard power badges, double sided
109 cardboard victory coins
1 cardboard game turn marker
1 custom six sided die
168 cardboard race tokens
18 cardboard lost tribe tokens
1 rule book
6 player reference sheets

Everything seems made well enough, as in my house the components have all stood up to many plays with minimal wear. I am not a fan of the plastic cartridge that the game comes with. It is sturdy enough, and keeps all those race tokens in place, but it is a pain to get the suckers out. Some small Ziplocks or coin envelopes would possibly be a better fit. I remove the plastic mold that holds the rest of the bits and put them in Ziplocks to get things in and out easier.

OK, so, as outlined above, there is a bunch of stuff in the box. What are we going to do with all of it? The first thing to do is determine how many players you have. One of the great things about this game is that there is a different board for 2, 3, 4 & 5 players, guaranteeing that carnage will commence during the course of the game. Pull out the proper board and turn to the proper side, and begin by giving 5 victory coins, all ones, to each player. Mix up the race banners and lay out six of them on the side of the board, and determine which one will be first. Then mix up the power badges and put one with each race banner. These will be your starting race/power combinations.

Each race has its own unique ability. Humans, for instance get extra victory coins for each piece of farmland under their control. Tritons need less troops to take territory adjacent to a lake or sea. Trolls get a lair placed in every territory they take, making it harder for other players to take that territory away.

The power badges grant similar boons. Some add victory coins either right away or each turn based upon certain conditions, some make it easier to take territory, some make it harder to let others take it away. Every game you will have different race/power combinations available, so every game will be different.

Put the Lost Tribe tokens on the board where marked, and mountain tokens on the mountains (if you want) and put the game turn marker on one. Determine who goes first (the game recommends whoever has the pointiest ears, but whatever)and get ready to play!

The first player is going to look over the available race/power combinations and decide which they want. If they want the first one, they just take it. If the want the second, they need to put a victory coin on the first and take the second. If they want the third, put a coin on the first and second… I think you get the idea. Move down the rest of the combinations to fill in the hole and put a new combination in the sixth slot.

The first player then takes the appropriate number of race tokens, determined by the number on the race card added to the number on the special power badge. These will be the available units you control while using this race. There are a couple of races who can add to the number as you play, but, for the most part, this is what you get.

Unless you are flying, you choose a spot on the edge of the map or shoreline and take over that spot. Essentially, the way it works is a completely empty piece of territory will take two units to conquer. Mountains take three. If there is anything or anyone occupying a territory, it takes one more unit than two for each thing occupying it. If the territory is occupied by a lost tribe, it takes three. If there are two units belonging to another player in a territory, it will take four. Two Amazons and a fortification? That will be 5. You continue conquering land until you do not have enough units to continue. Should you have one left in hand, you can roll the reinforcement die. There are four different symbols on this die, none (or lack of symbol I guess) 1, 2 & 3. If the roll shows enough pips, added to the units in hand, to take a territory, you get to take it. If not, then those units are just used as reinforcements. Now, you count up how much territory you own, and claim one victory coin for each piece. Then you add any bonuses.

You can now reinforce your territory. You can put as many tokens as you like on each piece of land, just so long as you leave at least one on each one. If you have a piece of territory that gives you a bonus, you would want to move more units there if it is in jeopardy of being attacked by another player. This will now end your turn.

The next player looks at the available race/power combinations and once again chooses which to take, paying for ones beyond the first in line just as the first player did. Play continues as it did for the first player. The second player could either take a different side of the map, or jump right in slaughtering the first player. The choice is theirs.

If a player successfully attacks another player, then the attacked player will permanently lose one unit. If there were units beyond the one they lose in the territory, they may hold on to those units until the reinforcement phase and put them where they like in territory they still hold.

As the game progresses, and players begin to engage one another in battle, the number of units you have available will begin to dwindle. There comes a point where you are losing territory with no way to reclaim it. What do you do? Abandon those useless creatures you once found favor with! At the beginning of your turn, you may declare that you are going into decline.

When going into decline, you turn over your race banner and power badge. Most races loose all of their powers, abilities and/or bonuses when in decline. You will take all but one unit from each territory you still control, and turn over the remaining unit in each to show the race is in decline. You will still get victory coins for each piece of territory your race in decline holds, but they cannot take any more (well, unless they are ghouls)

On your next turn, you will choose a new race/power combination as you did on your first turn. Then you enter the land as your predecessors did and claim as much as you can.

Each time the first player begins their turn, they move the game turn marker to the next turn number. Once turn 10 is complete, the game is over, and whomever has the most victory coins wins.

So, that is Small World in a nutshell. With the race/power combinations changing every game, every game is going to play out very differently. I really like that the game uses a different board for each possible number of players, so if people want to play the game, you never have to say that the game isn’t really good with x amount of players.

There are some bogus race/power combos, like Merchant Dwarves (they get a whole 5 units) but there are always enough combinations available that something should be useful to anyone. Strategy comes into play when presented with a combo that may get additional victory coins for holding certain types of territory. You will have to look at the map and see how hard it would be to get a hold of the most of that type. Some races/powers get bonuses for every territory they took that had something in it to kill. How tough a nut is your opponent to crack right now? Do they have a race in decline just waiting to be annihilated, or does every territory they hold have 3 units in it? There is enough thought that goes into the game that I do not get bored, but not so much that if the folks I am playing with have had a bit to drink, they don’t stand a chance. Added to this, this is my wife’s favorite game, so I get a good bit of use out of it.

All in all, while it may indeed be a Small World, there is room in it for me, and if you like what you see, there is room in it for you too.

8
Go to the Dixit page

Dixit

51 out of 58 gamers thought this was helpful

Everyone gather round, it is story time!

Dixit is an interesting little game. It is incredibly simple on the one hand, but has just enough strategy to it that you never know exactly how a game might play out. It is a good time for friends and family, and equally so for the new guy or gal to your group. The rules are simple, and the game will never play out the same way twice.

Opening the box, you will find 84 cards with various whimsical color artwork, 36 tokens used for voting in 6 different colors One scoreboard
84 new cards
36 voting tokens in 6 different colors, numbered 1 to 6
6 game pieces in 6 different colors

I am not much of an art critic, however, as the art on the cards takes center stage here, I can at least attest to the fact that, in my opinion, the art does its job. I take no issue with the quality of the components of the game either.

The game states it is for 3-6 players. It is my opinion that the closer you can get to 6 the better. I cannot see a group of three or even four having a good time with this, but 5 or 6 should do great.

So, what are we going to do with this stuff? First, everyone will get 6 voting tokens of a particular color numbered 1-6 and 6 of the cards. One player will be chosen as the first “storyteller” This player will say a word, phrase, sentence, song, etc. that they feel describes the card they plan to play. The storyteller puts their chosen card down face-down. Each of the other players will play a card from their hand face-down that they believe best fits the storyteller’s description. The storyteller will shuffle these cards and lay them out face up in a line.

Each of the other players will then lay down one of their voting tokens with the number card (1-6, left to right) they believe best fits the storyteller’s description.

This is where the game gets interesting. The storyteller wants most of the players to pick their card, but they do not want everyone to pick it. If everyone or no one picks the storyteller’s card, the storyteller gets no points, and everyone else gets 2 points. Otherwise, the storyteller and everyone else who picked the storyteller’s card gets 3 points a piece, and players other than the storyteller get one point for each vote their card received. After the round is over, everyone draws back up to 6 cards. The game continues until players can no longer get 6 cards in their hand.

This means that the player has to be able to balance his clues between being appropriately descriptive of their card while not being blatantly obvious.

This game, I think, tends to lend itself better to playing with a group comprised of mostly people you know well. Friends, family, that sort of thing. It can be pretty hilarious when you use an inside joke to describe just the right card, for instance. Aside from that, you can get a decent feel for how your description will go over. That being said, I think that introducing new people to the game is great. I would just do it one at a time.

This is a game that pretty much anyone can understand the rules 100% after playing one hand, and even the younger kids can get involved, although I would say the game suggestion of 8 is pretty good, as younger kids have trouble with understanding why they should not give obvious clues. The game takes all of half an hour to play tops, so there is not a big time commitment either. Works as a good filler, or for when you have folks over who just are not into your normal board games. I would compare it to Apples to Apples in that respect.

Dixit is a great game. There isn’t any reason why replay would suffer, as you can always come up with a different story for every card everytime you play, and, if your household is like mine, there will be plenty of laughs, and at the end of the game, no one will really care who won.

8
Go to the Dominion page

Dominion

166 out of 175 gamers thought this was helpful

This may not have been the first Deckbuilder game, but it certainly put them on the map and made the term common in the gaming lexicon. Dominion certainly may have its faults, but it has sold ridiculous amounts of copies and sits in many a gamers closet, and for good reason.

Not familiar with a deckbuilding game? Put on some sunscreen and come out from under that rock there and I will try and fill you in 🙂 Knowing what Dominion is and how it plays will pretty much define the genre for you.

Lets look in the box. There is a rulebook and some cards. 500 to be exact. There isn’t much else to the game. The cards are all nicely separated by type. Setup is a breeze, cleanup a little less so.

The game states it plays 2-4. I suppose it could support more, but the card stock is going to dwindle pretty fast. 3-4 is optimal, but two is really not out of the question. Figure on 45 minutes to an hour to play. Start off by putting each of the Treasure cards, Victory cards, Curse cards and Trash card into their separate piles. These are always out for every game, although the Curse cards are not always used.

In addition to these cards, there are 25 different Kingdom card decks. Of these, you are going to place out 10. These can be random or agreed upon by the players. This is what gives Dominion, and other deckbuilders, a unique feel to every game.

Each player is going to get 7 Copper cards and 3 Estates. So, what are these for? Every card has a value in the lower left corner. That value can be paid for by the treasure cards, represented at the beginning of the game by the copper cards received, and then used to build your deck throughout the game. The Estate cards, on the other hand, represent the ultimate goal of the game. These are worth victory points, 1 each in this case. At the end of the game, the player with the most victory points wins. There is a downside to these cards, however…

You have your 10 cards. Now you will shuffle them and pick 5. You may end up with 5 copper, enabling you to purchase one card to add to your deck worth up to 5. On the other hand, you may end up with 3 Estates and 2 copper. The Estates, while providing Victory Points to tally up at the end of the game do nothing at all until then except clog up your deck and give you useless cards in your hand. Any purchased cards go into your discard pile, along with played cards and those remaining in your hand at the end of your turn. Then you draw a fresh hand of 5 and await your next turn. Once your draw pile is exhausted, you will shuffle the discard pile to create a new draw pile.

Once you have some new shiny cards, your order of play is to play an action, if you wish/can, buy a card and clean up, where you discard and draw anew. The Kingdom cards generally provide actions of some type that you can enact. These could allow you to draw additional cards, give you additional money this turn to buy new cards, give you additional actions, allow you to purchase more than one card or even cause some kind of harm to your opponents. Your action phase ends when you cannot legally play any further cards. Some of the Kingdom cards are defensive as well, allowing you to counter a negative effect attempted by an opponent.

During the course of the game you will be, in addition to purchasing Kingdom cards, buying higher values of treasure cards as well as Victory Points. It may get to the point that those copper are causing more harm than good, or you want to get rid of some of those Estates because you feel you have better Victory Point cards in your hand and the smaller ones are just causing problems. In that case, some of the Kingdom cards allow you to trash certain cards. When you place a card in the trash, it no longer is available to draw. While a copper card, which costs 0 to buy, may be tempting to get every turn you can purchase nothing else, you need to keep in mind that if you have too many of any card, you will be seeing those cards pop up more than others. It gets to a point where you will want to have more chains of action cards played, which is impossible if you end up with one action card and 4 copper in your hand.

There is a good bit of strategy involved here, deciding what cards to buy, what cards to trash and when, how long to hold off purchasing victory point cards in favor of action cards and that sort of thing. You are on the clock, so you cannot wait forever. Once all of the Province cards (a type of Victory Point card) or any of the 3 supply piles of purchasable cards are gone, the game ends. The player with the most victory points in their deck wins.

As to the downsides, not everyone is going to enjoy the randomness involved with what cards you get every turn, although this really is mitigated somewhat by smart purchases. Some of the cards are not going to be favorites, and you really ought to be careful that you don’t end up with attack cards available in a game that defensive cards are not.

That being said, in my experience, the game is a good time. It is not hard to learn, doesn’t take that much time to play and presents a pretty different game every time. There are tons of expansions to this thing, so should you get tired of the base game and want more variety is is generally your favorite game store and $20 away. This is another one of those games that I think fits well in any gamers closet, unless they just cannot stand the game for some reason. Even if you have someone over who hasn’t gamed past Monopoly, chances are they will have a good time, although the Victory Point concept might throw them a bit the first time. If nothing else, I really think this is a no brainer when your local game store has it on sale. Pick it up and give it a try. I think you will like it.

7
Go to the Carcassonne page

Carcassonne

122 out of 129 gamers thought this was helpful

In the game of Carcassonne, you and your friends will build a French countryside one piece of cardboard at a time. There are, more importantly, wooden Meeples that you can make dance in between turns, and also perhaps make do disgusting things. Whatever you are into.

This is primarily a game of strategy if I had to label it. You are essentially jockeying for position with your Meeples to gain points while placing tiles in ways that will (hopefully) aid you more than your opponnents. The game plays 2-5, although I would recommend 3-5. I would say to plan for an hour to and hour and a half to play, depending on how well versed your group is playing this game. It could be less.

In the box, you will find 72 cardboard land tiles, 40 wooden Meeples in 5 different flavors, a cardboard scoring track and a rulebook and summary sheet.

The overall gameplay is pretty simple. To begin, everyone takes all of the Meeples of their chosen color and the starting tile, which can be identified by its different back, is placed in the middle of the table. The remaining tiles are put face-down where everyone can reach them. The first player will take a tile, look at it, and choose where to place it.

Each of the tiles will have various attributes that will create the map you are playing on. There are roads, cities, fields and cloisters depicted. There are simple rules regarding placement. Roads must connect to another road. City tiles must connect to another appropriate city tile. You cannot put the innards of a city, for instance, right up against a road.

Playing the tiles themselves is not the ultimate goal. You will be placing your Meeples strategically upon tiles to gain points. Depending upon where they are placed, they will fulfill certain roles;
either Knight, Farmer, Monk or worthless dirty Thief.

Here is how it works. Starting with the politician… I mean Thief. You declare it a Thief simply by placing it on a road segment. The Thief will remain on this segment until the road comes to a termination point on both ends. Once that happens, you remove the Meeple and gain one point for every tile that makes up that completed road segment.

For the Knight, you will place one of your Meeples into a city tile. Once that city is complete, by placing tiles that create a continuous city wall, the player with the most Meeples in that city will get two points for every tile that makes up that city.

To create a Monk, you place your Meeple upon a cloister. Once that cloister tile is surrounded on all sides, including corners, you take back your Meeple and score 9 points.

With the previous three types, once they score you get them back. The Farmer works differently. They will stay on the board until the end of the game. A farm is a continuous field, and a Farmer is a Meeple laid on its side is said field. At the end of the game, the player who deploys the most farmers is the same field scores three points for every completed city that farm supplies, or touches.

In addition to this, partial cities, cloisters and roads get points at the end of the game. Although a player cannot put a Meeple on a city or road occupied by another player’s Meeple, it is possible to have two players place Meeples on segments that were not originally connected in any way but end up being so. The player with the most Meeples gets the points, but a tie scores for both.

There are about 15,000 expansions for this game, adding all sorts of new tiles and rules. I find this to be a light, friendly game to play, and is a good way to introduce players to the world of board games along with Settlers of Catan and Small World. This is a good way to do it when you want to avoid any type of cut-throat gaming. While everyone is trying to score points, beyond placing a tile to benefit you and not your neighbor, there are not a whole lot of ways to stick it to your buddy.

Its nice and its light. It doesn’t always fit the bill when it is gametime depending on what everyone is looking for, but it won’t be likely to start a fight either. The only real negative I see is there isn’t a whole lot here, but it beats the heck out of Candy Land. You should be able to find a copy pretty cheap, so there is no reason for a gamer not to have a copy in the closet.

8
Go to the The Settlers of Catan page
148 out of 163 gamers thought this was helpful

Settlers of Catan has been around a while, and it is the game that first taught me that there is more to board games than what Wal-Mart carries in their game aisle. The game has quite a bit going on, yet manages to be approachable.

When playing Settlers, you will find strategic elements, player interaction and luck all play a vital role.

When you open the box, you will find

19 tiles with various terrain
6 sea tiles
9 harbor tiles
18 cardboard number tokens, representing possible die rolls 2-12
95 various resource cards
25 developent cards
4 reference cards
2 title cards
16 wooden cities
20 wooden settlements
2 six-sided dice
a wooden meeple looking thing (the robber)
and the rulebook.

All of the terrain pieces can be placed on the table in either a per-determined fashion or randomly. For the first few games, you should probably stick with the game suggestion. The tokens, in addition to the large number have a letter. You put these in alphabetical order, starting in the lower left tile, going right in a spiral, working your way to the middle. In addition, you will notice that there is dots listed on the tokens as well. These indicate how many different combinations of two six-sided dice will add up to that number. The reason you put the token down a certain way is it spreads out the most desirable dice combinations.

So, you have your board set up. The tiles you see each represent a certain resource that hex produces. They are:

Fields, producing Grain
Forests, producing Lumber
Hills, producing Brick
Pasture, producing Wool
Mountains, producing Ore

There is also a desert tile, which produces nothing.

The base game plays 2-4 players. Plan on around an hour to an hour and a half to play. A first player is chosen however you see fit, and they choose a place to put a settlement. The settlement is placed at the corner of the terrain hexes, meaning it will be sitting on up to three tiles. The next player sets one down and so forth, but the last player gets to set a second settlement immediately after their first, and then the order reverses. This means the first player places their second settlement last. As opposed to this, you can take the recommended settlement placement the game gives you as well. You will also receive two road segments in your color, and you will place one of those in any direction between hexes touching your settlement as you choose.

When choosing locations of settlements, you want to keep two things in mind. All 5 resources are necessary to build the things needed to win the game. Ideally, you will want to have settlements accessing all 5 types. In addition, however, you want to have your settlement on terrain hexes with favorable die rolls indicated. If you have all 5 resources covered, but one has a 2, one a 12 and another an 11, your are going to be waiting a while to fill up your hand.

Essentially, each player is going to start their turn by rolling the dice. Everyone who has a settlement on a terrain tile with that sum receives a resource of that type. If, for instance, someone has a settlement on a Mountain with an 8 and someone else on a Forest with an 8, then the first player gets an Ore and the second a Lumber.

What do you use these for? During the course of the game, you will be purchasing new settlements, building an infrastructure to do so (roads) upgrading your settlements into cities and buying development cards. These settlements and cities will gain you Victory Points, 1 & 2 each respectively. The ultimate goal of the game is to score 10 to win.

By upgrading your settlement to a city, you will receive two resources of the appropriate type they touch instead of one. Every settlement/city needs to be two road segments away from another, regardless if it belongs to you or another player. You need to plan your roadways properly so they do not end up terminating and boxing you in, making it impossible to continue growth. With proper planning, on the other hand, you could surround a certain hex with up to three cities, giving you six of that type of resource every time that number is rolled.

The development cards you purchase can give you various boons. You can get free segments of road to place, free resources, victory points and knights.

Which brings me to the Robber. Every time a player rolls a 7, two things happen. Every player who has more than 7 resource cards must discard half of them, rounded down. In addition to this, the player who rolled the 7 needs to move the Robber to a new hex.

The Robber prohibits resource production on the hex it sits on. So, for instance, it is placed on a Forest tile with an 8, no one who has a settlement or city on that tile will receive resources when an 8 is rolled. The Robber can be used to curb resource production on a player you feel is either ahead or a threat to you winning.

The Knight development cards are used two ways. When purchased, you keep them face down until ready to use them. When you are ready, you play the card and chase the Robber to a hex of your choosing. You can either do this to clear up a hex that is costing you resources because the Robber is there, or to cause harm to another player. In addition to this, once a player has laid three of these cards, they are awarded the Largest Army award, netting them two Victory Points. However, should someone else overtake their number of Knights, they will get the award instead, so the player who gets it will always be having to try and defend that title.

In addition to that, there is an award for Longest Road. The first player to place 5 continuous road segments gets this title, along with the 2 Victory Points it entails. Again, should anyone exceed your longest road, they take that title.

You will also occasionally get development cards worth victory points, which you should hold onto until they will push you to 10 points. When someone has unrevealed development cards, there is always the possibility they are sitting on points, so you can never just assume that what is on the board and what awards have been given are the entire story.

So, what if you are weak on a certain resource? There are ways to get around that. First off, relying on yourself, you can always trade 4 of any one resource for one of any other to the bank. In addition to this, if one of your settlements or cities sits on special harbor tiles, you can get better trade prices. This is a give and take thing. The harbor tile itself does not generate resources, so you will be out one hex that will generate resources on a die roll by placing a settlement there. There are two different kinds of harbor tiles. There are some where a certain type of resource (brick, for example) can be traded two for one. Only a player on that particular harbor can get that deal. The other allows you to trade any resource three to one. You will need to evaluate your needs to determine if placing a settlement on a harbor makes sense for you, and if so, which one. Putting a settlement on a harbor that gives two to one for Ore is silly if you are weak on Ore already.

There is also trade between players. On your turn, you can state you are willing to trade. You can state you are looking for a certain type of resource and see what other players offer you. You cannot ask for certain resources when it is not your turn, but there is wiggle room for negotiations. In this way, you may be able to get resources you need from others, but you will be inevitably helping them as well. On the other hand, I wouldn’t hold my breath at getting something from someone you have been hounding with the Robber for several turns…

That is Settlers of Catan in a nutshell. There are a few downsides I have seen to the game. For instance, the game is very susceptible to Kingmaker unbalancing should someone decide they cannot win but will stop at nothing to make sure someone else does, unless you make some house rules regarding trading to avoid it should someone in your group be inclined to do this often. Also, the game in my opinion plays most fairly with 3 players. Most of the time, it seems to me that some sucker in a 4 player game gets stuck with 3 settlements and is completely boxed in.

That being said, I have enjoyed most of my games of Settlers, and there have been many of them. It is a great blend of various game mechanics, and I believe it does a great job of showing folks who know nothing more of gaming than Monopoly and Life that there is more out there.

6
Go to the Shadows over Camelot: Merlin's Company page
57 out of 64 gamers thought this was helpful

Being an expansion, this is not playable without the base game. If you are interested in learning more about Shadows over Camelot, be sure to check out its page.

This expansion does more than add cards and characters, it also changes how the game operates on certain levels.

First off, you get seven new knights. Each has various new powers, but the coat of arms they possess are shared with the existing knights. What this means is that you cannot play both Sir Gaheris and Sir Galahad in the same game, for instance, because they share the yellow coat of arms. There is a new rule requiring the use of King Arthur, which I frankly thought was necessary anyway because not having his power in the game was nearly debilitating.

There is a new Travel deck included. This creates on-the-road hazards to knights moving to a quest. When moving to a new quest, the player must draw a travel card. Most of the time, nothing happens, but a knight may be waylaid by a battle, an overwhelming urge to seek the grail or even become captured by malcontents. To free a captive knight, another player must discard a special white card. Of course, if it is the traitor and you know it, you could just leave them to rot…

In addition, there is now a Merlin figure. He wanders about from quest to quest. Should your knight be at a quest that Merlin is currently present, you can draw a white card as a free action. If Merlin is sitting at, say, the grail quest and that quest is complete, black cards drawn with that emblem that normally would add a siege engine are instead discarded with no effect.

You may now play up to 8 players, but then there will be two traitors. The traitors do not know each other until revealed, but this can make the distrust aspect of the game much greater, and having two unrevealed traitors at the end of the game nets you three white swords being turned to black.

There is also a host of new special cards added, and some standard cards come with it just to try and keep balance. The rules have changed now so if a black card that affected a quest that has been completed is drawn, a siege engine is still added, but that card is permanently discarded and will not be reshuffled into the deck again.

Overall, I say that unless you are playing with 8 players and two traitors, this expansion makes the game easier. If you and your group like the game but find it very difficult, or just want some new knights in the mix, this would be a good buy. For me, I do not dislike the expansion, but I am not wild about the game anyway. The expansion does not really do anything to add to or detract from my enjoyment of the game. Take that for what it is worth.

6
Go to the Shadows over Camelot page
100 out of 113 gamers thought this was helpful

Shadows over Camelot is a coop game set, SURPRISE! in Arthurian legend.

By the way, I just learned that “Arthurian” is a word recognized by spell check. That is how important it is!

I cannot stress enough the team dynamic required in this game. You will not be able to win if everyone goes off to save Camelot on their own. It just isn’t happening.

This game also has a (optional)traitor aspect, so when in use, one player is trying to undermine the good of the whole. Like any good traitor dynamic, no one knows who they are, or even if there is one, which can add to the tension in the game.

So, lets look in the box. You get 1 gameboard with the round table and a couple of quest locations, three other boards with quest locations, 16 swords of the round table, 168 cards, 7 Knight character cards, 7 six-sided dice used to track life and 1 eight sided die, two rulebooks and 30 miniatures. Nothing seems overly cheap.

The game plays 3-7. Each player is going to pick a random knight from the character cards. Each Knight has a special ability unique to them, such as being able to play extra cards, get extra cards, gain extra life, etc. If using the traitor, the 8 loyalty cards are shuffled and handed out randomly. Only one is a traitor card, so there is no telling who they are or if a traitor even exists.

Your overall goal is to fill the Round Table with more white swords than black. You do this by completing quests. Everyone gets 5 white cards and a Merlin card. You are supposed to each take a card from your hand and put it face up in front of you at the beginning of the game and discuss who gets them in what the rules call a gesture of collaboration. Someone may choose to take none, and the group may decide to give several to one player. After this, you start departing for quests. You can discuss in general terms what the cards in your hand may be useful for, but you can never give values, such as saying “I have three Grail cards, so I can help with that quest” Some quests, such as the Grail and Excalibur, can have several knights working the quest at once, and some, like the Black Knight and Lancelot, can only have one knight doing them at a time.

On your turn, you have several things to choose from. You can either

Move to a new quest or Camelot
Perform a quest action
Play a special white card
Heal yourself of a hit point
Make an accusation of a suspected traitor (when allowed)

In addition, when in Camelot, you can choose from

Draw two white cards
Fight a Siege Engine

Movement consists of “I am going to do this quest” and going there. Generally, you can play one card a turn, and specific white cards are used for specific quests. This is the quest action.

Special white cards have implications and beneficial abilities beyond just playing a card on a quest action. To heal oneself, you discard three cards of the same type and get a hit point back (bad idea, by the way)

Each knight can only accuse someone of being the traitor once per game, and only when 6 siege engines are placed or 6 swords. The traitor can accuse someone falsely just to add a black sword.

Every player on their turn must draw a black card, which represents the forces of the world working against you. These cards populate the various quests on the board that you are endeavoring to complete.

For instance, to complete the Excalibur quest, you discard a white card to move the sword closer to the knights side of the lake. However, if a black Excalibur card is chosen, it moves the other direction. Ignoring the quest will cause the sword to fall to the forces of darkness and two black swords will be added to the table.

The grail is similar. The knights in this case must place specific grail cards on the track and fill it with 7 white cards. However, there are different kinds black cards that can fill the grail track, and some require a white grail card to just remove them, requiring two cards to fill the slot that black card sat on. Should the darkness take the grail, you get three black swords.

There are also quests to take on the Black Knight, where you need to take fight cards, a type of white card that has a number, 1-5 assigned, and create a full house, turn by turn. Only one knight can participate. There are Black Knight cards with values that accumulate, and the first party, the Black Knight or the player, gets five cards, then the totals are tallied. The highest value wins. A white sword is one or a black sword is given, then the quest resets.

There are also Saxtons and Picts to fight. Knights can lay down fight cards in a straight. Should a straight be laid before four of that type of enemy appears (caused, once again, by certain black cards)yet another white sword is won and then that quest resets again. A loss gets a black sword on the table and 2 siege engines.

Oh, yeah, siege engines. Get enough of these puppies (12) and the game is over. Here’s the thing. Quests that do not reset, such as Excalibur and the grail, those cards still show up. Should they do so, a siege engine gets laid down outside Camelot since that effect cannot take place.

The Merlin cards mentioned before are used to counter a black card when drawn. It takes three to get rid of the nasty ones, so three players will need to agree to part with the cards. The only way to get more of the standard white cards is to spend a turn in Camelot (netting two cards) and do nothing else, or complete quests. There is a bit more, but that should be sufficient to give you an idea of what you are up against. You can choose to, instead of picking a black card, give up a life point or lay a siege engine. This gives a bit of risk/reward to the strategy. I have seen several games where someone had to die to make sure the game kept going. Once the 12th sword is laid down, the most swords, white or black, wins, tie to evil. The traitor wins if present if darkness descends.

OK, so how do I feel about this game? There is a great deal of tension created by the fact the game is constantly giving you fires to put out. This is not necessarily bad, and I enjoy the concept in games like Red November. Forcing the players to work together is a good concept as far as I am concerned as well.

The problem is I really do not care for this game, and I really cannot tell you why. When my friends and family pull it out to play, I play, but I don’t get a great deal of joy out of it. I tend to feel a sense of foreboding when playing caused by the progression of evil and a sense of urgency to deal with the problems it causes, but I would assume that was intended. If cornered and asked, I would say my biggest issue is that there is a certain formula to winning the game that just puts me off. If you fail the grail and Excalibur, the game is pretty much written off. Should you succeed at those, victory is almost assured. To make the comparison again, in Red November, when things start going wrong, they are random. The consequences to ignoring certain things is pretty much equal. That isn’t the case in Shadows over Camelot. In addition, in Red November, failure, with the right group anyway, is humorous. Imagining your drunk gnome passing out has an amusing bent to it. Games that I have lost in Shadows tend to end up in arguments about who could have done what. It isn’t light hearted at all. In addition to that, I really don’t understand what the end game here is. What am I fighting for? If I get 7 white swords, the Picts and Saxtons are just going to leave Camelot alone forever? The Dragon is just going to fly off with the Black Knight? These are really all minor quibbles, but they seem to pile up for me and give me a sense of “meh” when playing.

So, take my opinion for what it is worth. Lots of people like this game, and I hope I gave you enough unbiased information aside from my opinion to be able to tell if this is right for you and your group. For me, I would rather play something else, but I will play when asked.

8
Go to the Killer Bunnies: Quest - Blue Starter Deck page
70 out of 77 gamers thought this was helpful

Say you are playing a game that you have dominated from round one. There are, say, 25 points available, and you have scored 18 of them in a 5 player game. That means you won, right? Not so in Killer Bunnies…

Does that bother you? Does the very idea set your teeth on edge? If so, I strongly recommend that you give this game a pass at your local game store.

This is a card game. As a card game, there is a certain amount of randomness that one can expect. You shuffle and deal, getting a random hand, and then get random cards to play with. Killer Bunnies adds another layer to that randomness.

I will get this out of the way. During the course of play, you will be awarded Magic Carrots. This makes sense, since you are after all questing for them as the title suggests. Depending on how many expansions your are playing with, you have 12 to 20 or so. Play ends when all Magic Carrots have been claimed. Then, a random carrot is chosen from another stack which declares which carrot is the winning carrot. It is very possible that a guy with only one carrot at the end is therefore the winner.

One other hangup I want to get out of the way before tackling the gameplay; everything a card does is not in every case printed on the card. There comes with the base game, and each expansion as well, an errata booklet covering what certain cards to, because not everything fits on the card. I am not talking about looking up what vigilance does in Magic the Gathering, and then you always know that vigilance means that the card does not tap when attacking, I mean that without the information in the card compendium, you will not know how to use the card fully. Let me give an example…

Fingercuffs states that it shares the fate of two bunnies. It gives examples of what buffs can be shared between the two bunnies. What it doesn’t say, however, is that the bunnies cannot be separated by a barrier and a new bunny cannot be physically placed between the fingercuffed bunnies. This is not an effect that shows up with other cards, so the restrictions do not exist on other cards. The card compendiums or a really good memory, therefore, are necessary to take along with the cards.

One more thing. Certain cards mention effects they have on things that are not included in the base set. That is because the folks who made the game had a good idea of what they would later include in expansions, but you will sometimes see reference to things you have never heard of and are not introduced until 4 or 5 expansions down the road. The game is designed so you purchase the expansions in order, although you can pick and choose if you really want to.

So, if you cannot get past that, feel free to move along. If you want to hear more, I will tell you what goes on during a game.

Once you open the box of the base game, you will find 6 12-sided dice of various colors, 12 small carrot cards, 24 water and cabbage cards, 12 larger pink backed carrot cards, the Kaballa’s Market card, which shows the prices of the purchasable cards, the blue deck with 101 cards and the yellow deck consisting of 51 cards. Card art is Loony Toons type of cartoony art. The cards are pretty thick and should stand up over time.

You shuffle up the blue and yellow backed cards together, shuffle both sets of carrot cards and the water cards and cabbage cards and out out the market card. If playing with expansions, those will be in the pile too. Shuffling can take a bit of work when you have several expansions and you have several hundred cards in the deck. Deal 7 cards from the blue and yellow stack. Players put aside money cards or zodiac cards they get and draw back up to 7 cards, and discard any play immediately cards and draw back up to 7 cards until you have 7 cards you get to keep.

You will now have cards labeled Run, Special and Very Special cards. The player puts two cards down horizontally one above the other. This is the player’s top run and bottom run cards. On their turn, they will show their top run card and play it, or if it is a Special or Very Special card, they can bank it to play as an instant later. Otherwise, a Special or Very Special can be played out of your hand, but only once per turn. Banked ones can be piled on. Certain cards cannot be played if the player does not have a bunny card out. Bunnies get played as run cards, but if something unfortunate happens to the bunny before the player’s next turn and the next card in the run is a Run card that requires a bunny to be in play (say, a weapon) then that card is discarded. Bunnies can basically be thought of as your troops, sent out to die for the glory of the Magic Carrot. When your turn is over, you move the bottom run card up and replace it from your hand and draw a card. You will use the money you get during the game to buy carrots, as well as water and cabbage cards. If someone plays a Feed the Bunny card, you will need these to meet the requirements or the bunny starves to death. Bunnies are going to die in this game. A lot. People will also be changing the prices at the market with certain cards, or closing it entirely.

There are cards that when drawn must be played immediately. With the base set, these are all Terrible Misfortune cards, and will result in one of your bunnies dying in a humorous way. During the course of the game you will play cards that will attempt to kill your opponents bunnies and amass carrot cards. Once the carrot cards are gone, you will use the smaller stack of carrot cards to find out who the winner is. You can either just pick one at random, or, as I usually do, drag it out in dramatic fashion, turning over cards one at a time to show who didn’t win, watching as people take another carrot from their stock that didn’t make the cut. One last caveat, you had to have a living bunny when the last carrot it chosen, or you are not even considered as a possible winner. All of your carrot cards get distributed to other players and you sit out the end.

One unique feature to this game as card games go is that where the bunnies are physically located matters. There is a mechanic called the Bunny Circle. Some weapons and effects have splash damage that affect the targeted bunny, and, say, the one to the right and left as well. This means that such a weapon may affect two different players, or even the person who played it if their bunnies are in close proximity to the target. There are also some roaming effects that slowly work their way through the bunny circle wreaking havoc and increasing the body count.

There are a lot of puns and even more TV and movie references in the titles and pictures of the cards. For instance, in the Red Booster there is a Holographic Bunny, and he has an “H” plastered on his forehead, which is a reference to Rimmer in Red Dwarf. The Minilith shows a bunch of bunnies dancing around it, like the apes in Space Oddssey. Nothing is taken seriously in this game.

That is basically the crux here. I don’t play Killer Bunnies when I care about winning. I play this when I want to have a good time with friends and family and laugh a lot. It is as random as random gets. For all practical purposes you could have rolled the dice at the beginning to determine the winner and not dealt a card.

To me, Killer Bunnies is like that old cliche about life. It isn’t about the destination, but it is the journey that matters. Killer Bunnies is all about having a great time with your friends and family. If you are looking for a less random way to do that, that is great. Just don’t expect more from this game than that.

8
Go to the Elder Sign page

Elder Sign

120 out of 127 gamers thought this was helpful

To begin with, I want to place a couple of disclaimers to this review.

One, I see this game compared to Arkham Horror a great deal. I have played one game of Arkham Horror, and while I enjoyed it, it was years ago and I do not really remember it. I therefore will not be making the comparison.

Two, this game gets a slightly higher rating out of me because I have created some alternative rules to play this with my 3 1/2 year old daughter, and a good chunk of the times I have played it with her. This review, however, will focus mainly on the vanilla, adult version. If you are curious how I make this work with my daughter, I have a house rule outlining it in the game tips.

If you are familiar with H.P. Lovecraft’s work, this is yet another derivative of it. If not, you really do not need to be to play this game. Suffice to say that his fiction deals with creatures of immense power and terror. Often regular folk stumble upon these critters trying to enter our world, and just investigating the phenomenon is often enough to drive men mad, let alone seeing them manifest.

The setting is based in the universe of his making. One of the Great Old Ones who are older than time itself is getting ready to awake with the help of a fanatical cult. The museum in which the game is played is ground zero, and only a handful of investigators stand in the way of the horrific creature entering our world. You and your friends will take on the role of these poor saps as they keep the bogeyman away. By exploring the museum and uncovering its secrets, you can gain the tools needed to do so.

There is no board per-se in this board game. Looking in the box, you will find:

A cardboard clock with a plastic hand to assemble,
6 green, 1 yellow & 1 red die with weird symbols and numbers,
A double-sided entrance reference sheet,
80 oversized cards with character information, adventure locations and great evil to battle,
76 smaller cards representing items and allies to aid you
144 cardboard tokens of various sorts

Everything seems sturdy enough to me. I am not much on card art, so my opinion matters little on that front, but for what it is worth it is a realistic style. Everything looks like modern depictions of the 1920’s.

So, we have a ton of cards and a ton of little cardboard markers. What do we do? The game plays 1-8 players. There are (if memory serves) 16 investigators. Everyone playing chooses one. Each one has a stamina and sanity rating that always total 10. Some folks have stronger minds and some stronger bodies, and some fall in between. If everyone takes characters with high sanity attributes, for instance, everyone may end up bleeding on the floor because no one can tackle high stamina cost adventures effectively. Each investigator has a special ability as well that is unique to them, be it extra items gained during play, ability to heal your friends, re-rolling undesirable results, you get the gist.

You will randomly (or by agreement) choose a Great Old One to do battle with. Each one has different effects on the game, just as the investigators have different abilities. I would say Yig is the easiest and Cthulu is the most difficult, but that is certainly debatable. Each one has a different number of Elder Signs needed to seal it away.

You put out 6 random adventure cards on the table, and the first player chooses where they want to go. Each adventure card contains some flavor text and a bunch of symbols. The adventure card essentially takes place in or around the museum. The symbols correlate to the symbols on the dice. You normally roll the 6 green dice, but you may be able to use items or abilities that allow you to add the red or yellow die, or both. Adventures generally require 2-3 tasks to complete. A task is generally 1-3 different symbols. The dice have faces that are as follows:

Peril (Skull)
Lore (Scroll)
Terror (Tentacaly thingy)
Investigation (Magnifying glass with values 1, 2 and 3)

The Yellow die has no terror but has a 4 investigation, and the red die is the same as the yellow, but replaces the 1 investigation with a wild that can stand in for any of the above or 4 investigation.

The adventure tasks will have varying combinations of needed symbols. Two lore can be completed with, well two lore, and 7 investigation can be completed with any combination of investigation dice equal to or greater than 7. A task must be completed in its entirety in one go, and all of the tasks on an adventure must be completed in one investigator’s turn. If you roll the dice and cannot complete a task, you may discard one of the dice and roll again. When you discard a die, you have the option to “focus” a die, or save one die on your character card as long as you are not already doing so, to save for a future roll this turn only. The more you fail, the less dice you have to continue attempting.

Should you fail to complete all of the required tasks in an adventure, you suffer the consequences listed on the card. These usually are damage to your stamina and/or sanity, monsters added to existing adventure cards or doom tokens. Succeed, and reap the rewards of the adventure. These can be items, portals to other worlds with greater rewards, and the titular Elder Signs.

The overall goal of the game is to acquire a certain number of Elder Signs indicated on your bad guy card to seal it away and save the world. Amass too many doom tokens, however, and the Great Old One awakes. Dealing with an awaken Old One usually results in death, but it is possible, albeit unlikely, to seal it away. The Old One essentially replaces your adventures at that point and you need to roll the indicated combination on the card to remove a doom token and have to bring the total to 0 to win. At least one Old One wins instantly when awakened, however.

Some adventures can have negative effects on the world even when completed successfully, however, so sometimes you have to weigh risk vs. reward. It could cost sanity or stamina to complete a task, or completing an adventure could summon a monster.

Monsters represent either cultists trying to summon the Old One you are trying to fight or horrors that have escaped into this dimension. They can replace certain tasks on adventures, or get added if none of those special replaceable tasks or available. They are once again defeated by rolling specific combinations of dice.

Also, by defeating monsters and completing adventures, you keep those cards for the value of the trophies they give you. Trophies can be turned in for healing or items at the entrance in lieu of taking a turn.

Every investigator turn, the clock moves three hours. When it goes all the way back to 12, it is Midnight (basically every 4 turns) At midnight, mythos cards are revealed, generally summoning monsters, adding doom tokens and causing harm to the players, first right when revealed and again the next time midnight hits. Some adventure cards also have consequences at midnight if you didn’t complete them prior.

So, that was a lot going on, but I will tell you that you will have this figured out by the end of your first game easily, and next game you will barely read the rules.

Personally, I enjoy the heck out of this game. There is a heavy random element, being a dice game after all, but I enjoy the theme, and apart from that the gameplay as a whole. If you are not a fan of dice games, I would steer clear. But at $35.00, you could do a lot worse.

Biggest cons are setup and tear down can take a bit, and nothing will ever fit in the box properly without a bunch of ziplocks, but I find these to be easy to overlook once the game gets going.

7
Go to the Elder Sign: Omens page

Elder Sign: Omens

56 out of 63 gamers thought this was helpful

Just a heads up, I plan on giving this the full review treatment. If you just want to see what is different between this and the board game, skip to the end.

Welcome to Arkham Yatzee, electronic edition! Alright, calling it Yatzee is a bit unfair, but you are essentially rolling dice hoping for a series of desired results, so, boiled down, that is a somewhat apt description.

Disclaimer: I own this on Android. I am guessing that the game is the same on your Apple device, but I cannot attest to that. The base game cost me $3.99. There is an expansion available for an additional $2.99. I have not purchased the expansion.

In addition, I have seen some describe Elder Sign as “Arkham Horror Lite” I have played one game of Arkham Horror in the past, and that was some time ago so I cannot make the comparison for you.

So, onto the game. Elder Sign is set in the Lovecraft universe. I am not going to go into a lot of Lovecraft lore, but suffice to say that many creatures of great and terrible power and visage have existed before time itself and want to eat and/or enslave us and just touching the surface of their realms can drive a person mad. One of these Great Old Ones is trying to enter our world with the help of degenerate cultists and the portal is the museum in which our game takes place. Figure on a game taking half an hour to an hour.

Once you get the game up and going, you need to choose a Great Old One to try and stop from entering our universe. You can choose from Yig, which is tantamount to easy mode or Azathoth, which is considered medium mode. If you have purchased the expansion, you can also choose Cthulu, which is considered hard mode.

You then choose 4 investigators from a pool of 16. The expansion appears to include and additional 6. Each investigator has varying sanity and stamina statistics, certain starting items and a special ability. Once you choose your team, an intro movie plays and then the game begins.

The game plays in landscape mode. If you have not played before, there is a decent tutorial system that offers to play every time you do something you have not before. If you were so inclined, you can reset the tutorials if you wanted to hand your device over to someone who has not played before so they can see them. You see a blueprint of the museum and there are various points of interest marked, called adventures. Your investigators start at the entrance of the museum, and return there every time their turn comes around again. You can click on an adventure or the entrance to focus on it, then on the banner on the top of the screen to see what the adventure requires to complete or what you can do at the entrance.

The ultimate goal is to score enough Elder Signs by completing adventures to seal away the Great Old One. That is 10 for Yig and 14 for Azathoth. If you take too long, or fail adventures, however, the doom track begins to fill with doom tokens. Too many of those, and the Great Old One awakes.

So, let’s go on an adventure! You activate the adventure, and a graphic tied to that adventure comes up, then the requirements appear along with the HUD. The adventure will have one to three tasks to complete. They have no names, just a picture with smaller inset pictures depicting the glyphs needed to do that task. You click on the book to roll virtual dice and summon glyphs. You normally get 6, but by using items can add a special red and/or yellow die. You then try and match the glyphs you rolled to the adventure requirement. If you cannot use your rolled glyphs to complete one of the adventure’s tasks, you can discard one of the glyphs you summoned and re-summon the remainder. Rinse and repeat until you successfully complete all adventure tasks or fail, either by giving up or running out of glyphs.

The glyphs correspond to sides of a die:

Peril (skull)
Lore (scroll)
Terror (tentacally thingy)
1 Investigation (magnifying glass with number 1)
2 Investigation (you get the idea)
3 Investigation

The yellow die removes the terror side and adds a 4 Investigation, and the red die also removes the 1 Investigation and adds a Wild.

Tasks can include things like 2 Peril, 1 Terror and 1 Lore, etc. There can also be sanity and stamina costs just to complete the task. The museum is a rough place, and investigations in the Lovecraft universe generally do not leave you whole even when you win. Some tasks on an adventure can be completed in any order, and some must be done in a certain order. You cannot complete more that one task per roll, so even if you have glyphs you wanted for further tasks, you have to re-roll and hope. If you do have to discard, you can pull an additional glyph from the remainder to the side to save for the remainder of the adventure attempt Other items you may have could also allow you to save a result or re-roll dice of your choosing. A successful adventure scores the reward for the adventure, which can include items and spells to help out on adventures, access to alternate dimension adventures where the rewards are greater, trophies to spend at the entrance on healing and items, and the coveted Elder Signs. Fail, and suffer the consequences. These can include damage to your sanity or stamina, doom tokens or monsters being added to adventures, making them harder to complete. There is some more to this, but that is adventuring in a nutshell.

Each investigator takes their turn, and each adventure turn moves the clock. Essentially, every 4 investigator turns will turn the clock to midnight. At midnight, uncompleted adventures with a midnight effect (depicted with a moon) cause their listed effect, which may add monsters, harm investigators or increase the doom track. A doom token is also added automatically, and may cause a monster to appear as well.

If a investigator looses all of their sanity or stamina, they die. If all of your investigators die, it is game over. I know for a fact that if Azathoth awakens, it is game over. I think you might be able to battle Yig, but, frankly, if I fail to seal Yig away it is because all of my investigators die, not because I filled the doom track, so, frankly, I do not know.

I do have a couple of issues with the mechanics of the game. Sometimes it doesn’t like where my finger is when attempting to drag and drop glyphs, but that got better over time as I figured out where the device wanted my finger to start. I get a bit irritated that the game, or at least the movies, do not ignore the auto sleep function of my phone. I have yet to see the entire opening movie because my phone goes to sleep, and when I wake it up by touching it the movie gets pre-empted. On the other hand, the game auto-saves when you close it, so if you wanted to pick up where you left off it is easy to do so.

For those of you who want to know the differences between the digital and board game versions, here you go.

The allies have been removed entirely. There doesn’t seem to be any lingering mythos that I can see. Spells can be cast AFTER the glyphs are rolled, so in response to something that you wanted to keep. If an investigator dies, they are dead. No picking a new one. There are significantly less Great Old Ones to choose from. There seem to be easier monsters in the pot against Yig than against Azathoth, and the midnight effects are harsher against the latter.

There is also no set-up and no clean-up, which is nice. You can just start it up and play, and stop when you would like.

So, is it worth the purchase? I think so. I played it a great deal the first week I had it, and after that I start it up now and then. I also strongly recommend it if you are interested in the board game but just aren’t sure it is for you. Four bucks isn’t too much for what can amount to a preview of the $35.00 game, and they seriously are close enough that you would get the general idea.

7
Go to the Food Fight page

Food Fight

33 out of 36 gamers thought this was helpful

So, you and your buddies want to sit down and play a card game. Do you feel like something serious and competitive? Because if you are, Food Fight is not the droid you are looking for.

The name ought to say that anyway, but it bears mentioning. I do not play Food Fight when I am looking to win a game. I play it when I am looking for a good time.

Looking in the box, you have 190 cards, 18 meal plate tokens, 9 after dinner mint tokens, a rule book and a cardboard Food Fight stand-up. The latter is simply thematic and does nothing. The artwork is Simpsons/South Park quality cartoon depictions. I am good with it personally, but honestly I am not much on card art anyway. Take a look at the cards depicted on the site here to determine if you can stand looking at them.

The ultimate goal of this game is to score 10 points. So how do we get there? 27 of the cards are battlefield cards. They have titles such as Push at Hamburger Hill and Battle of the Bulge. They indicate where/when the battle will take place, either breakfast, lunch or dinner. They also each have a point value. Each player will receive three meal tokens, also each representing the three meals. Before playing your cards you will take into consideration which meals are up for grabs and secretly choose a meal to battle.

Each player receives 8 cards. Most cards are food warriors, many of which have ranks such as Private Pancake, General Donut and and Captain Cereal. Each soldier has a yumminess factor, which will determine the winner of each skirmish. They also each have a meal designation, and many have special abilities printed on the bottom of the card. Along with these cards you will have cards that can be played as instants to alter the tide of battle.

So, you choose which meal you are battling at and then pick your troops. You take 5 soldiers and shuffle them randomly. When choosing, it is important to take the battle into consideration, as some cards have abilities or higher yumminess factors at certain meals. For instance, the Dinner Roll has 1 yumminess, but that is increased by 8 at dinner, giving it 9.

So, everyone has chosen their warriors. It is time to reveal the battle you showed up at. If every player is at the same battle, everyone starts by revealing the top card of their chosen army. Yumminess values are compared, and instants can be played. Once no player wants to play any further instants, a winner of that skirmish is decided, and that winner is awarded an after-dinner mint token. Ties go to the player whose troop matches the battle being fought (hot dog, a lunch troop defeats pancake, a breakfast troop) or, if that does not determine the winner, do a die roll or coin flip or something similar. The next troop is revealed, instants played, etc. Rinse and repeat. Once all troops have been played, the player with the most mints wins the battle, and takes all of the battlefield cards available for that meal.

If, say, two players in a four player game are doing battle at lunch and two at dinner, then the two at lunch square off against each other, then the two at dinner in a separate battle.

If only one player is at a meal, then they do battle with The Dog. There is a stack of The Dog cards, each one with a value on it. The player reveals his troop as normal, then reveals the next The Dog card, then plays instants as normal. If the player has a higher yumminess factor than the value on The Dog card, the player wins that skirmish. Either way, they then reveal the remainder of their cards in the same fashion. They do not take the battle unless they win the majority of the skirmishes.

That is the game in a nutshell. The craziness factor of this game is similar to Epic Spell Wars of the Battle Wizards: Duel at Mt. Skullzfyre, another game by the same company. Obviously, there is a great deal of randomness and luck involved in this game, as not only are you dealt 8 random cards from the deck, you then have to shuffle the 5 troops you are using. Most of the strategy goes out the window since you have little to work with, leaving only decisions on when to play your instants. Can you win this skirmish, or do you hold on to this card for a skirmish where you have a higher number to begin with? This is not necessarily a bad thing, but I want to point out the fun of this game lies less in winning and more in the craziness of the journey to the end.

All in all, I enjoy this game in its place. I could see how this would be a great time with children, and there isn’t any reason a group of adults cannot have a blast playing it too. Just keep in mind what the game is and do not expect it to be more than it is.

8
Go to the Magic: The Gathering page
62 out of 69 gamers thought this was helpful

This is a real bear of a game to try and review, especially when I like to do my best to let people reading my reviews to know what they are getting into. Most established gamers at least know that Magic the Gathering exists even if they don’t understand what it is about. I will try to fill in a couple blanks.

I suppose to being with I will say that if you want to go into the game store and purchase a game, take it home, play it and never need to purchase anything else, this isn’t for you. Getting into Magic is expensive. REALLY getting into it to play in tournaments every Friday will likely be a noticeable drain on your finances.

Let me try and put it this way. Board gaming is a hobby. Magic the Gathering is a hobby in of itself. The original set came out around 1993 if memory serves, and new sets have come out pretty regularly since. I was into the game back in the mid to late 90’s and got back into again recently, and boy have things changed. My understanding is every year essentially a new core set comes out followed by three themed sets that generally correlate to one another. Each new set is going into introduce not only new cards but new card mechanics. In addition to this over time old rules have been changed from the way the originally worked, and even an entire card type was abolished. Certain cards have been banned from tournament play, some because they deal with an ante system that essentially allows to to gamble cards in your collection, while others have been deemed too powerful or disruptive so they cannot be played.

To top this off, just having a deck and wanting to play in a tournament isn’t enough. There are all kinds of different tournaments that are held at your local game store, and you have to learn what cards and sets are allowed at what. Most sanctioned tournaments are restricted to the newest set of cards that have been released. Then you have tournaments where you purchase a starter deck and a few booster packs and make a deck with what you get from your purchase right there. Others have unopened boosters that players do a draft to get cards from to add to a starter pack. Then there are Vintage and Legacy tournaments that allow you to play any card in your collection. This means if you always want to play in the newest tournaments, you need to keep buying the new cards. There is more to the hobby then just building a deck is essentially what I am saying here.

So, what do you need? Well, you local game shop sells starter pack and booster packs. There is more, but lets focus here for the beginner. In the past, you could purchase starter packs. You can still find some of these for older releases online. With each starter pack you get 60 cards including 3 rares, 9 uncommon, 26 common, 22 land, and a rulebook. Nowadays, there are mythic rares, which of course are rare rare cards. One of those three conceivably could be one of those. Land is required for every deck, but once you have enough you have enough. Often the rarer the card, the better the card, but this is not always so. You can build a perfectly respectable deck out of nothing but commons, as long as they are the right commons. These tend to run in the neighborhood of $10 – $20 a piece.

Booster packs have 16 cards, nowadays consisting of 1 rare, 3 uncommons, 10 commons, one basic land a tips and trick card. These will run you about $3.50 to $4.00 a pop. These are where you will get a good chunk of your new cards.

There are also pre-made event decks of all kinds with new releases, which can get you going but won’t get you anything rare. They also are currently selling what they call fat packs with several boosters, a couple event decks, life counters, MTG lore, learn to play books and that sort of thing depending upon the release. The event decks look to run in the area of $10 – $14 and the fat packs around $40.

Most game hobby stores will also buy and sell singles. Some of the rarer, more desirable cards can cost obscene amounts of money. For instance, my most expensive card is a Guardian Beast, which runs $35 – $40 dollars. There are many more cards that go for much more. This means that if you have the money, you can build any deck you want, and there are tons of stores who sell singles online, so you can get them shipped directly to you.

So what do you do with all of these cards now that you have them?

I will give a basic overview of the game, mostly because I have already gone and babbled quite a bit. Most games consist of two players. You use your cards to build a deck. A deck consists of a minimum of 40 cards, and if in a tournament or a group’s house rules a possible maximum number. Basic land is the foundation of any deck. Land provides mana which is used to cast spells. Spells consist of sorceries, which can only be played on your turn, instants which can be played (pretty much) anytime, creatures, who do the fighting for you and enchantments, which may provide a buff or debuff on a creature or other permanent card (a card that does not get discarded once used) or something that affects the caster in a positive manner or the opponent in a negative manner, or even a global effect for both players. Most non-land cards are of a certain color, black, blue, green, red and white. Each color has a certain flavor of mana associated with it, provided by the different basic land cards, swamp, island, forest, mountain and plains respectively.

Cards of a certain color will require at least one of its affiliated mana along with a possible number of colorless mana, meaning any other color. The colors tend to follow themes, black is a lot of sacrificing creatures or your own life total, blue is deck manipulation, drawing and causing the opponent to discard, red has a lot of direct damage spells, etc. This is an oversimplification and going into what each color does would take forever, just know that each color does some things better than another. In addition, there are artifact cards that tend to be cast entirely with colorless mana, but there are more cards that can destroy them easily.

Creatures you summon have a power and toughness and can be used to attack another player or block an opponent’s creatures trying to attack you, although a creature that attacked a turn cannot normally block the same turn. Your instants and sorceries cause or heal damage, revive or destroy creatures, cause you to draw or discard, etc. Many creatures have special abilities that can be triggered in addition or in place of attacking and blocking.

You begin a turn by drawing a card. You can lay down a land if available, then summon creatures and cast other spells. Your opponent can answer with spells of their own if available, rinse and repeat. Over time, you lay down more land, allowing you to cast more powerful spells and summons. There are dozens of special abilities you will need to refer to until you are familiar with them. I would say this game is still, for all I have mentioned here, subject to the old cliche; easy to learn, hard to master. The intricacies of the cards, the combinations of colors and abilities to explore are endless, limited only by your collection and the time you put into mastering the craft.

I enjoy this game. I enjoy playing it, I enjoy seeing what I get in a pack of cards, so help me I even enjoy sorting through the stinking things, putting them in order so I can find them easily, reading the flavor text, etc. But be forewarned, if you are not willing to put time, effort and money into the hobby, I would stay away. I just don’t want anyone getting sucked in like I did without some idea of what they are getting into.

7
Go to the Epic Spell Wars of the Battle Wizards: Duel at Mt. Skullzfyre page
84 out of 91 gamers thought this was helpful

I would like to start off by saying that for this game to be fun, you are going to need to be willing to feed into the zaniness. This means using an exaggerated dramatic voice to say the name of your spell, speaking in the third person with the name of your character, that sort of thing. If you and your group are looking for a more laid back, serious card game, this isn’t it. I don’t drink and I enjoy the game, but I would certainly say that drinking wouldn’t hurt. One last disclaimer, this game isn’t for children. The depictions, while cartoony to the extreme, are graphically violent and there is profanity sprinkled in among the cards. You have been warned.

You open the box and you will find 199 different cards, several tokens, 4 six sided dice, 8 hero cards and one cardboard stand-up of Mt. Slullzfyre, the latter being absolutely useless except for ambiance. The art on everything is South Park quality cartoon stills. This may put some off, so I recommend looking at the box or the rulebook before purchase. What you see is what you’re getting. I have no complaints about the overall quality of the contents of the box, although the instructions can be a bit tiresome to read. It is one thing to use a stilted font on a game like this, it is quite another to have the size and lines change mid-statement.

Everybody picks a wizard. They have names such as Zanzabart the **** Genie, Lady Lazervere of the Space Kingdom, Princess Holiday & her Furicorn and Fey Ticklebottom the Enchanter. You choice doesn’t really matter since there are no character specific powers so pick whichever one makes you laugh.

Everybody picks 8 cards and then at the same time build their spells face down. There are three types of spell components you build your spell from; A Source, Quality and Delivery. You can build your spell from one to three cards consisting of no more than one of each of the spell types. Players who played one card go first, two cards second and three cards third. The delivery of a spell has a number on it that determines initiative. The higher the number, the sooner your turn. If there is no delivery card, initiative is considered 0. Ties are determined by die roll.

Each card in the spell indicates that something should happen. Damage may be caused to a player on your right or left, randomly or to strongest/weakest. if you have a specific target, care needs to be taken that you choose cards that will damage that player, so there is a strategic component to the game. This though is mitigated in that if your target was the strongest opponent when you built your spell, there is no guarantee they will remain so when your turn comes up. Delivery cards generally tell you to roll dice to get x/y/z result. Each spell component has a different magical glyph, arcane, dark, elemental, etc. Each glyph in your spell that matches the glyph on the delivery generally gets you another die to roll to determine the delivery’s result.

The names of the cards are pretty crazy, and you are encouraged to read the spell when it is cast. You then end up with combinations such as “Bleemax Braniac’s – Mysterious – Fist O Nature” or “Muzzlesnap’s -Ballsy – Testikill” for example.

The spell may also cause you to get a treasure card or cause someone to loose or gain one. Treasure cards often increase the power of your spells by adding dice to the power rolls, acting as an addition glyph of a certain color in any spell or cause damage to another player when they play certain types of spells.

You may also end up with a Wild Magic card, which can be played as a wild in place of any spell component. When resolving that part of the spell you draw from the draw deck until you end up with that component and add it to your spell. This can allow you to play components that were not available in your hand or let you take a chance on scoring a card with a glyph you wanted to play but didn’t possess.

Each player has 20 life, and it often disappears pretty quickly. It isn’t unusual for three rounds to go by for a winner to be declared. The winner, who killed everyone else, gets a “Last Wizard Standing” token. The ultimate goal is for one player to get two of these tokens to be declare the overall winner. However, when you die, you get a random “Dead Wizard” card. This card gives you some kind of boost the next game, be it additional hit points, larger hand size or a treasure card to start. This results in whoever got the Last Wizard Standing token last game to be the weakest wizard this time round. I would plan on a full game taking half an hour to an hour.

So, basically what you have here is a card game light on strategy and heavy on sophomoric humor, which isn’t necessarily a bad thing. If you take the game as seriously as it takes itself, you will have a good time.

8
Go to the Quarriors! page

Quarriors!

70 out of 77 gamers thought this was helpful

First off, I want to say that if you just HATE Dominion-esque deck building games, I really don’t anticipate you will get much enjoyment out of Quarriors. It is different, but not enough to mask the core deck-building premise. You are still building a deck. Instead of shuffling, you are putting the dice in a bag and shaking them up, but that part of the game is still prevalent. With this comes increased randomness as the dice you have purchased each have 6 sides that do different things.

Components

Still with me? Ok. Let me try and give you an overview of what you get with Quarriors. The box is made of metal and is rather small and portable, say 6 and a half inches cubed. So in package it doesn’t take up a lot of space. Open it up and you have about 55 or so cards and 130 dice. Nothing in the box including the box itself seems overly cheap.

Setup & Gameplay

Setup isn’t too laborious. You put out the three basic cards, Basic Quiddity, Assistant and Portal and the dice that go with them. You then choose three random spell cards and 7 random creature cards and put those out as well. Each color spell and creature die has about three spell cards that it use it, so if you pull one that is already using that color die you need to put it back and redraw. Every card with the exception of the Assistant and Basic Quiddty have 5 dice associated with it available for purchase. This area of the table is now called “The Wilds”

Each player gets 8 Basic Quiddity Dice and 4 Assistant dice, for a total of 12, that they put into their dice bag. The first player rolls six random dice from the bag. The basic Quiddity dice have values of 1 or 2, and the Assistant has three sides with one quiddity, two with a creature and one side that allows you to re-roll that die with another of your choice. The creature side of the dice have three numbers. Upper left is their level, upper right its attack value and lower right its defense. With the quiddity you now have at your disposal you can either purchase dice from the wilds (one per turn) and/or summon creatures you may have rolled. The costs for the creature is its level. When you summon creatures, each of them automatically attacks any creatures the other players had summoned their last turn. The total amount of damage must be absorbed one creature at a time. If you do enough damage to kill one of their creatures, they get discarded and they move on to the next creature they have until all the damage is mitigated. Then the next player in line does it all over again.

Should your creature survive to your next turn, you discard it and score points, glory in this case, on the glory track. Each creature is worth an amount of glory indicated on its card. The winner is the first to the number of glory points you decided to play to at the beginning of the game. When scoring a creature, you also have the opportunity to cull one die from your stock that you no longer want as well, thinning out the available dice you have to draw from.

Spells you purchase can do things such as increase the power or defense of all summoned units that turn, increase the amount of glory they are worth, make it harder for other people to summon creatures, buy more than one thing a turn, etc. Creatures often have special powers as well, and depending which side of that creature die was rolled, those powers may be different for the same creature. Portal dice may allow you to draw additional dice from the bag and roll them. The creature cards available are usually 3 types of the same creature, say Warriors of the Quay, Strong Warriors of the Quay and Mighty Warriors of the Quay, but despite the lazy naming conventions, they powers and abilities they possess are often different enough that it isn’t a big deal. The stronger the creature, the more it will cost to purchase it, often leading to a decision between purchasing this creature this turn or summoning something, meaning you may not get any points this round. Most games should come in around the 30 – 45 minute mark.

Summary and Thoughts

Any deck building game has a certain amount of randomness included due to the fact that when you shuffle the deck, you never know which cards are going to come up. This game increases that aspect greatly. You drew a powerful creature die, great! Then you roll it and get a side giving you a quiddity to spend instead of a creature to summon. Or, you draw a fist full of creatures and roll no quiddity to summon them with, so you get to do nothing at all this round.

The one other hangup some might have with the game is depending on what creatures you pull at the beginning, the game can go really fast or really slow. Say you pull a Strong Defender of the Pale with no high attack creatures. Nothing is going to kill that creature when it comes out, so every time it comes out it is going to score. On the other hand, if you have a lot of little creatures or lots of high attack creatures, scoring can be few and far between. It is nothing that someone well versed in a deck building game hasn’t had to deal with in some form, and no doubt you will develop your own house rules to deal with these issues as you encounter them, but it bears mentioning.

I have a few potential negatives that I mention here, but I just want to make sure everyone knows what they are getting into. Dropping $50 bucks on a game is one thing. Hating it is another. If my experience means anything, I personally love this game, and I have not run into a person I have played with that didn’t like it.

9
Go to the Mr. Jack page

Mr. Jack

39 out of 41 gamers thought this was helpful

Jack the Ripper has once again killed a hapless working girl in the London night, but is unable to slip away quietly before being cornered in a district by a group of investigators. Some of the leading detectives of the day have gathered to put an end to Jack’s tyranny, including Sherlock Holmes, James Watson and William Gull, the Queen’s physician…

Wait, the Queen’s physician?

Alright, the game is light on story. So is checkers. What this game provides is an easy to learn, hard to master two player game that should fill 30 – 45 minutes of your day.

I see a lot of people alluding to the deduction part of this game, which is accurate, but I find it has some chess-like qualities as well. There are 8 different characters, or pieces if you will, each of which possesses a different ability. One player will take the role of Jack the Ripper, posing as one of the investigators in an effort to escape. The other is the detective attempting to catch him.

Jack has two ways to win. He can either escape the district while unseen, or he can elude capture until the end of the 8th turn. The detective, on the other hand, must capture Jack to win.

The board is set up the same way each game. Jack picks a card to determine who they are impersonating, and then four of the eight investigator cards are chosen. The detective chooses one to move and uses their ability, Jack chooses two to play, and then the detective the fourth. The following turn the remaining four will be played in the opposite, Jack plays one, detective plays two, the the detective last. Each character has a special ability that in all but two cases are mandatory to use. These include swapping which manhole covers are open and closed for sewer access (quick travel) which exits are open or closed by police cordons and what gaslights are lit and which are not. Jack’s goal essentially is to cause as many of the investigators either seen or unseen at the end of the turn as possible, depending upon how he wants to play. If he wants to escape, he needs to be unseen, and if he wants to play to the end of the 8th turn, he can do it either way. Investigators are seen if they are standing next to a lit gaslight, adjacent to another investigator or illuminated by Watson’s lantern. Jack must reveal at the end of the turn whether he is seen or unseen, and the detective then gets to turn over the investigator tokens that are eliminated by this information.

(ie, Jack says he is seen. 5 of the investigators fit that bill, so the detective turns over the other three.)

In addition to this, whomever plays Sherlock Holmes picks an alibi card secretly. This stack consists of all but the card Jack is holding, so the detective can tell by this card one character who is innocent. Jack, on the other hand, can use this ability to remove one of those cards so the detective will never be able to eliminate one investigator in this manner. Figuring out who Jack is isn’t enough, however. The detective player still needs to catch him with one of the characters by landing on the same hex. If the detective accuses the wrong character, he loses.

I like that the game comes in at under an hour. I also enjoy that there is very little random aspect to the game. While you don’t know which cards will be available on turns 1,3,5 & 7 until they are drawn, I still find that when I loose there was always something else I could have done with the characters available to me to have had a better outcome. When things don’t (or do) go your way, you generally cannot blame the game. You have no one to blame but yourself.

This game doesn’t get old for me. I will happily set the board back up after playing a round and play another. I hope this review can help you determine if you feel the same.

9
Go to the Mage Knight Board Game page

Mage Knight Board Game

101 out of 108 gamers thought this was helpful

Do you enjoy games that generally take a minimum of 2 hours to play? Do you mind needing to use a rulebook that is 8 1/2 x 11 and 20 pages long? Are you willing to pay $70 to $90 for a board game? Do you mind clearing off the entire table to play? Do you mind spending 10 minutes setting up the cards and tokens necessary to play a game?

If the above sentences make you shudder with revilement, I would say it is safe for you to walk away right now from Mage Knight and never look back. This is about as hardcore as board games get, and there is no shame in not being interested in something if you aren’t interested in it. Mage Knight is not for everyone.

If, on the other hand, the above has not scared you off, feel free to read on.

I would classify Mage Knight as something of an adventure game. You take the role of the titular Mage Knight, and individual who has made themselves beholden to something called the Council of the Void in exchange for great power. They send you out on various missions represented by just under a dozen scenarios in the rulebook. The story isn’t important.

While there is a goal for all the players to achieve in a given scenario, for the most part the players in the game are focused on themselves and their own conquests. There is a leveling system that doubles as a scoring system to determine an overall winner of the scenario. As you level up, your characters will become noticeably stronger. The game play requires a combination of skill and luck. There is some dice-rolling that comes into play as well as deck-building as you go through the game, and a good bit of resource management There is also a PVP aspect to the game as well.

There are 4 Mage Knights to choose from. Each one varies a bit in terms of abilities available to them, but not enough to go into here. The map is represented by cardboard hexes that get added randomly as the players explore the map. Each larger cardboard hex contains 7 spaces with different terrain types and locations to explore and interact with. Each game will be different regardless of the scenario played by virtue of the fact you will have a different map to play on each game.

Every action you take, from movement along the map to fighting bad guys to interacting with the locals in a village will be done with the cards in your hand. Every character starts with 15 cards that are pretty much the same and one card unique to that Knight. They provide values for movement, attack, defense and influence. Some also facilitate the acquisition of mana which will be used to power your abilities. Each card has a no-cost value or ability and another stronger version that costs mana to cast. There is a shared mana pool you can draw from that depletes over time as well as mana crystals you have earned doing various things in the game that you can save and spend as needed. You also can use influence to hire units to command in villages, monasteries, cities and mage towers. You will have opportunities to purchase spells and abilities during the game as well.

As you defeat monsters and do other various things, you will gain fame. Fame ultimately determines the overall winner of the game. This also doubles as experience points. As you level up you will have ability cards randomly drawn to choose from to add to your deck. You also will get to choose from character-specific skills drawn randomly as well. This means that even though you may be using the same character as last play it can be played very differently this time. You will on alternate levels get tougher to hurt and be able to command more units.

Each scenario has X rounds, and each round consists of several turns. The round ends when one of the characters runs out of cards to draw and chooses to declare the end of round, which adds another layer of strategy. Do I end the round and wait until the next to start fresh, or do I use the cards in my hand and hope they are enough?

Complex enough? There is more! Each round is the equivalent of a half day. First round is day, second is night. Movement is easier in the forest and harder in desert during the day and vice-versa at night. The stronger version of magical spells requires black mana, which is only available at night, but during the day you have access to gold mana which can act as any color mana but black making standard actions easier to power up. Everyone picks a tactic card at the beginning of a round which grants a boon of some kind and determines turn order. The later your turn, the better the boon. There are different tactics at night and at day.

Want to storm that keep? If it is day, you can walk up to it and see what is inside. If it is night, you either take your chances and attack blindly or wait until the next round to see what is inside.

Want a couple more cards in your hand for the next turn? Ransack a village! Want a powerful artifact? You can burn down the monastary. Just keep an eye on your reputation meter which determines how easy or hard it is to hire units and buy spells.

There is definitely more to this game than I want to try and cram into this review. If I haven’t scared you off, I recommend you click on the “see official rulebook” link on the site here and read the Game Walkthrough. Not the Rulebook! The Game Walkthrough! There are two rulebooks with this game. One kind of holds your hand through a game and the other just has information that expects you to know the basics. As I said, very complex.

As far as what is in the box, I saw another review here stating that the cards were very flimsy. I assume that the game has gone through a higher quality reprint, because I found the card quality to be superior. Nothing in the box feels cheap to me. My only complaint is one of the characters has no eyes for some reason and just looks weird, but that complaint aside, I am very happy with the game’s quality.

The game has a perfectly good solo variant as well. If I need something to occupy a couple of hours, I am more than happy to break out the game and just play. It doesn’t get old for me.

In closing, as I said before, this game isn’t for everyone. It is expensive. It is complex. It has a ton of pieces to keep track of. It takes up the whole table. It takes hours to play. However, if what you read here seems interesting, I will say I am not doing the game justice. This is one of my favorite games of all time. If you are willing to put in the time this game deserves to be played properly, it may become one of your favorite games as well.

9
Go to the Zombie Dice page

Zombie Dice

34 out of 38 gamers thought this was helpful

Quick disclaimer: I have this rated at a “9” mostly because it is yet another non-Candy Land game that my 3 year old daughter will play happily with me. For adults, I would give it a “7”

Ah, Zombie Dice. Its like Yatzee of the Living Dead. You take the roll of a walking, rotting corpse. The dice represent your potential victims. Your goal is to rack up a victim count of 13 before your undead brethren can.

The game costs in the neighborhood of $12.00 – $15.00. You get a cup with with a prominent somewhat cartoony zombie missing part of an arm and the silhouette of others in the background, a two sided glossy piece of paper with the rules and 13 dice with various colored icons on them.

This is primarily a risk/reward scenario. To play, you shake the cup, pull out three random dice and roll them. The results indicate how things went with the three potential victims you were chasing. A brain indicates that you caught them and feasted upon their tasty gray matter, a burst indicates that the malcontent shot you and the footprints indicate they got away. Assuming you did not end up with three shotgun blasts, you have the option of either scoring the brains you rolled and ending your turn, or putting aside the shotgun blasts and brains you rolled, and reroll any footprint dice along with random dice from the cup for a total of three more. Rinse, lather and repeat until you either voluntarily end your turn and score the brains you ate or have your turn ended for you by three shotgun blasts, meaning you get nothing. Play continues in the direction of your choice.

The dice are green, yellow and red. The colors indicate the toughness of your prey. Green has more brains and less weaponfire, yellow even amount of both, and red more gunshots and less brains. If you have rolled all 6 greens and have 2 wounds, you know that reaching into the cup again is going to be pretty risky. If you end up rolling 12 dice and still can go on, you can make note of what you have on the table, toss them all back in and keep going.

The biggest draw for me is that it is a very simple premise that my daughter can easily grasp and at the same time it teaches her simple risk/reward concepts. Hearing her count her “brain,boom and feet results is also a hoot. The game is very portable so keeping her occupied at a restaurant or the DMV is easy as well. The dice are very good quality and will stand up longer then it will take to inevitably loose them. My daughter aside, it is a quick filler game with the older people you play with and as an added bonus I am sure you can make an enjoyable drinking game out of it if that is your thing.

If you have a young child you want to play games with and don’t mind the zombie motif, even a zombie’s victim can see this is a good buy. I certainly don’t explain the living dead to my daughter and the game plays just fine without her understanding why there are brains on the dice.

Even if you don’t have a small child, this is still in my opinion a good buy to fill time between longer, more complex games or when you have 10 minutes to kill.

9
Go to the Gulo Gulo page

Gulo Gulo

43 out of 46 gamers thought this was helpful

I had heard good things about this game while scouring the net for good games for small children, but struck out trying to find a copy for some time. I stumbled upon it at a comic book store during a 50% off board game sale, and am very pleased that I did so.

Gulo Gulo is primarily a dexterity based game. The box contains several heavy cardboard hexes with colorful pictures of wolverines with different color eggs, about three dozen wooden eggs of various sizes and colors, a wooden concave nest, a wooden stick with an egg on the end and 5 different colored wolverines. Everything contained appears to be good quality.

You build a face-down path of hexes in any shape you desire that lead to a stack at the end. The stack contains several standard hexes and one hex with a baby wolverine pictured with a bunch of colored eggs. As you turn up the hexes and reveal the colored egg on the other side, you attempt to fish out the colored depicted on that hex from the nest. Also in the nest, however, is the stick mentioned before. If a player knocks an egg out of the nest while attempting to get the one they need, or cause the stick to hit the table, then that player needs to go back to the previous hex with that color depicted, or back to the beginning if that is not possible.

If there are exposed hexes in front of you (revealed by other players or because you got sent back) you can try to take that color egg and skip the colors between, so it is easy to get back into the game if you get sent back. Once you get to the stack, you start revealing the hexes one by one and adding to the path until you find Gulo Junior, at which point you try and take one of the two purple eggs from the nest to win. A game will take in the neighborhood of half an hour or so to play.

So, the gameplay isn’t particularly deep, and there is certainly some randomness and luck involved both when hoping your needed egg is easily accessible, and also when Gulo Junior will show up. There is a little bit of risk/reward involved when trying to skip back up on the path when knocked back depending how buried the egg you want is in the nest, but not that much. I cannot really recommend this game for a group of adults by themselves because of this. It is rather simplistic compared to other dexterity based games such as Space Pirate or Catacombs.

However, in my opinion, it excels as a game to play with the wee ones, and is a great way to get them to play games with you that are not Candy Land. In my case, I have a three and a half year old daughter, and she had no difficulty picking up on the rules. More importantly, she asks to play it again immediately after the game is over, right after her nap, when she wakes up in the morning… you get the picture.

In closing, I very much enjoy this game. Not because it challenges my intellect or my egg-stealing skills, but because it does pose a challenge to my daughter, and not one that turns her off to the game. I expect the true value of this type of game will be realized in another 10 years when because of the foundation that this type of game builds she will gladly play a couple of hours of Mage Knight or a quick game of Quarriors or the like. I get to spend time with her, and not with her eyes glued to the TV in the meantime.

If you have a small child, and you see this game, I strongly recommend you pick it up. You won’t hate it, and your kids will love it.

9
Go to the Cthulhu Dice page

Cthulhu Dice

61 out of 68 gamers thought this was helpful

I will come out up front and admit that this game would have limited appeal for a group of game-geek sober adults long term (or at all). That isn’t what it does well.

What it has done well for me is act as a gateway game for my three year old daughter. There are many things that the game does to accomplish this.

For about six bucks, you get a good-sized twelve-sided die with various pictures and 18 glass tokens. There are many color variations available, so you can let your kid pick out their very own. The die is big enough that it is just about impossible for it to get lost when the wee one rolls it off the table. The tokens are easily replaceable and could be substituted with just about anything. The game easily fits in a ziplock baggie in your pocket to take anywhere.

The rules are very simple, and a game is generally over in 5 minutes. This keeps it within her attention span each game, and keeps her willing to play it again and again. This keeps her occupied waiting for a table or her food in a restaurant.

Each player takes 3 sanity tokens. The player who’s turn it is, the caster, chooses a victim and rolls the die. The most common results are yellow sign, which causes the victim to give a sanity token to Cthulu (middle of the table) and tentacle, which causes the caster to take one sanity token from the victim. Other possible outcomes are an elder sign, which allows the caster to take one sanity token from Cthulu, Cthulu, which causes all players to give a sanity token to Cthulu and the eye of Ra, which gives the caster the ability to choose any of the above options.

The victim then gets to respond, rolling against the caster. Really, all of the above is exactly the same for them, with the exception that a tentacle causes the victim to have to give a sanity token to the caster.

It also teaches some basic decision making skills. Who are you going to roll against? What should I do when I get the eye. This isn’t rocket science, but it is a breath of fresh air after a game of Candy Land.

In closing, this game has made my daughter enjoy game time and choose it over TV time. I have introduced more difficult games, such as Zombie Dice and Rattlesnake. In addition, there is little in the world cuter than hearing her saying “you have to give one to Cthulu” when she rolls a yellow sign, or “you lost all your sanity!” I really cannot think of six dollars I have better spent. I have essentially rated this game based upon the time she and I have spent together with it, and it has to this point been time well spent.

× Visit Your Profile